Enter into your sourdough era with this simple, reliable sourdough starter recipe using just flour and water. You can learn to bake sourdough bread, pancakes, muffins, and more with confidence from a sourdough baker with almost 10 years of experience.
Quick Recipe Overview: How to Make A Sourdough Starter
⏱️ Ready In: 8 days (until active and ready to bake)
🍶 Yield: 1 active sourdough starter
🔥 Calories: Not applicable
🌾 Main Ingredients: Flour, water
🥖 Dietary Info: Vegan • Dairy-free • Egg-free
❤️ Why You’ll Love It: This sourdough starter recipe is simple, dependable, and made with just flour and water, giving you a strong, bubbly starter you can use for bread, pancakes, muffins, and countless sourdough recipes.
SUMMARIZE & SAVE THIS CONTENT ON
“Thank you for actually taking the time to explain the WHYS!! There aren’t enough posts out there that tell you why and how…just “DO”. I am the type of person that needs to know why and how. I can’t wait to try a sourdough starter again.
THANK YOU!” – Margot
Why You’ll Love This Recipe
- Simple and approachable: Made with just flour and water, this sourdough starter recipe is easy to follow—even for beginners.
- No special equipment needed: You don’t need commercial yeast, scales, or fancy tools to get started.
- Builds real understanding: Clear explanations help you understand why each step matters, not just what to do.
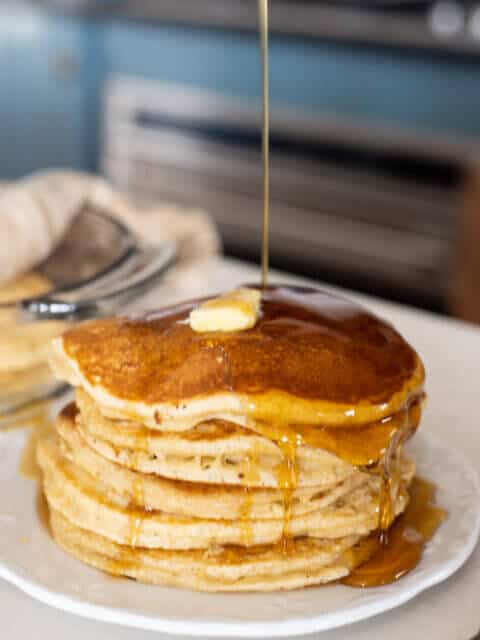
- A foundation for endless baking: Once established, this starter can be used for bread, pancakes, muffins, and more, and kept alive for years.
Sourdough may be mainstream now, but when I made my first starter in 2017, it was still unfamiliar to many home bakers. Bread existed long before commercial yeast, and a sourdough starter is simply fermented flour and water that captures wild yeast and beneficial bacteria to naturally leaven simple sourdough bread. This traditional method has been used for thousands of years and is even what biblical references to “leaven” describe. Confused by all the sourdough terminology? I’ve got you! Bookmark my Complete Guide to Sourdough Terms and come back when you need it. Let’s dive in!
This post may contain affiliate links. I only recommend products I use and love. If you purchase through my links, I may earn a small commission at no extra cost to you.

What is a Sourdough Starter?
A sourdough starter is a fermented mixture of flour and water used as a natural leavening agent for breads and other baked goods.
It contains wild yeast and beneficial lactobacilli bacteria naturally present on grain and in the environment, which feed on the flour’s carbohydrates and produce carbon dioxide for rise and organic acids for flavor.
A starter is kept active through regular feedings of fresh flour and water, allowing the yeast and bacteria to stay balanced and strong over time.
Why Make A Sourdough Starter?
In the mid-1800s, Louis Pasteur’s work with yeast led to the development of commercial baker’s yeast, the fast-acting yeast commonly used today. Before that, bread was leavened by fermenting flour and water to capture wild yeast from the environment—what we now call a sourdough starter.
In sourdough, wild yeast produces carbon dioxide to leaven the dough while naturally occurring bacteria contribute acidity and flavor over time. During this slower fermentation, compounds like phytic acid are reduced, and some gluten proteins are partially broken down, changing the structure and characteristics of the finished bread compared to loaves made with commercial yeast and short rise times.
Key Ingredients

- Unbleached flour: Quality, unbleached flour is best because it contains naturally occurring microorganisms and minerals that support consistent fermentation, while bleached flours are treated to remove these elements. Any variety of wheat flour works. I buy organic unbleached flour (and whole grains) in bulk from Azure Standard.
- Unfiltered water: Using unfiltered water helps avoid chlorine and other disinfectants that can interfere with fermentation, allowing the starter to develop more reliably. I use our well water and have no issues.
Fresh Milled Flour for Sourdough Starter
TLDR – You can feed a sourdough starter with fresh milled flour from any wheat variety.
- Any grain works: Fresh milled wheat, spelt, einkorn, rye, or other grains can all be used to feed and maintain a sourdough starter.
- Why fresh milled helps: Freshly milled flour retains the natural components of the grain, which can help kickstart and sustain fermentation.
Equipment Needed to Make a Sourdough Starter
- Glass or stoneware jar: Non-reactive materials are best for sourdough starter, as they won’t interact with the natural acids produced during fermentation and allow you to easily see activity and rise. I love using Weck Jars because they are pretty and make me happy, good reason, right?
- Wooden spoon or spatula: Wood is traditionally preferred because it doesn’t react with acidic starter and is gentle to stir with. While other utensils can work, wood is a simple, reliable option many bakers use. Stirring your starter with a metal spoon isn’t going to kill it, but wood is still the gold standard.
- Loose covering: Use a loose-fitting lid, cloth, or cheesecloth secured with a rubber band to protect the starter while still allowing airflow, which is necessary for fermentation. I just use the Weck lid on my starter jar without the rubber seal.
- Avoid plastic when possible: Plastic can absorb odors over time and may scratch easily, creating places for residue to collect, which is why many sourdough bakers choose other materials.
- Kitchen scale (optional): A scale allows for precise measurements and consistency, especially when adjusting feeding ratios, but it is not required—this sourdough starter recipe works just fine using measuring cups. I didn’t own a kitchen scale for my first 5 years as a sourdough baker.
Step-By-Step Instructions
This sourdough starter recipe works with many types of flour, including einkorn, rye, whole wheat, and all-purpose. My personal preference is a mix of all-purpose and rye, but you can experiment to see what works best for you. Use warm water when possible (no warmer than 110°F). The full process typically takes 8–12 days.
Day 1
Combine ¼ cup water and ⅓ cup flour and stir until fully mixed. The starter should be thick but easy to stir; consistency will vary depending on the flour used.
If the mixture is too thick, add water 1 tablespoon at a time. If too thin, add flour 1 tablespoon at a time. Cover loosely and leave at room temperature.
Day 2
Discard (throw away or compost) half of the starter. This discarding step is only necessary while establishing a new starter.
Add ⅓ cup flour and ¼ cup water to the remaining starter and stir until combined, adjusting consistency if needed. Cover loosely and return to room temperature.
Days 3–7
Repeat the steps from Day 2: discard half, feed with flour and water, stir, and cover.
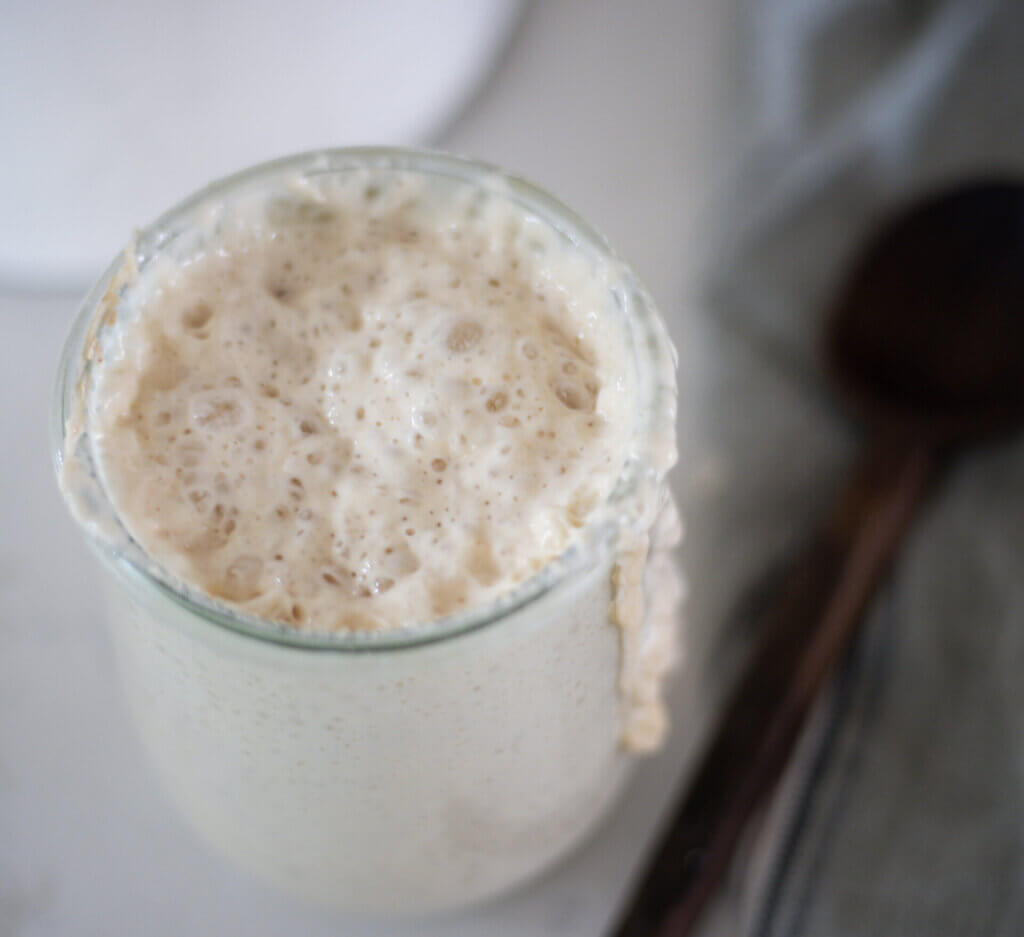
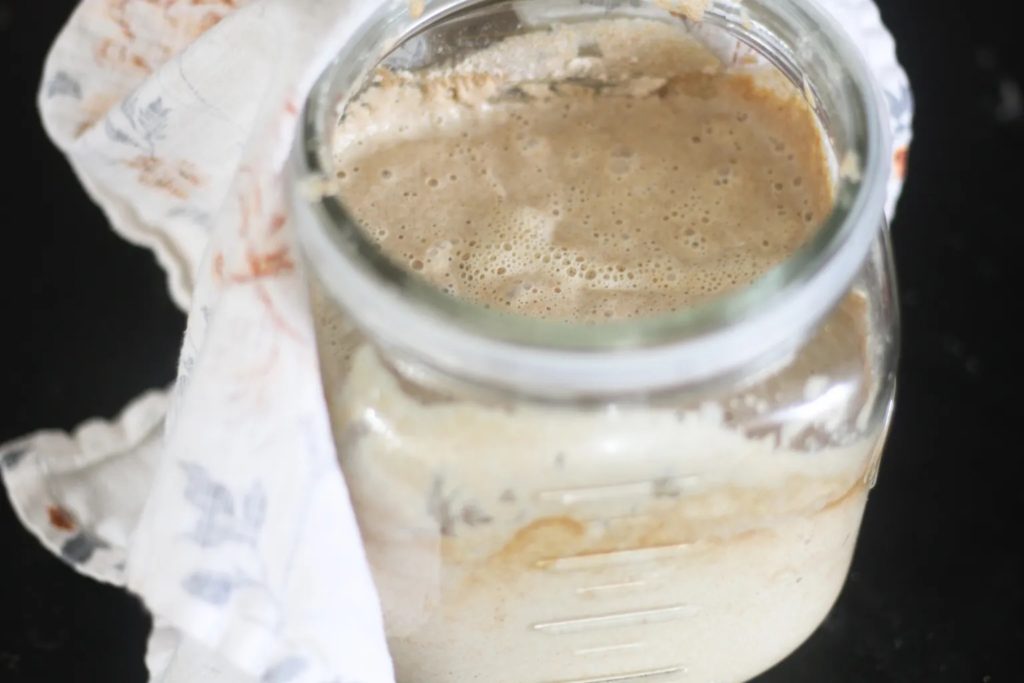
During this time, you should see bubbles forming and notice a mild sourdough aroma. The starter should rise after feeding and may nearly double in size within 12–24 hours.
The highest point the starter reaches after feeding is called the peak. After peaking, it will slowly fall back down, signaling it is inactive and ready to be fed again.
If the starter peaks and falls quickly, especially in warm environments, it may need to be fed more often than every 24 hours.
If a thin liquid layer (“hooch”) forms on top, it means the starter is hungry. Pour it off when discarding, feed the starter, and consider feeding more frequently (every 12 hours) or increasing the flour slightly.
Day 8 (or later)
A mature starter will rise predictably after feeding, show plenty of bubbles, and smell pleasantly sour.
For best results, use the starter in recipes when it is at its peak. If it has already fallen, feed it again and allow it to peak before baking.

Sourdough Starter Schedule (First 8 Days)
- Day 1: Mix flour and water, cover loosely, and leave at room temperature.
- Day 2: Discard half of the starter, then feed with fresh flour and water.
- Day 3: Discard half and feed again; you may start to see small bubbles.
- Day 4: Continue discarding and feeding daily as fermentation strengthens.
- Day 5: Starter should begin rising more predictably after feedings.
- Day 6: Look for bubbles, rise, and a mild sour aroma.
- Day 7: Starter should rise and fall consistently within 12–24 hours.
- Day 8: Starter is typically mature and ready to use when it reliably peaks after feeding.
What to Do With a Sourdough Starter Once It’s Established
- Keep it at room temperature for regular baking: If you bake daily or several times a week, store your starter on the counter and feed it daily to keep it active and ready to use. This works well for people making sourdough bread, pancakes, waffles, or discard recipes throughout the week. (Like me!)
- Store it in the refrigerator for occasional use: If you only bake once a week or less, keep your starter in the fridge to slow fermentation. Feed it, let it sit at room temperature briefly, then refrigerate. When you’re ready to bake, take it out, feed it, and allow it to become active again. Bake when it peaks.
- Adjust feeding to your schedule: A frequently used starter may be fed every 12–24 hours, while a refrigerated starter is typically fed once a week or before baking.
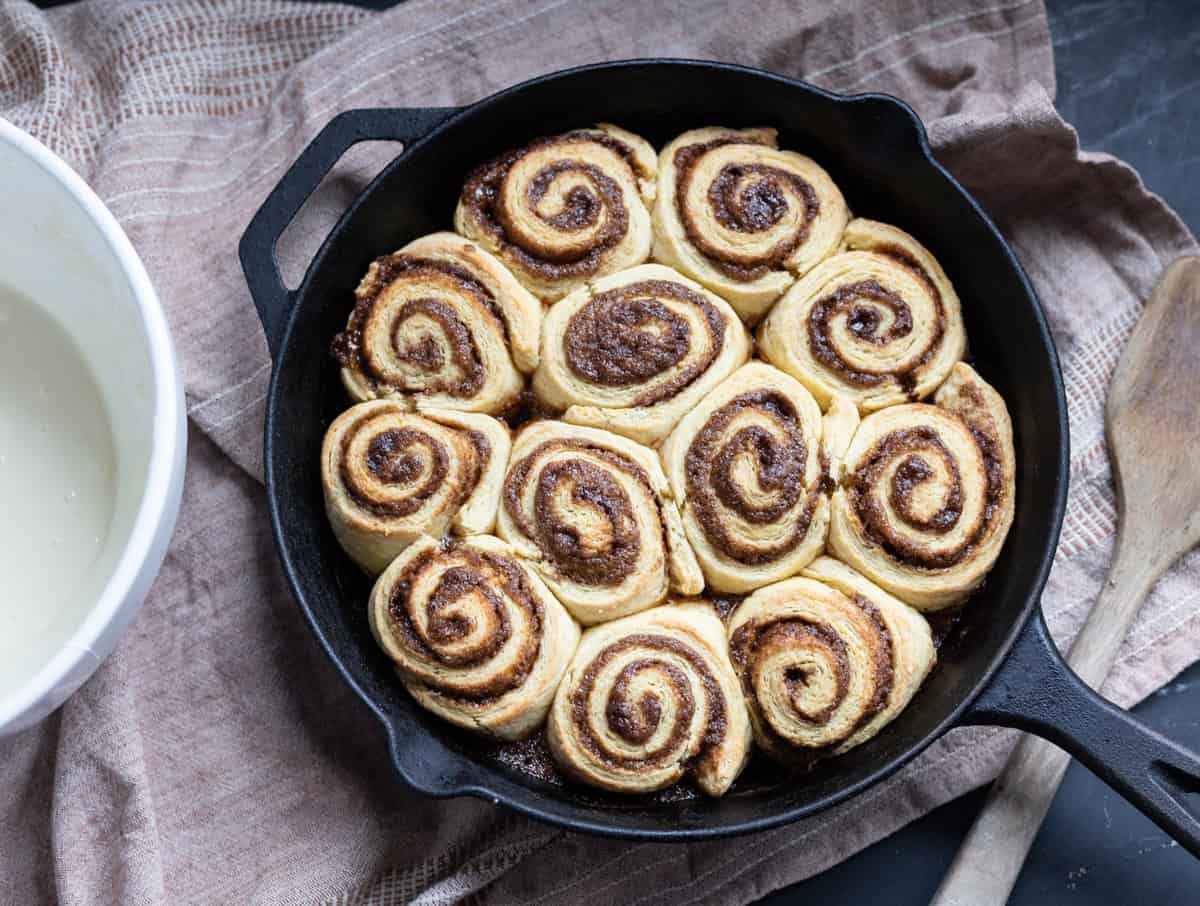
- Use the discard intentionally: Extra starter can be saved for easy discard recipes like quick discard pancakes, sourdough discard crepes, discard blueberry muffins, or flaky sourdough discuits instead of throwing it away.
How to Make a Sourdough Starter FAQs
A sourdough starter recipe typically takes 5–7 days to become active, though some starters may take up to 10–12 days depending on temperature, flour type, and feeding schedule.
Most sourdough starter recipes work well with unbleached all-purpose flour, whole wheat, rye, or fresh milled flour. Rye and whole grain flours often ferment more quickly, but any unbleached flour can be used.
A sourdough starter recipe may be slow to bubble if the environment is cool, the starter is underfed, or the flour lacks fermentable material. Continued regular feedings and patience usually resolve this.
Tap water can be used in a sourdough starter recipe if it is free from chlorine or chloramine. If your tap water is treated, letting it sit uncovered or using filtered water can help fermentation proceed more reliably.
A sourdough starter recipe is ready when the starter rises predictably after feeding, shows plenty of bubbles, and reaches a peak before falling back down.
Yes. Discarding is part of establishing a sourdough starter recipe and helps control acidity and volume. Once the starter is mature, discard can be reduced or used in recipes.
If you see fuzzy growth, colored spots (green, black, pink, or orange), or anything that looks like mold, the proper answer is that the starter should be discarded and restarted. However, many seasoned sourdough bakers disregard this warning, scrape off the mold, and transfer some “clean” starter to a new jar. Mold can develop if the environment is too warm, the starter is not fed regularly, or the container is not kept clean. A layer of gray liquid (hooch) or a sour smell is normal and not mold—mold will look visibly fuzzy or powdery.
If insects get into your sourdough starter, it’s safest to discard it and start over. Some seasoned sourdough bakers disregard this warning, remove the bugs, and transfer some unscathed starter to a clean jar. Bugs are usually attracted when the starter is left uncovered or when sweet residue builds up around the container. To prevent this, keep your starter covered with a loose-fitting lid, cloth, or cheesecloth secured with a rubber band, and wipe down the sides of the jar after feedings.
Expert Tips
- Keep feeding consistent: Regular feedings at roughly the same time each day help the starter develop a predictable rise and activity.
- Watch the starter, not the clock: Temperature and flour type affect fermentation, so look for bubbles, rise, and a pleasant sour smell rather than strict timelines.
- Adjust thickness as needed: A starter that’s too thin may rise poorly; aim for a thick, stirrable (not pourable) consistency that holds bubbles.
- Use warmth—but avoid too much heat: Sourdough starters ferment best in a warm, stable environment (generally around 70–78°F). If the space is too cool, activity may slow; if it’s too warm, the starter can ferment too quickly, weaken, or become overly acidic. Steady warmth is good; heat is not.
- Be patient during the early days: Activity can stall or fluctuate in the first week—this is normal and usually resolves with continued feeding.
- Test for readiness: The float test (pictured below)—dropping a small spoonful of starter into water—can be used as a quick check, but consistent rise and visible bubbles are more reliable indicators of readiness.
- Feed before baking: For best results, use your starter when it has recently peaked after a feeding.

I won’t go into all the details on sourdough baking in this post, but I will share a bit on hydration for those who love precision. Don’t let it overwhelm you.
I didn’t know any of this stuff for my first few years working with sourdough; I just worked by look and feel of the dough, which is where I built most of my knowledge.
Understanding Sourdough Starter Hydration
- Sourdough starter hydration is calculated by dividing the weight of water by the weight of flour and multiplying by 100 (hydration % = water ÷ flour × 100).
- A lower hydration (stiffer) starter might be 60% hydration, such as 50g flour + 30g water, which looks more like dough and tends to ferment more slowly.
- A higher hydration (more liquid) starter could be 125% hydration, like 40g flour + 50g water, which is looser, bubbles quickly, and rises/falls faster.
- The key is always weighing ingredients when you want to be precise —because “cups” vary too much for hydration to be accurate.
Troubleshooting
If your sourdough starter isn’t behaving the way you expect, try not to be discouraged.
Sourdough starters are generally adaptable, and slow or inconsistent activity often means a small adjustment is needed—such as changing the feeding schedule, flour type, water, ratio, or storage temperature. In many cases, working with the starter you already have is more effective than starting over.
That said, there are clear times when a starter should be discarded, such as when mold is present throughout the starter.
In other situations—like surface discoloration, separation, or temporary inactivity—it’s often possible to refresh the starter by removing the affected portion, transferring a small amount of healthy starter to a clean container, and feeding it as usual.
With patience and consistent care, many starters can be maintained long term, even after setbacks.
Storage
- Room temperature: Keep the starter on the counter and feed daily if baking frequently.
- Refrigerator: Store in the fridge and feed about once a week if baking occasionally.
- Before baking: Remove from the fridge, feed, and allow it to become active again at room temperature.
- Long-term care: Always store covered and use a clean container to avoid contamination.


If you love this recipe, please leave a ⭐ 5-star ⭐ rating below! If you have questions or suggestions – drop a comment!

How to Make A Sourdough Starter with Just Flour and Water
Ingredients
Equipment
Method
- Day 1: Mix ⅓ cup flour (40 g) and ¼ cup water (60 g) until thick but stirrable. Cover loosely and leave at room temperature.
- Day 2: Discard half of the starter. Add ⅓ cup flour (40 g) and ¼ cup water (60 g), stir, cover, and leave at room temperature.
- Days 3–7: Repeat discarding half and feeding once daily. Look for bubbles, rise, and a mild sour smell.
- Adjust as needed: If the starter is too thick, add water 1 tablespoon at a time; if too thin, add flour 1 tablespoon at a time.
- Ready to use: The starter is ready when it rises predictably after feeding and reaches a peak before falling (usually by day 5–8).
Nutrition
Notes
- Flour & water: Use quality unbleached flour and unfiltered water for best results; exact flour type can vary.
- Consistency matters: Aim for a thick, stirrable texture—adjust with small amounts of flour or water as needed.
- Feeding schedule: Discard and feed daily while establishing the starter; timing may vary based on temperature.
- Warmth: Starters do best in a steady, warm environment (about 70–78°F); avoid direct heat.
- Activity signs: Look for bubbles, rise, and a mild sour aroma rather than strict timelines.
- Readiness check: The float test can be used as a quick indicator, but consistent rise after feeding is more reliable.
- Troubleshooting: Slow activity, hooch, or brief stalls are normal—adjust feeding frequency, flour, or thickness before starting over.
- Storage: Keep at room temperature with daily feedings for frequent baking, or refrigerate and feed weekly for occasional use.
Tried this recipe?
Let us know how it was!About the Author
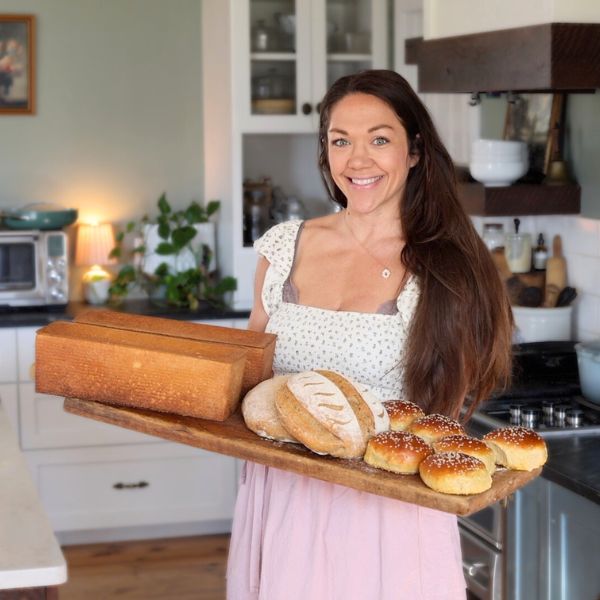
Welcome to Hopewell Heights, I’m Steph – seasoned sourdough baker, homesteader, homemaker, homeschooling mom of 5, and creator behind this Heritage American food blog. I hope you enjoy my family’s favorite, from-scratch recipes!
My flour and water sourdough starter will be 10 years old soon, and it’s as strong as ever – I use it almost daily!
How can I make my sour dough starter have a stronger or more of tangy sour dough starter
Awesome
Is there a trick to discarding half the start? Dump it all in a measuring cup and put half back in the starter jar?
I’m on day 8 and have tiny bubbles and just smells like wet flour?
Hey there! Are you getting a rise after daily feedings?
Do you not use the Wild yeast in your starter? When does that come in? ?
The starter is the wild yeast!
Thank you for actually taking the time to explain the WHYS!! There aren’t enough posts out there that tell you why and how…just “DO”. I am the type of person that needs to know why and how. I can’t wait to try a sourdough starter again.
THANK YOU!
You are so welcome!! I am a why person as well, let me know how it goes if you get another one going!
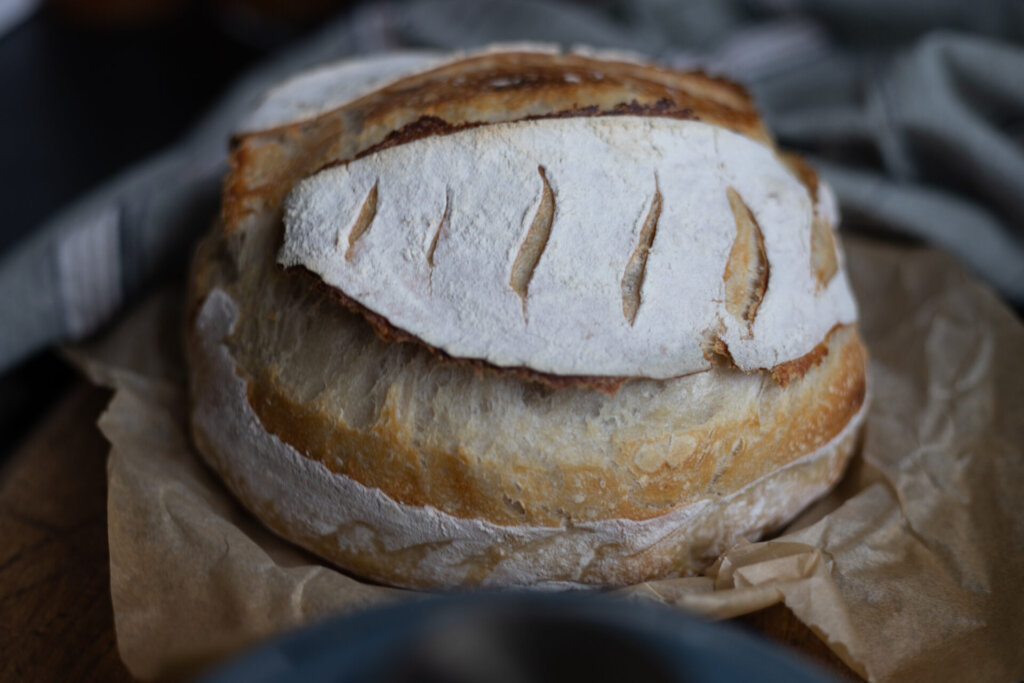
I see some of your other recipes with your starter but can’t you make a loaf of bread with it also?
Yes you can Sue! I have bread recipes on my list to post soon!
Yea! Thx for this info. I got the supplies you recommended and started my starter today! I’m excited for better gut health for our fam that tastes great, too.
Yay!!! So happy you’re jumping on the sourdough train! It’s kind of like having a pet but way less maintenance ?