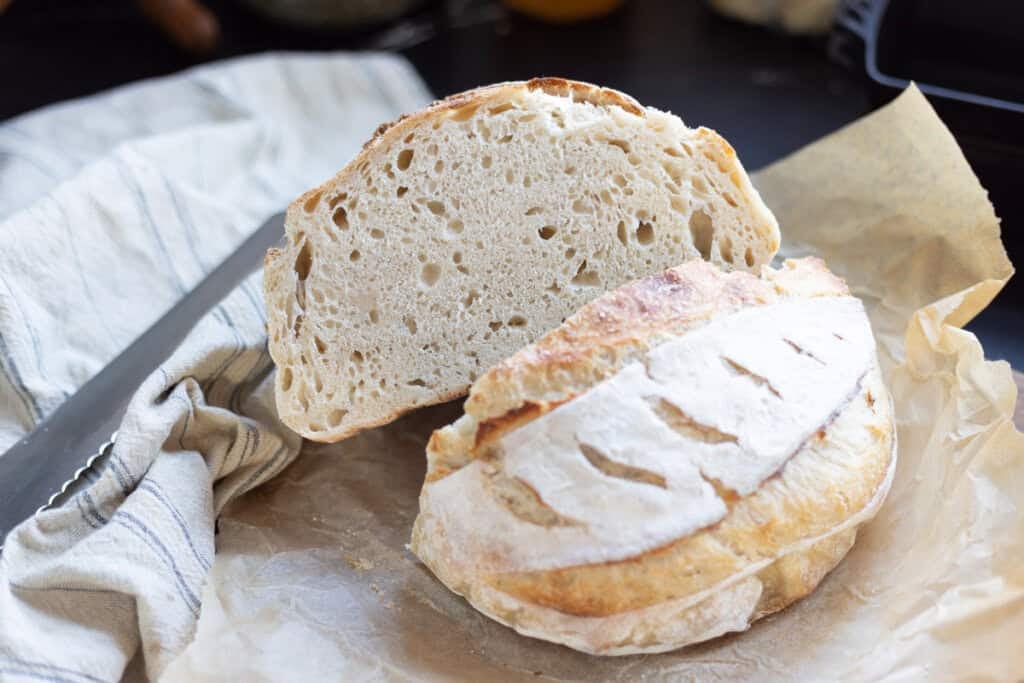
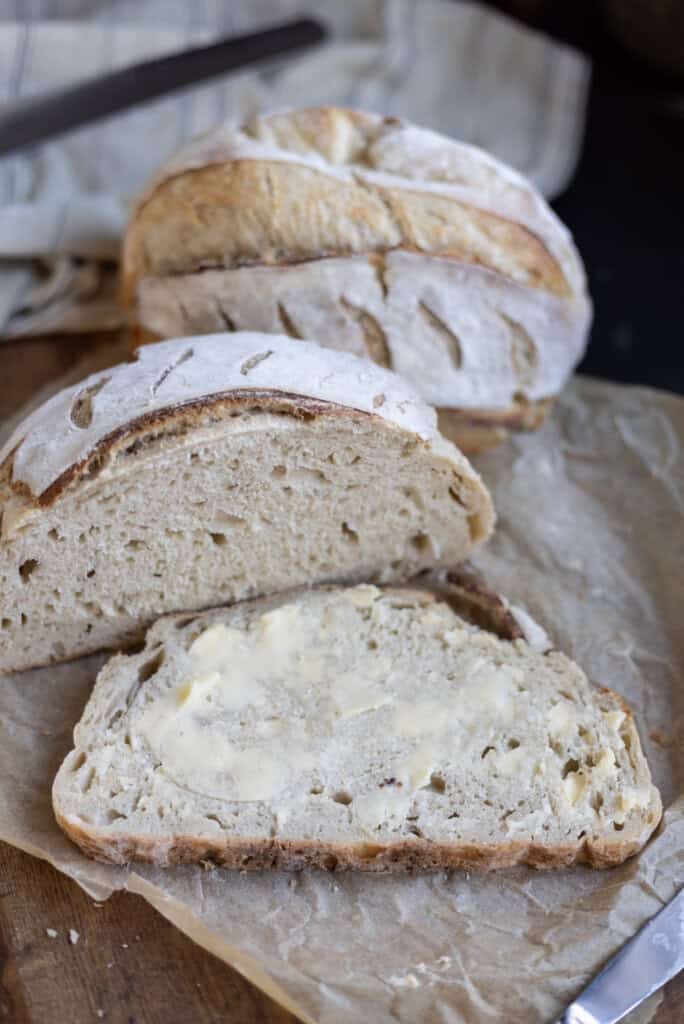
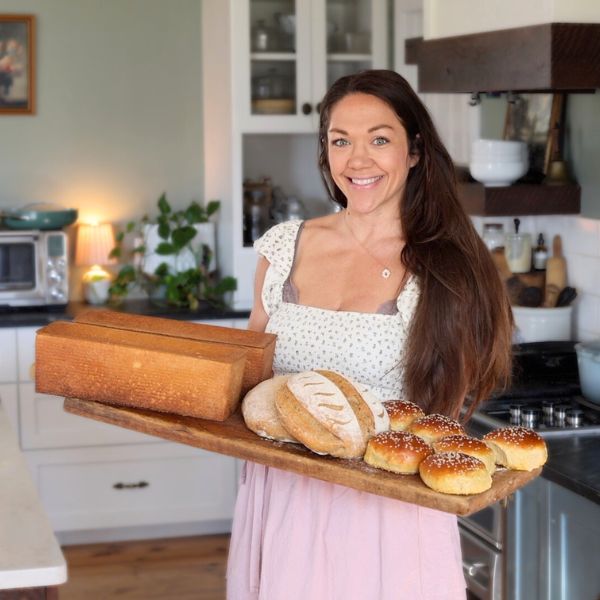
Crusty, golden, and deeply flavorful, this sourdough artisan bread delivers bakery-quality results with simple techniques perfect for beginners.

Quick Recipe Overview: Beginners Sourdough Artisan Bread
⏱ Ready In: ~18–24 hours (mostly hands-off)
🍞 Yields: 1 sourdough artisan loaf
🔥 Calories: 120 per slice
🌾 Main Ingredients: Flour, water, sourdough starter, salt
🥗 Dietary Info: Naturally leavened, vegan, long-fermented
💛 Why You’ll Love It: Crisp crust, chewy interior, simple method, incredible flavor
SUMMARIZE & SAVE THIS CONTENT ON
“I can’t believe how easy your starter recipe was and your instructions on how to maintain it and then finally on how to bake an artisan loaf! Mine came out beautiful, thank you so much!” – Lynn D.
Why You’ll Love This Recipe
- Beginner-friendly method with simple stretch-and-fold technique and no fancy tools
- Crackly artisan crust and soft inside from steam baking and proper fermentation
- Long fermentation improves flavor & texture for authentic sourdough taste
- Only 4 simple ingredients and no commercial yeast required
This rustic loaf is the foundation of traditional sourdough baking. With slow fermentation, proper shaping, and baking in a hot, steamy environment, you’ll achieve the signature oven spring and crusty exterior that artisan loaves are known for. Preheating a Dutch oven helps create steam and high heat that promotes crust formation and rise. Proper proofing is essential — well-proofed dough produces better oven spring and structure. We’ll cover all of that below.
This post may contain affiliate links. I only recommend products I use and love. If you purchase through my links, I may earn a small commission at no extra cost to you.
Simple Sourdough Method
If you’re new to sourdough, measuring in cups and learning to work by feel can actually make the process less intimidating and more successful. Instead of juggling scales, levain builds, and complex hydration calculations, this simple approach helps you focus on understanding how the dough should look, feel, and behave.
Because flour absorbs water differently depending on humidity, grain type, and even altitude, one baker’s precise measurements may not produce the same results in your kitchen. Learning to observe the dough — adjusting with a sprinkle of flour if it feels soupy or adding a splash of water if it feels stiff — helps you create the right consistency every time.
- Builds confidence: You learn to recognize properly hydrated dough instead of relying solely on numbers.
- Adapts to your environment: Weather, altitude, and flour types affect hydration and fermentation speed.
- Simplifies the process: Skipping levain builds and scales reduces overwhelm for beginners.
- Encourages consistency: Watching the dough leads to more reliable results than strictly following timing.
- Teaches true sourdough skills: Experienced bakers rely on visual and tactile cues, not just measurements.
- Gets you going ASAP: Use this method to start making sourdough bread today, rather than buying a bunch of supplies and obsessing over details.
The goal isn’t perfection (at first) — it’s familiarity. As you learn how properly fermented dough feels and responds, you’ll gain confidence and consistency, making every loaf better than the last. Then you can experiment with more precise measurements and methods for specific results like a big, open crumb loaf.
While you’re working on your sourdough skills, bookmark my Complete Sourdough Vocabulary post and add my sourdough pullman loaf recipe to your bake-next list. It’s my favorite sandwich bread!
What Is Long Fermented Sourdough Bread?
Long fermented sourdough bread is made by allowing the dough to rise slowly — typically 8 to 24+ hours — using wild yeast and beneficial bacteria from an active sourdough starter. During this extended fermentation, naturally occurring lactic acid bacteria and wild yeasts break down sugars, proteins, and starches, transforming both the flavor and digestibility of the bread.
Unlike quick-rise breads made with commercial yeast, long fermentation develops deeper flavor, improves texture, and changes the nutritional profile of the grain.
Benefits of Long Fermentation
- Improves Digestibility: Extended fermentation helps break down gluten and complex starches, making bread easier to digest for many people. (source)
- May Reduce Gluten Content: Sourdough fermentation partially degrades gluten proteins, which may improve tolerance for some people who are sensitive to gluten. (source)
- Supports Mineral Absorption: Natural acids produced during fermentation reduce phytic acid, which can improve absorption of minerals like iron, zinc, and magnesium. (source)
- Helps Stabilize Blood Sugar Response: Organic acids formed during sourdough fermentation can slow starch digestion and may lower the bread’s glycemic impact. (source)
- Encourages Beneficial Microbial Activity: Sourdough fermentation involves lactic acid bacteria that support a healthy microbial balance in fermented foods. (source)
In short: Long fermentation transforms simple flour and water into a more flavorful, potentially more digestible, and nutritionally enhanced bread — one of the reasons traditional sourdough has been a central part of the human diet for millennia.
Key Ingredients

- Active Sourdough Starter – A bubbly, active starter provides natural leavening and signature tang. If your starter is weak, see my guide to maintaining a strong sourdough starter.
- Flour – Bread flour creates a strong gluten network for structure, but all-purpose flour works just fine. I buy organic, unbleached all-purpose flour and organic whole wheat for milling in bulk from Azure Standard.
- Water – Hydration level influences crumb openness and texture. Use untreated, pure water for the best results.
- Salt – Enhances flavor and strengthens gluten structure. I use Redmond Real Salt in my daily baking.
Sourdough Artisan Bread Sample Baking Timelines
Same Day Bake
Serve Next Morning
- Night Before (8–10 PM) – Feed starter so it is active and ready in the morning.
- 6:00 AM – Mix dough and rest.
- 6:30 AM – Add salt.
- 7:00–9:00 AM – Stretch & folds every 30 minutes.
- 9:00 AM–3:00 PM – Bulk ferment until dough is puffy and increased about 50%.
- 3:00 PM – Pre-shape and rest.
- 3:30 PM – Final shape and place in banneton.
- 3:30–8:00 PM – Cold proof in refrigerator.
- 8:00 PM – Bake.
- Cool & rest overnight – Flavor and texture improve as the loaf rests.
- Next Morning – Slice and serve.
Overnight Cold Proof Option
- Night Before (8–10 PM) – Feed your starter so it is active and ready by morning.
- Morning (6:00 AM) – Mix dough and rest.
- 6:30 AM – Add salt.
- 7:00–9:00 AM – Perform stretch & folds every 30 minutes.
- 9:00 AM–2:00 PM – Bulk ferment until dough is puffy and increased about 50%.
- 2:00 PM – Pre-shape and rest.
- 2:30 PM – Final shape and place in banneton.
- 2:30 PM – Next Morning – Cold proof in the refrigerator overnight for deeper flavor and structure.
- Next Morning (7–9 AM) – Bake straight from the refrigerator.
- Cool completely – Allow loaf to cool before slicing for best texture.
Beginners Sourdough Artisan Bread FAQs
Sourdough artisan bread is a rustic, naturally leavened loaf made using a sourdough starter instead of commercial yeast. It is known for its crisp crust, chewy interior, and deep flavor developed through slow fermentation.
Sourdough artisan bread is long-fermented, which develops richer flavor and texture compared to quick-rise breads. The fermentation process also breaks down starches and proteins, making it easier to digest for many people.
Sourdough artisan bread typically takes 18–24 hours from start to finish, but most of that time is hands-off fermentation and cold proofing. The long rise allows flavor and structure to fully develop.
Sourdough artisan bread may not rise if the starter is weak, the dough is under-fermented, or the kitchen temperature is too cold. Ensuring an active, bubbly starter that has doubled after feeding and is at peak, and allowing enough bulk fermentation time are key to good oven spring.
A Dutch oven is recommended because it traps steam during baking, helping sourdough artisan bread develop oven spring and a crisp crust. However, you can create steam in a regular oven using a preheated pan and hot water; this is called the open bake method.
If your sourdough artisan bread dough isn’t rising, the most common cause is a weak or inactive starter. Your starter should be bubbly, doubled in size, and pass the float test (see the photo below) before mixing the dough. Dough can also struggle to rise if the room temperature is too cool, the fermentation time is too short, or too much flour was added, creating a stiff dough. Allow enough bulk fermentation time, keep the dough around 70–75°F, and ensure proper hydration for the best rise.
If you’re unsure whether your starter is ready to use, drop a small spoonful into a glass of water — if it floats, it’s full of gas and active enough to help your dough rise.

Troubleshooting Sourdough Artisan Bread
Even simple sourdough can behave unpredictably. If something doesn’t go as planned, small adjustments can make a big difference on your next bake.
Dough isn’t rising
- Starter may be weak — it should be bubbly and doubling before use.
- Room temperature may be too cool; aim for 70–75°F or use a proofer.
- Bulk fermentation may need more time.
- Dough may be too dry; stiff dough slows fermentation.
Dough feels too sticky to handle
- High hydration doughs feel sticky at first, but strengthen during folds.
- Lightly wet hands instead of adding excess flour.
- Perform additional stretch-and-folds to build structure.
Dough spreads flat instead of holding shape
- Dough may be overproofed (proofed too long).
- Surface tension may be insufficient during shaping.
- Try a shorter bulk rise or shaping more tightly.
Dense or heavy crumb
- Under-fermented dough didn’t develop enough gas.
- Starter may not have been active enough.
- Dough may have been handled too roughly, deflating air pockets.
Gummy interior after baking
- Loaf was sliced before fully cooling.
- Bread may be slightly underbaked — bake until deep golden brown.
- Excess moisture can remain if oven temperature is too low.
Pale crust or soft exterior
- Dutch oven or baking surface may not have been fully preheated.
- Bake longer uncovered to deepen color and crisp the crust.
Scoring didn’t open during baking
- Dough may be overproofed.
- Score deeper and at a shallow angle.
- Cold dough straight from the fridge scores more cleanly. Try flash freezing before scoring.
Bread tastes too sour
- Reduce cold proof time.
- Use the dough sooner after bulk fermentation.
- Feed your starter more frequently to mellow acidity.
Remember: sourdough improves with observation and practice. Each loaf teaches you how your dough behaves in your kitchen environment.
What to Do With Sourdough Bread That Didn’t Turn Out
Even less-than-perfect sourdough is still delicious and useful. A flat loaf, dense crumb, or overly crusty exterior can easily be transformed into something wonderful.
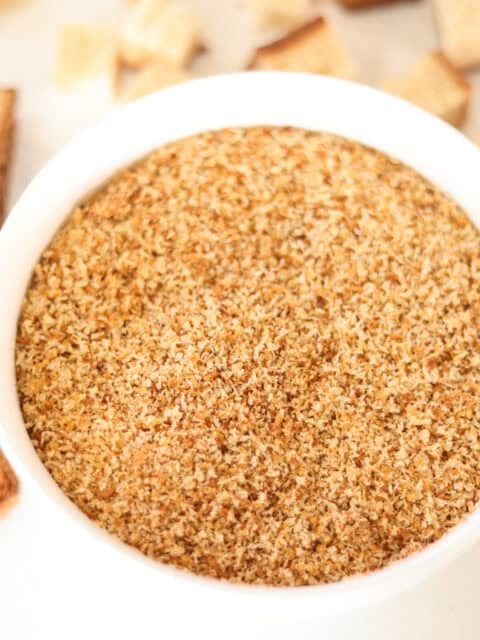
- Turn it into breadcrumbs by drying slices in a low oven, then pulsing into crumbs for coating meats, topping casseroles, or adding crunch to baked dishes.
- Make sourdough croutons by cubing the bread, tossing with olive oil, salt, and herbs, and baking until crisp — perfect for soups and salads.
- Slice thin for crostini and toast with a brush of olive oil for a sturdy base for appetizers and spreads.
- Use for French toast casserole since dense bread works beautifully for French toast casseroles, savory breakfast bakes, or bread pudding.
- Learn from the loaf by noticing the crumb, texture, and rise — each bake helps you understand fermentation, hydration, and dough handling.
A “failed” loaf is really just an ingredient in disguise — and often the start of an even better meal.
Tips and Tricks
- You don’t need special tools to start. A mixing bowl, spoon, clean towel, and any oven-safe pot with a lid can produce beautiful artisan bread.
- You don’t have to weigh ingredients. While a scale improves precision, you can bake successfully using measuring cups and adjusting by feel.
- Learn to read the dough instead of the clock. Watch for the dough to become puffy, smoother, and slightly jiggly rather than relying strictly on timing.
- Look for a 50% rise during bulk fermentation. Dough that doubles can overproof; a moderate rise gives better oven spring.
- Adjust if necessary. If the dough feels very stiff, add a little water. If it’s overly sticky and soupy, sprinkle in a small amount of flour during folds.
- Cool kitchens slow fermentation. If your home is below 70°F, place the dough in the oven with the light on or near a warm appliance.
- Cold proofing makes baking easier. Refrigerated dough is easier to score and holds its shape better. This is why the second “rise” is done in the fridge as a “cold proof.”
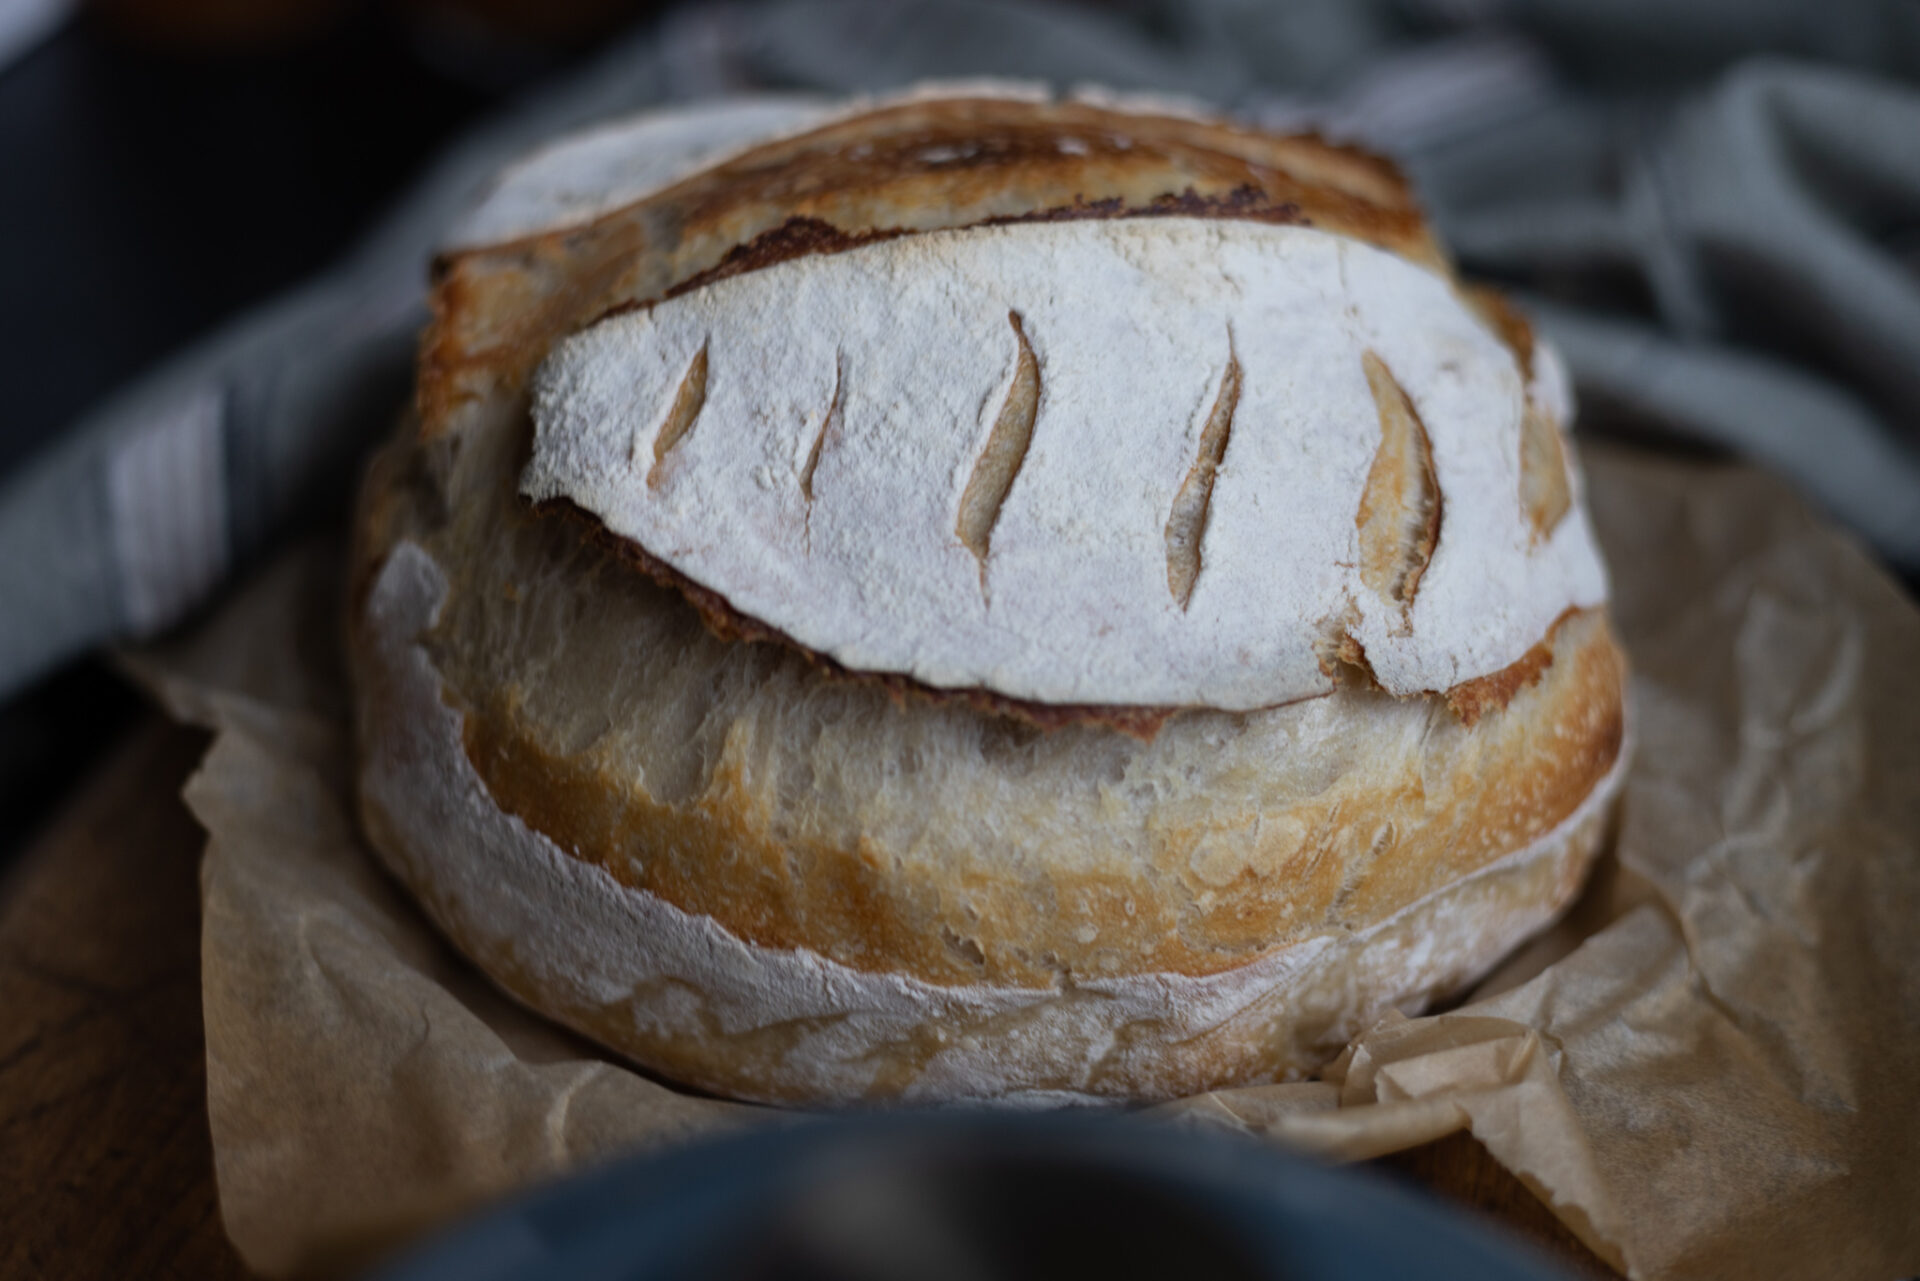
- Slash confidently before baking. Scoring gives the bread a place to expand and prevents random cracks. Don’t be afraid to score well.
- Let the loaf cool before slicing. Cutting too soon can create a gummy texture inside.
- Flash freeze before baking. Transfer the banneton basket with the dough from the fridge to the freezer while preheating the oven. This quick flash freeze makes the dough easier to score.
- Your first loaf doesn’t have to be perfect. Every bake teaches you how dough should feel and behave — that’s the real sourdough skill.
Storage
- Store at room temperature by keeping the loaf cut-side down on a cutting board or wrapped in a clean towel for up to 2 days to preserve the crust.
- Use a bread bag or linen wrap to protect the crust while allowing airflow, which prevents sogginess.
- Avoid airtight plastic at room temperature unless the loaf is fully cooled, as trapped moisture can soften the crust and encourage mold.
- Freeze for longer storage whole or by slicing the loaf first, then sealing it in a freezer bag for up to 3 months.
- Refresh before serving by reheating slices or the whole loaf in a 350°F oven for 8–10 minutes to restore crust crispness.
- Refrigeration is not recommended because it accelerates staling and dries out the crumb.


If you love this recipe, please leave a ⭐ 5-star ⭐ rating below! If you have questions or suggestions – drop a comment!
Beginners Sourdough Artisan Bread
Ingredients
Equipment
Method
- Feed your starter. Feed your sourdough starter 4–8 hours before baking so it becomes active, bubbly, and near its peak. It should double in size and smell pleasantly tangy.
- Mix dough. In a large bowl, stir together the water and sourdough starter, then add the flour and mix until incorporated. Cover and rest for 30 minutes, then add the salt and work it in with a spoon or your hands. Cover and rest for 30 minutes.
- Strengthen the dough with stretch-and-folds/kneading. Over the next 2 hours, perform a set of stretch-and-folds every 30 minutes (3–4 sets total). The dough should become smoother and more elastic. Grab the dough on one edge and stretch it up, then fold it over the opposite edge, repeat on every edge. If stretch and folds intimidate you, just knead the dough a bit every 30 minutes, then place it back in the bowl, cover, and rest.
- Bulk ferment until puffy. After the last stretch and fold, cover and let the dough rise at room temperature until it looks airy, shows bubbles along the sides, and has increased in size by about 50%. If your kitchen is cooler than 70F, consider placing the dough in the oven with the light on or in a warm place.
- Pre-shape and rest. Turn the dough onto a lightly floured surface, gently shape into a loose round, and rest 20–30 minutes.
- Final shape. Shape into a tight round by pulling the dough toward you to create surface tension. Place seam-side up in a well-floured banneton basket or towel-lined bowl.
- Cold proof. Cover and refrigerate 8–24 hours to improve flavor, structure, and scoring before baking.
- Preheat oven and Dutch oven. Place your Dutch oven or pot with a lid inside the oven and preheat to 475°F for at least 30–45 minutes.
- Turn out and score. Remove dough from the refrigerator, flip onto parchment paper, and score the top with a sharp knife or razor.
- Bake covered, then uncovered. Lower the temperature of the over to 425F, then carefully lower the dough into the hot Dutch oven. Cover and bake 30 minutes, then uncover and bake 10-15 minutes more until deep golden brown.
- Cool completely. Transfer to a rack and cool at least 1 hour or overnight before slicing so the crumb sets and avoids gumminess.
Nutrition
Video
Notes
- Starter readiness matters. Use starter that has doubled in size, looks bubbly, and smells pleasantly tangy for the best rise.
- This is a beginner-friendly hydration. The dough should feel soft and slightly tacky, not stiff or soupy — adjust with a sprinkle of flour or a splash of water if needed.
- Watch the dough, not the clock. Fermentation speed changes with temperature, flour type, and altitude, so look for a puffy dough with bubbles rather than relying strictly on time.
- A 50% rise is ideal for beginners. Letting the dough double can lead to overproofing and a flatter loaf.
- Cold proofing improves results. Refrigeration strengthens structure, deepens flavor, and makes scoring easier.
- If you don’t have a banneton, use a bowl lined with a well-floured towel.
- If you don’t have a Dutch oven, bake on a preheated baking stone or sheet and place a pan of hot water in the oven to create steam.
- Score to control expansion. One confident slash allows the loaf to expand and prevents cracking.
- Bake until deeply golden. A darker crust develops better flavor and ensures the interior is fully baked.
- Cool before slicing. Cutting too early can create a gummy texture inside.
- Every loaf teaches you something. Small adjustments in fermentation, shaping, and hydration lead to better results each time.
Very helpful and precise recipe
I make this sourdough bread several times a week, usually just the classic but I add in chocolate chips. cheese, and whatever else I can think of and it turns out every time!
Adjusted the flour in this for fresh-milled. Turned out so great! This is my favorite artisan loaf recipe I’ve used so far and made me switch from my previous tried & true.
Wet sticky mess. Kept waiting for it to get better. Ended up tossing the thing in frustration. I think there’s something wrong with this recipe.
Hi, thanks for your sourdough recipes I have followed a few and everything has turned out delicious (pancakes, and biscuits)
I have a question
Your recipe says to use 3 cups (360g) of all purpose flour but on your YouTube video posted on this blog you say to use 4 cups and that you know the consistency
I used your recipe and I have a very wet and sticky mess that looks like it’s lacking flour
Do you recommend adding more flour at this point or trashing and starting fresh?
This is the recipe I keep coming back to for whenever I need to make a loaf of bread! So easy and always good results 🙂 soft interior and closed crumb
I can’t believe how easy your starter recipe was and your instructions on how to maintain it and then finally on how to bake an artisan loaf! Mine came out beautiful, thank you so much!