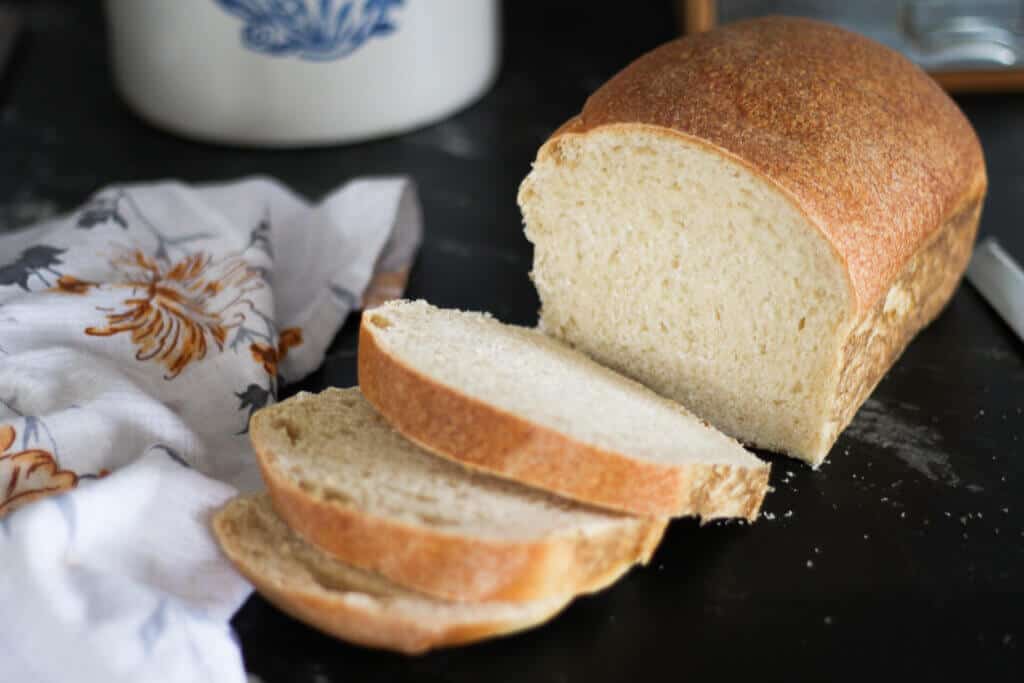
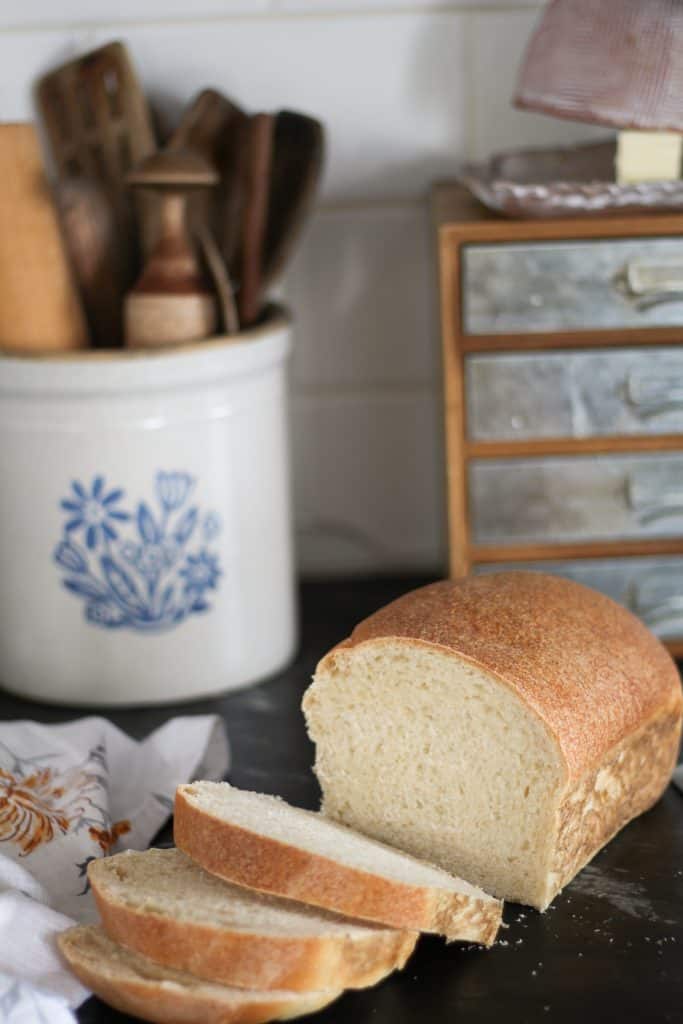
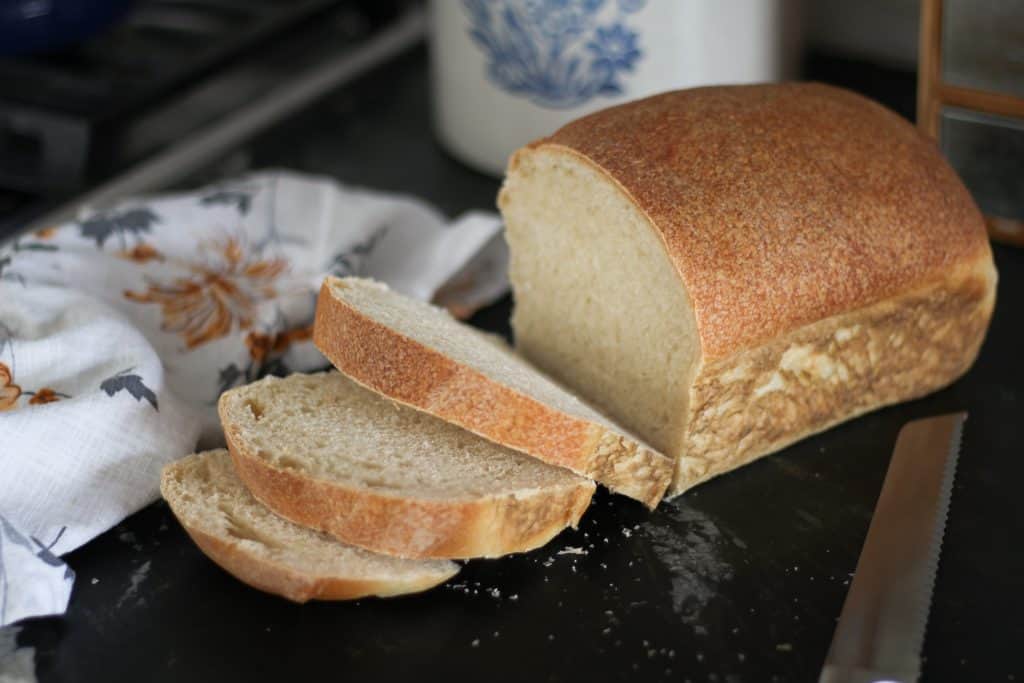
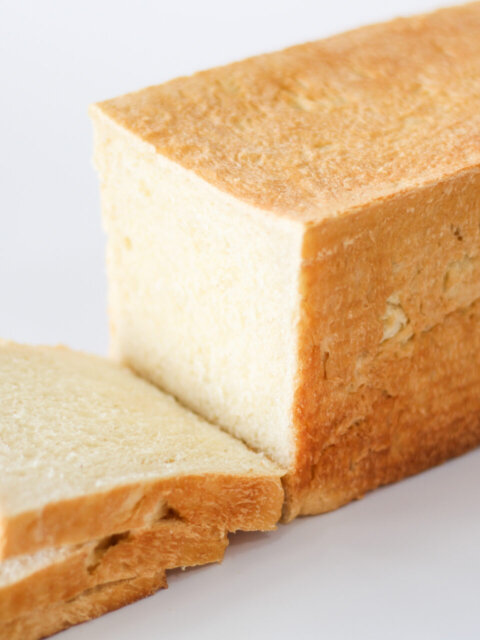
Long fermented, soft sourdough sandwich bread is pillowy and lightly sweet, making it the ideal everyday loaf for toast, grilled cheese, and classic sandwiches your whole family will love. I’ve been making this recipe for my family of 7 for almost 10 years!
Quick Recipe Overview: Soft Sourdough Sandwich Bread
⏱ Ready In: ~12–18 hours (including long fermentation + bake time)
🍞 Serves: 2 standard sandwich loaves
🔥 Calories: ~160–180 per slice (varies by slice thickness)
🌾 Main Ingredients: Active sourdough starter, flour, milk, water, honey (or sugar), oil, salt
🥖 Dietary Info: Long fermented, yeast-free, can be made dairy-free
💛 Why You’ll Love It: This soft sourdough sandwich bread is long fermented, but includes a quick discard option as well as noted for using fresh milled flour if that’s your preference.
SUMMARIZE & SAVE THIS CONTENT ON
“This is the first sourdough sandwich bread I ever made, we love it so much and I’ve made it countless times over the years – I have the recipe memorized by heart!” – Steph
Why You’ll Love This Recipe
- Long fermented but still soft: Develops flavor and breaks down phytic acid and gluten while staying tender with a mild, family-friendly sourdough flavor.
- Fresh milled flour option: Includes guidance for using fresh milled wheat for added nutrition without sacrificing softness.
- Quick discard option: Don’t have time for a long ferment? A faster discard version makes this loaf flexible for busy baking days.
Simple sourdough artisan bread is one of my absolute favorite breads, but sometimes you just need a classic sourdough sandwich loaf – this is my go-to recipe! If you find yourself flying through these loaves, check out my sourdough pullman bread recipe for a long, square loaf that yields 24 slices!
This post may contain affiliate links. I only recommend products I use and love. If you purchase through my links, I may earn a small commission at no extra cost to you.
While you’re working on your sourdough skills, bookmark my Complete Sourdough Vocabulary post and add my sourdough pullman loaf recipe to your bake-next list.
Key Ingredients
Precise measurements and instructions can be found in the recipe card at the bottom of the page.
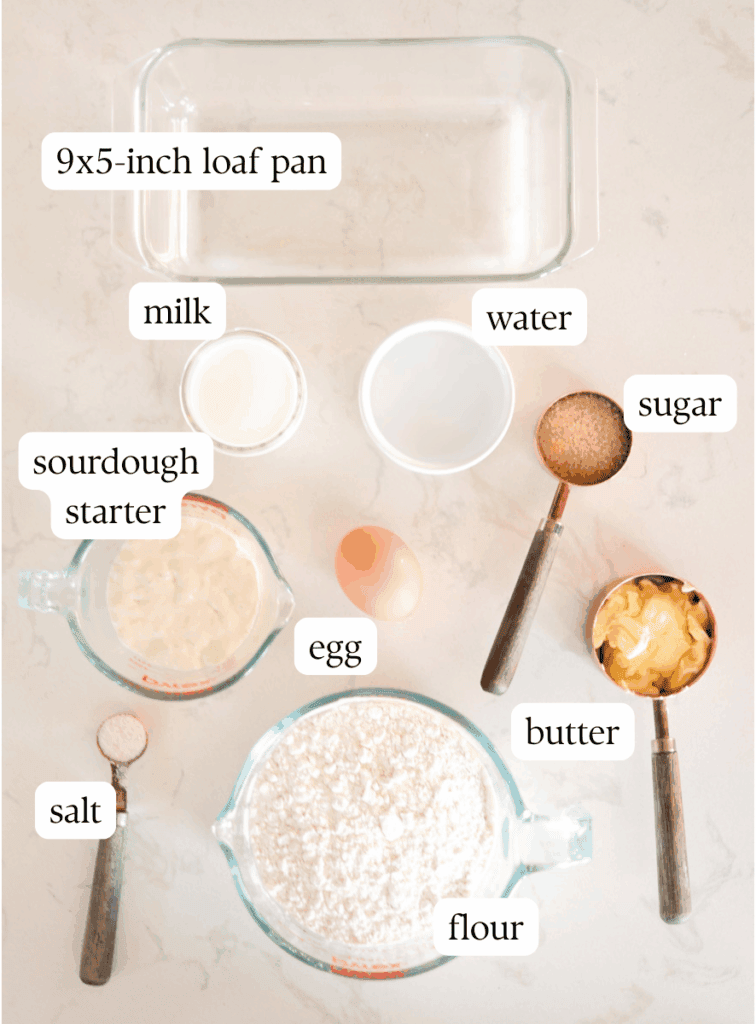
- Active sourdough starter: Provides natural leavening and a mild, balanced sourdough flavor. Check out my quide to making and maintaining a sourdough starter.
- All-purpose flour: Creates a soft, tender crumb ideal for sandwich bread. I buy organic flour and grain in bulk from Azure Standard.
- Milk: Adds richness and keeps the loaf soft and moist. Substitute with water or unsweetened non-dairy milk for a dairy free option.
- Sugar: Lightly sweetens the bread and supports fermentation for good rise.
- Butter: Keeps the crumb tender and helps the bread stay soft longer. You can use olive oil, avocado oil, or coconut oil in place of butter.
- Salt: Enhances flavor and strengthens the dough structure.
Fresh Milled Flour for Soft Sourdough Sandwich Bread
TLDR – You can use freshly milled hard white wheat as a 1:1 replacement for the all-purpose flour in this recipe.
- Best Wheat Variety: Hard white wheat works best for soft sourdough sandwich bread because it provides enough structure for a good rise while still baking up tender and mild in flavor.
- How to Substitute: Replace the all-purpose flour with freshly milled hard white wheat by weight (1:1).
- Hydration Tip: Fresh milled flour absorbs liquid differently—add a few extra tablespoons of flour if the dough is too sticky.
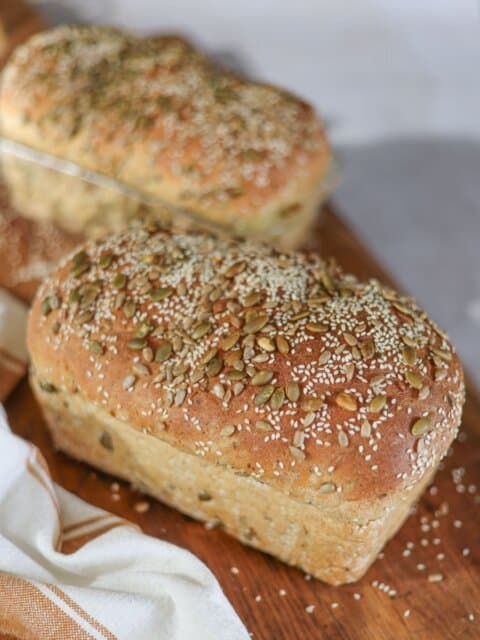
Try this seeded sourdough sandwich loaf next, it’s one of my favorites for sandwiches!
Step-By-Step Instructions

Step 1 – Add Ingredients to a mixing bowl and mix until combined.
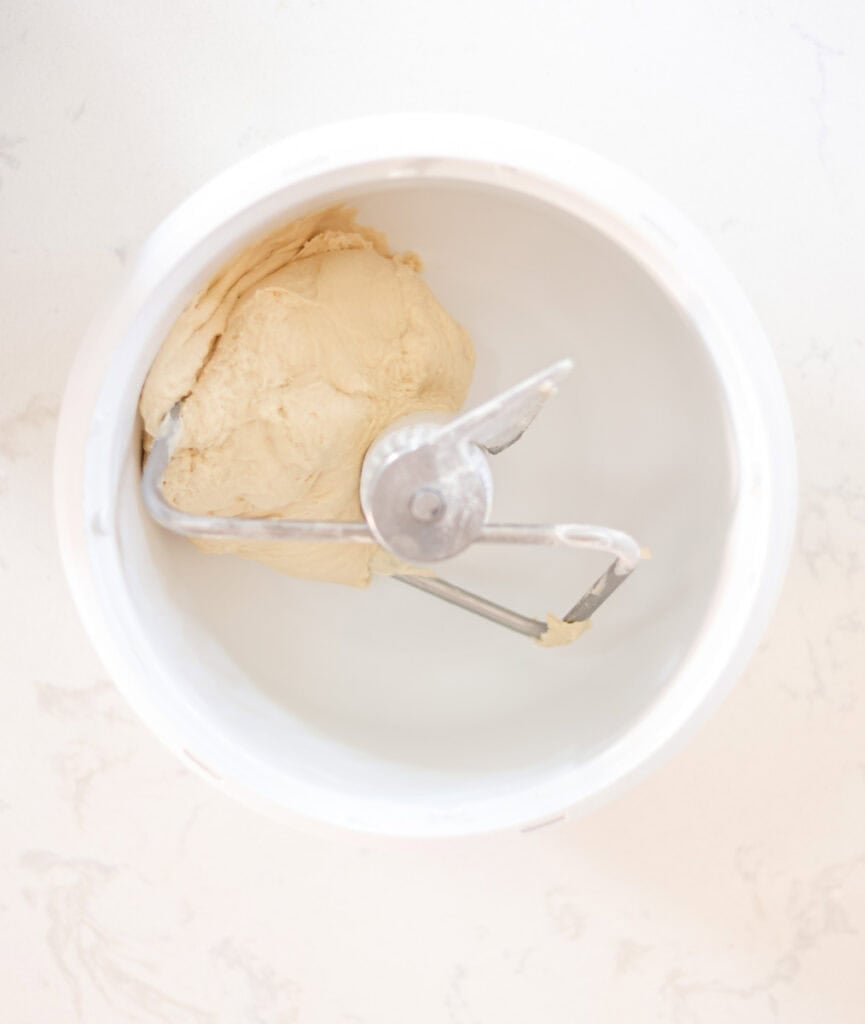
Step 2 – Knead the dough by hand or with a stand mixer for 5-10 minutes until smooth and elastic.
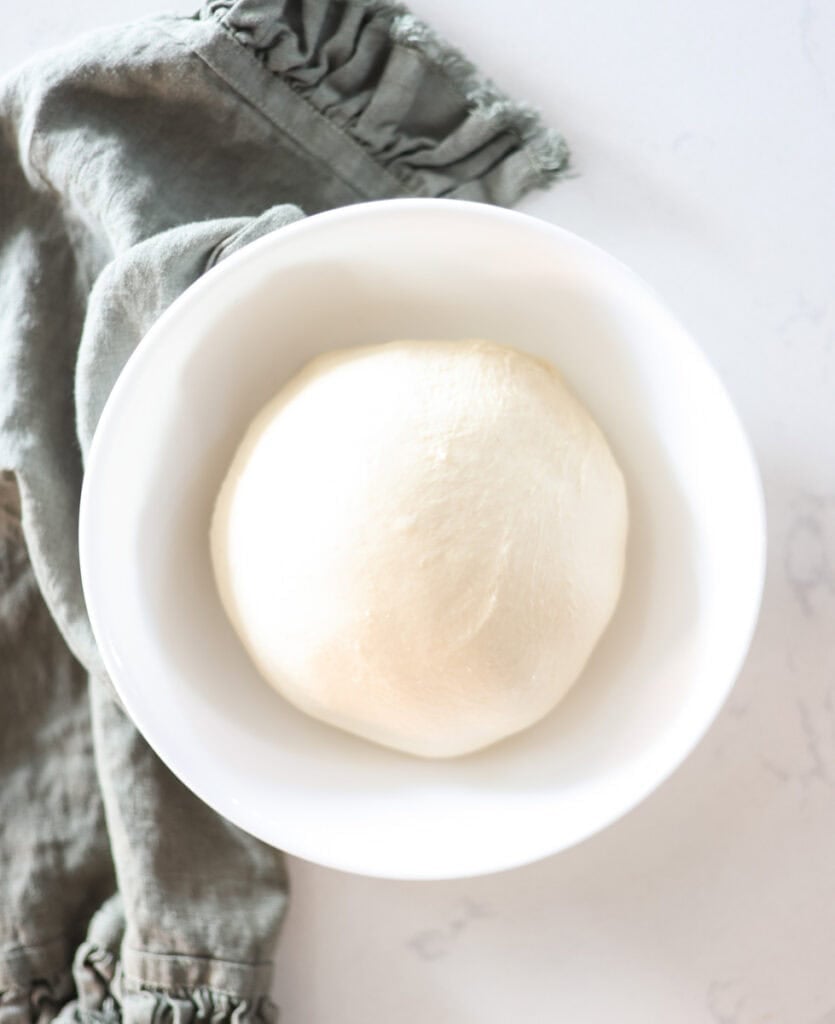
Step 3 – Shape the dough into a ball and place in a greased bowl.

Step 4 – Bulk Ferment: Cover the dough with a towel for bulk ferment at room temperature. This can take 4-12 hours or longer, depending on starter strength and temperature.
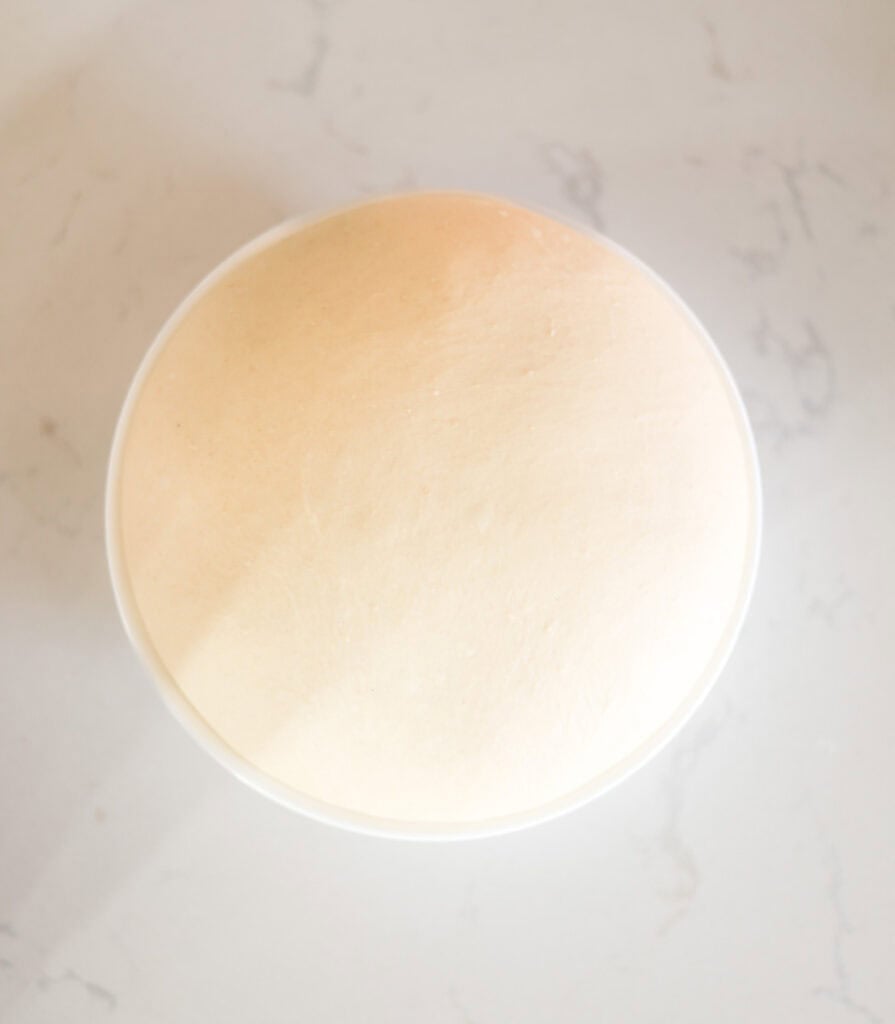
The dough should be almost doubled in size after the bulk ferment.
Step 5 – Final Rise and Bake: Shape the dough into a 9-inch loaf, place in greased loaf pan, let rise for 2-4 hours until the dough is 1 inch above the edge of the pan, then bake in preheated oven at 350F for 30 minutes.
Sourdough Sandwich Bread Sample Timelines
Quick Discard Option
Same Day
- 0:00 – Add 2 teaspoons instant yeast to ingredients, then mix and knead the dough.
- 0:10–1:30 – Cover and rise at room temperature until doubled.
- 1:30–1:45 – Shape dough into a loaf and place in pan.
- 1:45–2:45 – Second rise until dough crowns about 1 inch above the pan.
- 2:45–3:30 – Bake, cool, and slice.
Long-Fermented Option
Day 1
- Morning–Afternoon – Feed sourdough starter.
- Evening – When starter is active, mix and knead dough. Cover and ferment overnight at room temperature.
Day 2
- Morning – Shape dough and place into loaf pan for final rise.
- Late Morning – Once dough crowns about 1 inch above the pan, bake.
- Midday – Cool completely, then slice.
Soft Sourdough Sandwich Bread FAQs
Use an active, bubbly starter at peak strength, knead the dough until smooth and elastic, and allow it to rise until it’s visibly puffy before shaping and baking — a soft, tender crumb comes from proper fermentation and rise cues rather than timing alone.
It can turn gummy if it’s underbaked or sliced while warm; bake until the internal temperature reaches about 200–205 °F and cool completely before cutting. Overproofing can also weaken the structure and cause gumminess.
Most doughs ferment about 4–12 hours for the first rise and 2–4 hours for the final rise, depending on starter strength and room temperature — look for the dough to be airy and visibly expanded rather than relying strictly on the clock.
Yes — this bread works with discard by adding about 2 teaspoons instant yeast to the dough, which shortens the bulk ferment to roughly 1–2 hours before shaping.
Yes — freshly milled hard white wheat works well as a 1:1 replacement for all-purpose flour by weight; fresh-milled flour absorbs liquid differently, so hold back a bit of liquid and add it only if needed.
A 1.5 lb loaf pan works best for a tall, soft loaf; aim for about 700–725 g of dough for a full loaf or 450–500 g for a 1 lb pan.
Let the bread cool completely, then store in a bag or airtight container at room temperature for up to 3 days.
To keep the flavor mild and family-friendly, use a recently fed starter and ferment in a warmer environment — shortening the fermentation time reduces sourness.
Expert Tips for Making Soft Sourdough Sandwich Bread
- Use starter at peak: Bake with a bubbly starter that has just doubled for the best rise and mild flavor.
- Watch the dough, not the clock: Fermentation times vary widely; dough should look airy and feel light before shaping.
- Knead for structure: Proper gluten development is key to a soft, tall sandwich loaf—stop kneading when the dough stretches without tearing.
- Shape tightly: A firm, even roll creates good surface tension and helps the loaf rise straight instead of spreading.
- Proof to the right height: Bake when the dough crowns about 1 inch above the pan for optimal oven spring.
- Bake thoroughly: An internal temperature of 200–205°F ensures the crumb sets without gumminess.
- Cool completely: Slicing too soon releases steam and compresses the crumb—wait until fully cooled for clean slices.
Storage
- Room temperature: Store fully cooled bread in a bag or airtight container for 2–3 days.
- Refrigeration: Not recommended, as it dries out soft sourdough sandwich bread faster.
- Freezing: Slice once cooled, then freeze in an airtight bag for up to 3 months.
- Reheating: Toast slices straight from frozen for the best texture and flavor.
More Sourdough Bread Recipes to Try


If you love this recipe, please leave a ⭐ 5-star ⭐ rating below! If you have questions or suggestions – drop a comment!

Soft Sourdough Sandwich Bread
Ingredients
Equipment
Method
- Mix wet ingredients: In a mixing bowl, whisk together the water, milk, active sourdough starter, sugar, and butter until combined.
- Add flour: Add the salt and flour and mix until a dough forms, then knead (by hand or mixer) until smooth and elastic, 6–10 minutes. The dough should be soft and slightly tacky.
- First rise (bulk ferment): Cover and let rise at room temperature until noticeably puffy and risen (about 4–12 hours, depending on starter strength and room temperature).
- Shape: Turn dough onto a lightly oiled surface, gently press into a rectangle, then roll up tightly into a loaf. Pinch the seam closed and tuck ends under.
- Second rise: Place in a greased 1.5 lb loaf pan, cover, and let rise until the dough crowns about 1 inch above the rim (about 2–4 hours).
- Bake: Bake at 350°F for 30 minutes, until deep golden and the internal temperature reaches 200F.
- Cool: Remove from pan and cool completely on a wire rack before slicing for the best texture.
Nutrition
Notes
- Starter strength matters: Use an active, bubbly starter at peak rise for the best oven spring and soft crumb.
- Dough texture: The dough should feel soft and slightly tacky, but not sticky. Add a tablespoon of flour only if needed after letting the dough rest for 10 minutes.
- Fermentation timing: Bulk rise time will vary based on room temperature and starter activity—look for a visibly puffy dough rather than the clock.
- Pan size: This recipe is sized for one 1.5 lb loaf pan (about 800 g dough).
- Proofing cue: The loaf is ready to bake when it rises about 1 inch above the pan rim and slowly springs back when lightly pressed.
- Baking tip: Tent loosely with foil if the top browns too quickly during the last 10 minutes of baking.
- Fresh milled flour option: Use hard white wheat, milled fresh, as a 1:1 replacement for the all-purpose flour by weight. Expect a slightly softer dough—add an extra few tablespoons of flour if needed.
- Discard option: This recipe can be made with sourdough discard by adding 2 teaspoons instant yeast to the dough, reducing the bulk ferment to 1–2 hours before shaping.
Tried this recipe?
Let us know how it was!About the Author

Welcome to Hopewell Heights, I’m Steph – seasoned sourdough baker, homesteader, homemaker, homeschooling mom of 5, and creator behind this Heritage American food blog. I hope you enjoy my family’s favorite, from-scratch recipes!
The absolute best bread, everyone loves it.
I have been making bread for a while now, at least 6 years. I have tried other sourdough sandwich loaves in the past but they just weren’t what I was looking for. I gave yours a try, I even did freshly milled flour. I did let it sit for about 15 min between mixing and kneading in my mixer to allow the fmf to absorb the moisture (autolayse) and I maybe added a tip or two of extra water. It turned out as I have always wanted my sourdough sandwich bread to turn out!! Yay!! I can’t wait to try the Pullman loaf next. Thanks, girl.
This is the best recipe I have tried. So soft and easy. My whole family loves it! Thank you!
This is the first sourdough sandwich bread I ever made, we love it so much and I’ve made it countless times over the years – I have the recipe memorized by heart!
I have been making this recipe for w years now and we love it. I would like to try making it with freshly milled whole wheat. Do you know what adjustments I would need to make to the recipe to do this?
Miss you so much!!! Step 3 William wont let it rest. He keeps sneaking and eating the dough ( literally as im typing).? Can’t wait to eat some myself if theres any left to bake!
I really like this recipe but my family rarely needs three loafs of bread at a time. Any tips for halfing the recipe or storing the dough for another day?
I mixed my dough last night. It has doubled in size during first rise. I held back a little flour to mix in while kneading. It looks more fluid than previous times I’ve made the bread. I’ve never been happy with the bread. It didn’t rise as well as it should during the second rise. The bread has always been really dense. I’m hoping for better this than the past few Baking’s. I’m concerned though. I hope for better when I add the remaining flour. I held it back because someone told me adding flour when kneading was the cause of the dense bread. Any help?
hello! What size bread pan are you using?
What size loaf pan do you use? Thank you!
Excuse my ignorance but, what is ‘EVOO’.
Thanks,
Suzanne
Like you I wondered this, being in the U.K. so I googled it and it’s; extra virgin olive oil ! I used sunflower oil in mine as my partner doesn’t like olive oil.
So I just got to the part where we let it sit for 24 hours and realized i forgot the salt 🙁 So far it looks great but I’m wondering if I should try to add it somehow before I put into pans tomorrow? Will it taste funny without it? I mean, we will of course be slopping salted butter on it – lol
You’ll be ok!! It’s just a flavor thing but yes, with salted butter all is well ?
For some reasons, recipes with lengthy chunks of time just make my brain stop working…so…could you please share when you normally start it? Is it something you start before going to bed or a first thing in the morning type deal? Let’s say summer time(I’m in AZ, it’s nearly always summer here.)
Hey Laura! You’ll probably have a 24 hour bulk rise so if you start in the morning, you’ll bake in the evening the next day. If you start in the evening, you’ll bake in the morning two days later!
Mine is going through the bread pan rise, SO impressed with the rise despite the fact that my sourdough starter has been having trouble bubbling after feedings. My starter is about 6 months old and my first rise almost TRIPLED in size. If you have a cold house like me, stick it in your oven with the light on, or put your oven as low as it will go and turn it off after a few minutes and stick your loaves in. It helps warm it up a bit.
So happy to hear your rise is good! And great tip with the oven – a little warmth goes a long way!
Mine totally failed! No rise at all, so upsetting. I know my starter is good as I did the water test.
Oh no!! How old is your starter?