Easy Pullman Loaf Recipe – Pain De Mie Sandwich Bread
Pullman loaf recipe: Craft the perfect Pain de Mie sandwich bread effortlessly. Elevate your sandwich game with homemade goodness!
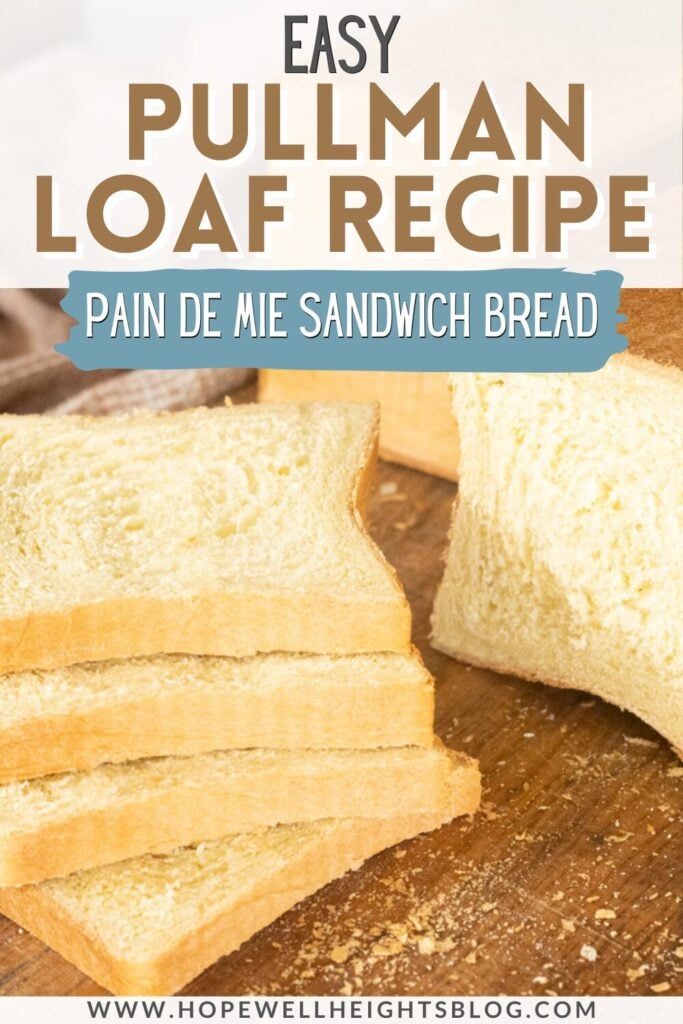
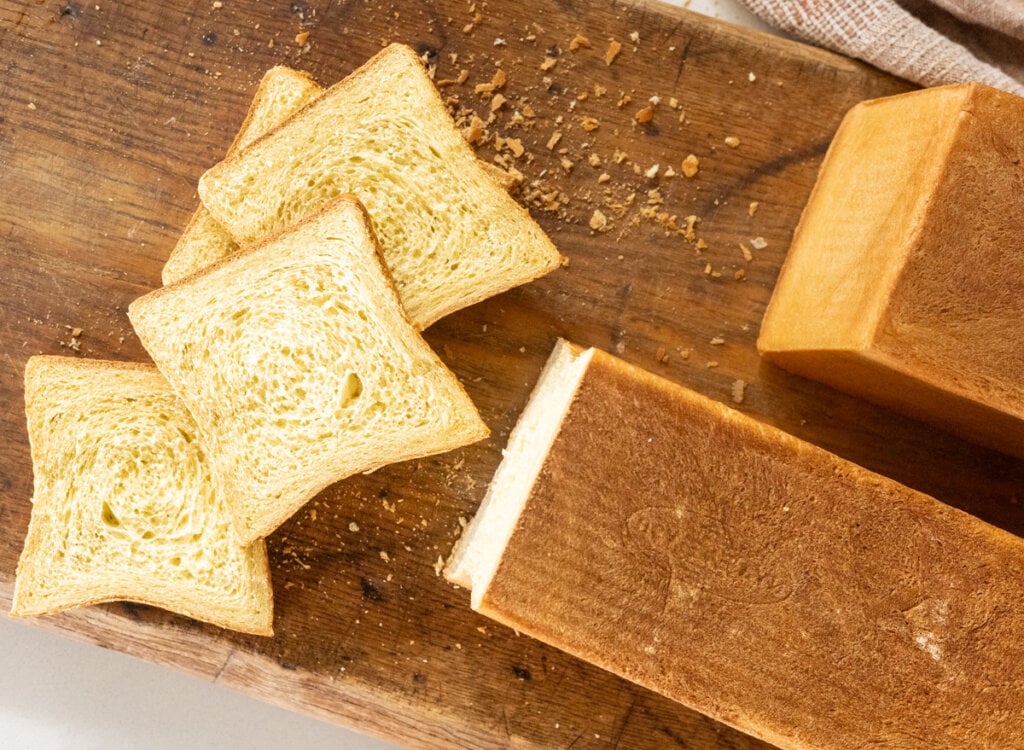
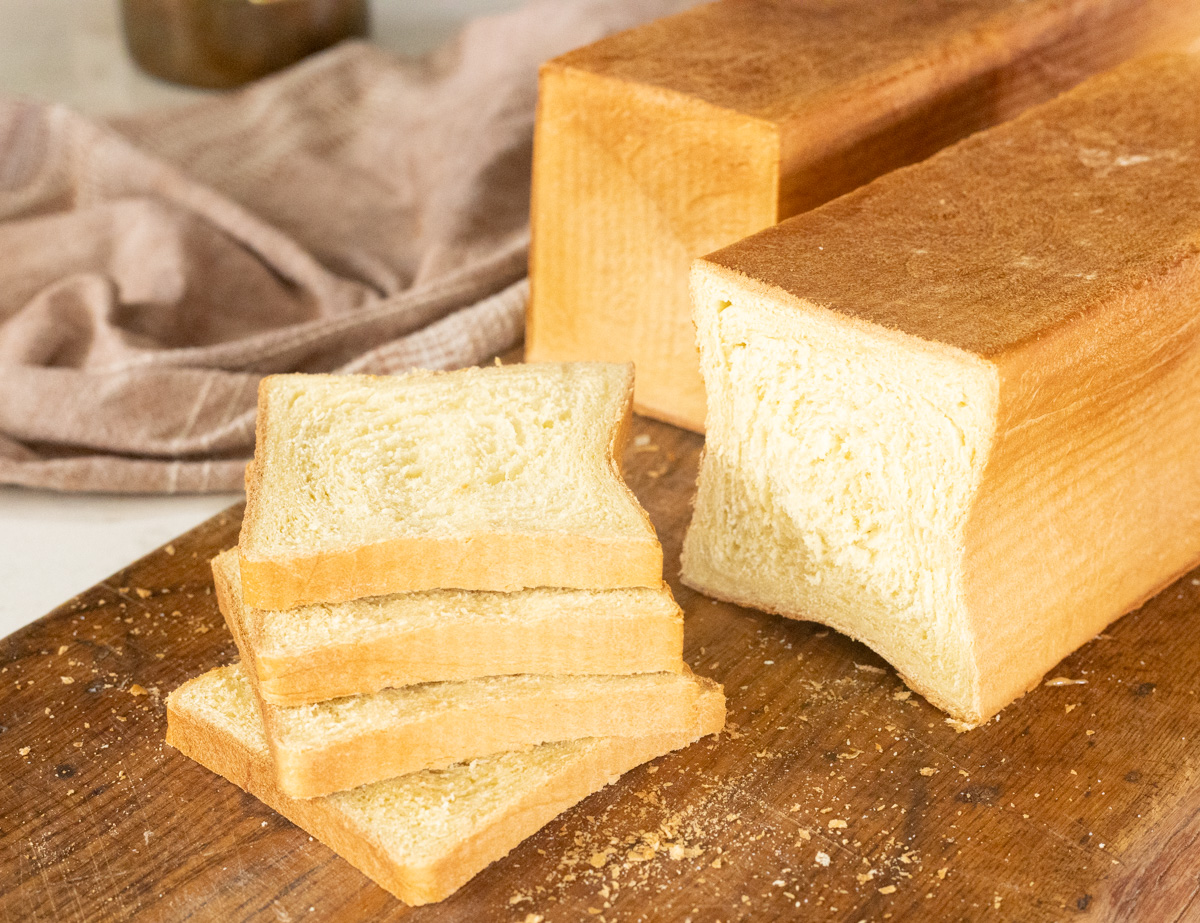
Ditch the store-bought sandwich bread with less-than-desirable ingredients and try out this easy-to-make Pullman loaf which is the perfect sandwich bread with a super soft crust. This is the perfect bread for anyone who loves a classic, square shape for a sandwich loaf. Those who prefer a soft loaf to artisan loaves are sure to love this recipe!
I may receive a small commission for items purchased through affiliate links in this post at no additional cost to you.
Why You’ll Love This Recipe
- Soft Texture: The Pain de Mie sandwich bread, also known as Pullman bread, has a soft and tender crumb, making it perfect for sandwiches and toast.
- Versatility: This bread can be used for various types of sandwiches, from classic ham and cheese to more gourmet combinations. Its neutral flavor complements a wide range of fillings.
- Basic Ingredients: This recipe uses very simple ingredients that you probably already have at home.
Spend a week with me getting stuff done in the kitchen and in the garden with my new little baby in tow, including making this bread! Baby was 3 weeks when I filmed this video so I had to have some help and take lots of breaks in-between tasks, but I was able to cross the must-do’s off my list!
What You’ll Need
INGREDIENTS
- 2/3 cup warm milk = 150 grams
- 2/3 cup warm water = 75 grams
- 1.5 tablespoons instant yeast = 13 grams
- 2 eggs = 100 grams (50 grams per egg, on average)
- 1/4 cup white sugar = 50 grams
- 1/4 cup butter = 55 grams
- 1 tablespoon salt = 15 grams
- 4 – 4 1/4 cups all purpose flour = approximately 480-510 grams (120 grams per cup of flour)
TOOLS
- Large Bowl or Stand Mixer
- Rolling Pin
- 13? Pullman Loaf Pan
Step-By-Step Instructions
MAKE THE DOUGH
Mix all ingredients except flour in a large mixing bowl or in the bowl of a stand mixer. Slowly add flour to the dough 1 cup at a time and mix by hand (or with the dough hook attachment if using a stand mixer) until the dough is sticky but workable.
Knead the dough for at least 5 minutes until it’s smooth but still sticky. It should not be a firm dough. (If the dough is too sticky to work with even after adding the required amount of flour, cover it and let the dough rest for 30 minutes before trying again, instead of adding more flour)
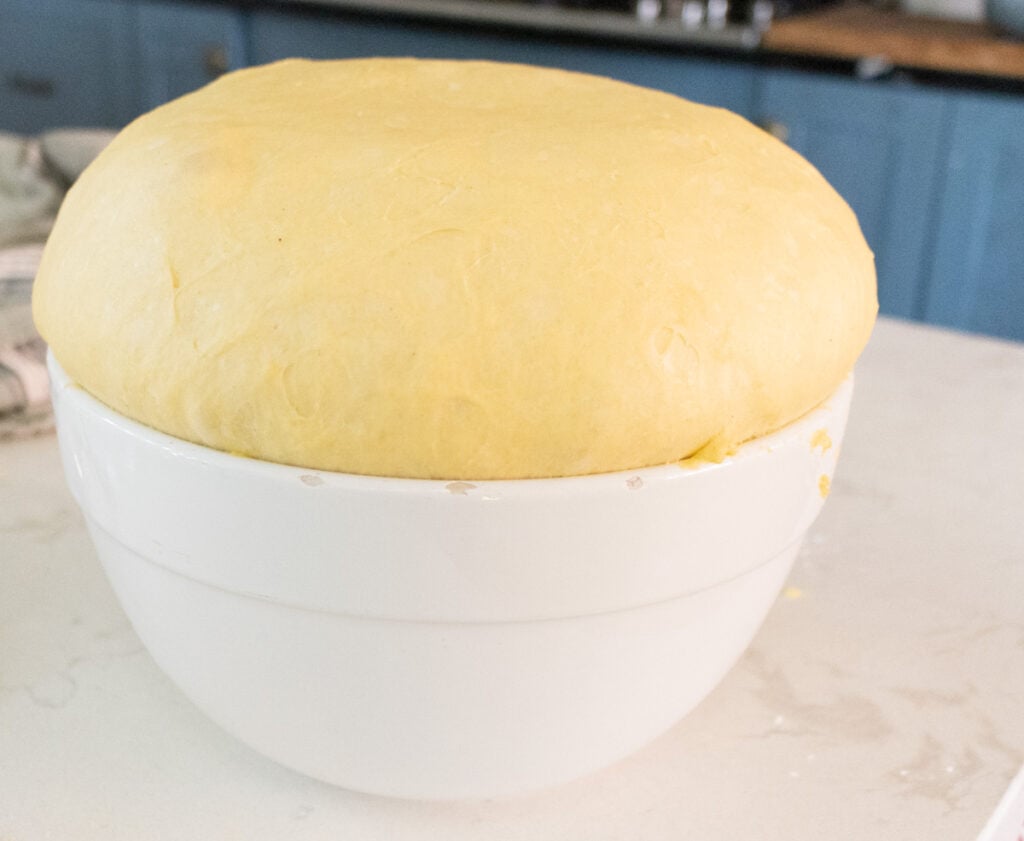
LET THE DOUGH RISE
Place the dough in a large bowl or baking bucket. Add a splash of olive oil to keep the dough from sticking to the sides of the bowl. If you’re using a stand mixer, you can keep it in the bowl you used when mixing. Cover the dough and let it rise for 45 minutes in a warm place or until doubled in size.
ROLL AND SHAPE THE DOUGH
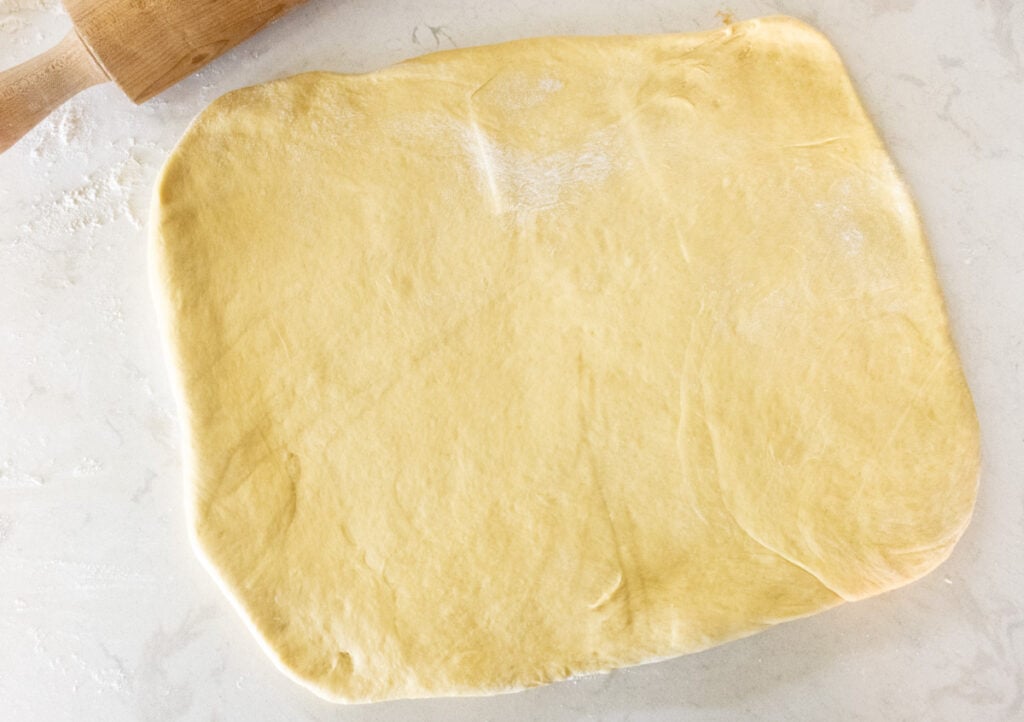
Begin shaping the dough by rolling it out into a 13” wide rectangle, similar to how you would for cinnamon rolls.
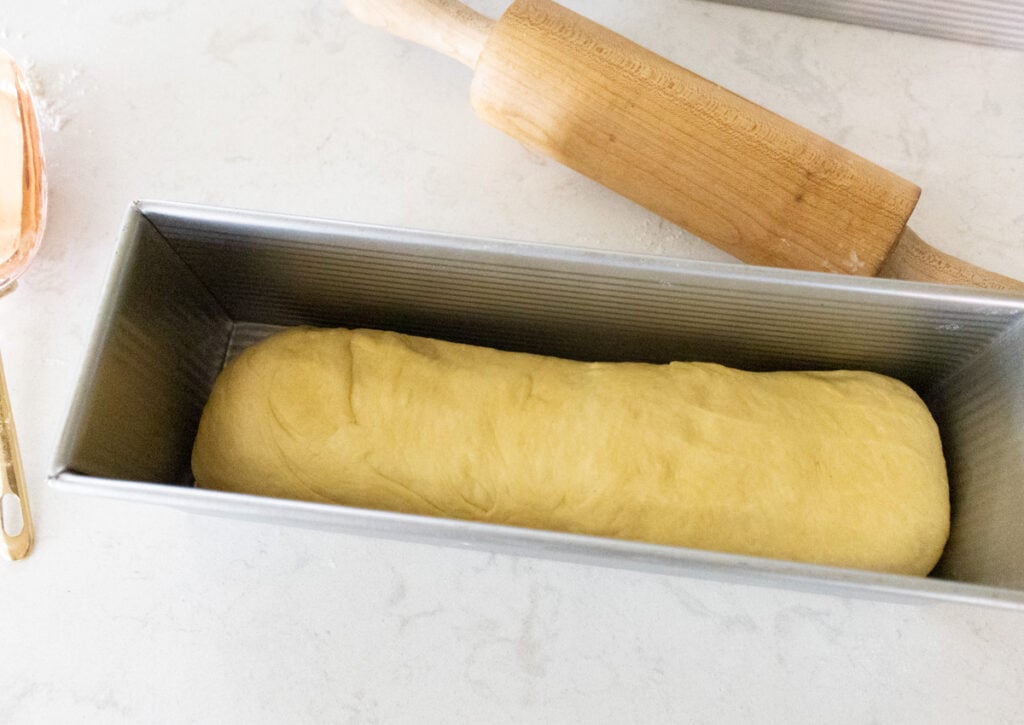
Roll the dough into a log shape, using a bench scraper to keep it tight as you roll it toward you. Seal it.
FINAL PROOF
Place the shaped dough in a non-stick or greased and floured Pullman pan seam side down and cover it with the lid, then begin the final rise (you can use a proofing box for this step). This step should take about 30 minutes at room temperature.
Once the dough is about 1/2 inch (1.3 cm) away from the lid of the pan, preheat the oven to 375°F (190°C).
BAKE THE BREAD
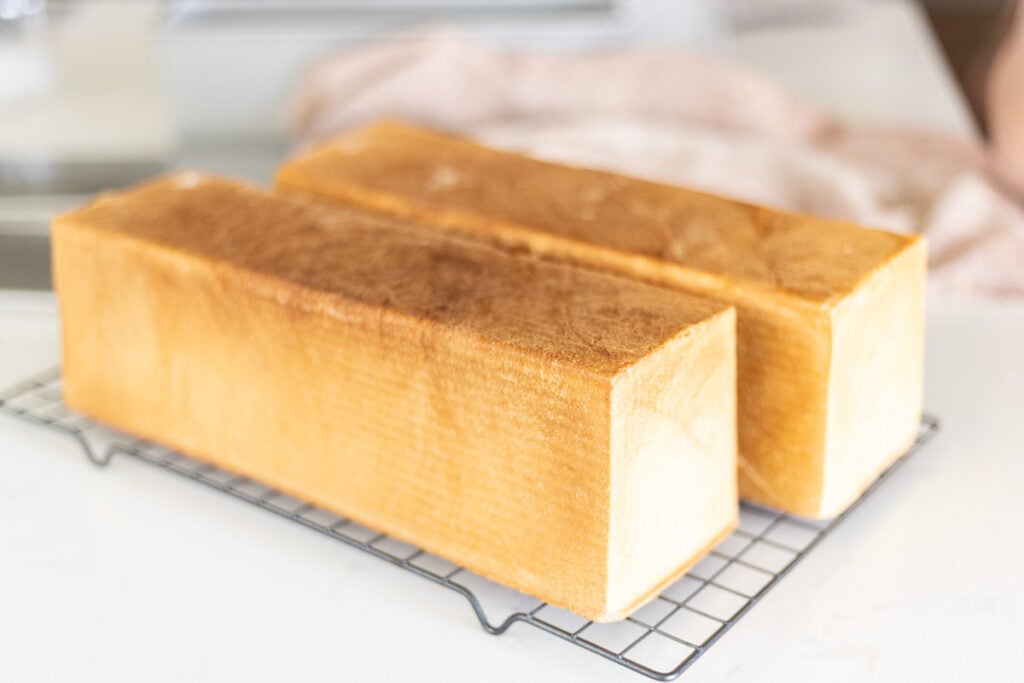
Once the oven is preheated, bake with the lid ON for 40 minutes. After removing the bread from the oven, pull the lid back a little bit to allow the bread to begin cooling. The internal temperature of the bread should be around 170-180°F (77-82°C). After 30 minutes, turn the bread out onto a cooling rack and allow it to cool completely before slicing.
FAQ
- Can I substitute all-purpose flour with bread flour for this recipe?
- Yes, you can substitute bread flour for all-purpose flour in this recipe. Bread flour has a higher protein content, which can result in a slightly chewier texture.
- Can I use active dry yeast instead of instant yeast?
- Yes, you can use active dry yeast instead of instant yeast in this recipe. However, you’ll need to activate it in warm water before adding it to the dough.
- Can I make this recipe without a Pullman loaf pan?
- While a Pullman loaf pan is ideal for achieving the classic square shape, you can still make this recipe using a regular loaf pan. Just keep in mind that the shape and size of the loaf may differ.
- How long does it take for the dough to rise?
- The time for the dough to rise can vary depending on factors such as room temperature and yeast activity. On average, the first rise (bulk fermentation) may take about 1-2 hours, while the second rise (proofing) may take around 1 hour.
- Can I refrigerate the dough overnight for a longer rise?
- Yes, you can refrigerate the dough overnight during the first rise (bulk fermentation) to slow down the fermentation process and develop more flavor. Simply cover the dough tightly and place it in the refrigerator. Allow it to come to room temperature before shaping and baking.
- How do I know when the bread is fully baked?
- The bread is fully baked when it reaches an internal temperature of around 190-200°F (88-93°C) and sounds hollow when tapped on the bottom. Additionally, the crust should be golden brown.
Tips
- Sourdough Pullman Loaf: If you’re a fan of sourdough bread and would like to try sourdough Pain de Mie, check out my recipe for the sourdough version!
- Measure Ingredients Accurately: Use a kitchen scale to measure ingredients accurately, especially flour. This ensures consistency in the dough texture and final result.
- Use Proper Yeast: Instant yeast is preferred for this recipe as it can be added directly to the dry ingredients without needing to be activated in warm water. If using active dry yeast, activate it in warm water before adding to the dough.
- Knead Thoroughly: Proper kneading is essential for developing gluten in the dough, which contributes to the bread’s structure and texture. Knead the dough until it is smooth, elastic, and passes the windowpane test.
- Monitor Dough Consistency: Pay attention to the dough consistency throughout the mixing and kneading process. It should be slightly tacky but not overly sticky. Adjust the flour or water as needed to achieve the right consistency.
- Allow Sufficient Rise Time: Ensure the dough is given enough time to rise during both the bulk fermentation and proofing stages. This allows the yeast to ferment and the dough to double in size, resulting in a light and airy crumb.
- Shape the Loaf Properly: When shaping the dough for the Pullman loaf pan, make sure to roll it tightly to create a smooth surface and even shape. This helps prevent air pockets and ensures an evenly baked loaf.
- Use a Pullman Loaf Pan: If possible, use a Pullman loaf pan with a lid to achieve the classic square shape and soft crust. The lid helps trap steam during baking, resulting in a tender crumb and a uniformly browned crust.
- Preheat the Oven and Pan: Preheat the oven and Pullman loaf pan before baking to ensure even heat distribution and proper oven spring. A hot oven and pan help kick-start the baking process, resulting in a well-risen loaf.
- Cool Completely Before Slicing: Allow the Pullman loaf to cool completely on a wire rack before slicing. This allows the internal moisture to redistribute, preventing a gummy texture, and ensures clean slices.
Storage
- Cool Completely: Allow the Pullman loaf to cool completely on a wire rack before storing. This prevents condensation buildup, which can make the bread soggy.
- Wrap Tightly: Once cooled, wrap the Pullman loaf tightly in plastic wrap or aluminum foil. Ensure that the entire loaf is covered to prevent moisture loss and keep it fresh.
- Store at Room Temperature: Store the wrapped Pullman loaf at room temperature in a cool, dry place, such as a bread box or pantry. It will stay fresh for 2-3 days.
- Refrigerate for Longer Storage: If you don’t plan to consume the Pullman loaf within a few days, you can refrigerate it for extended freshness. Wrap it tightly and place it in the refrigerator for up to a week.
- Freeze for Long-Term Storage: For even longer storage, you can freeze the Pullman loaf. Wrap it tightly in plastic wrap, then place it in a resealable freezer bag or wrap it again with aluminum foil. Frozen Pullman loaves can last for several months.
- Thaw Properly: When ready to use frozen Pullman loaf, thaw it in the refrigerator overnight or at room temperature for a few hours. Avoid thawing it in the microwave, as this can make the bread soggy.
- Reheat if Desired: If you prefer warm bread, you can reheat slices of Pullman loaf in a toaster or oven until warmed through. This can help revive the texture and flavor, especially if the bread has been stored for a while.
Easy Pullman Loaf Recipe – Pain De Mie Sandwich Bread
Ingredients
Equipment
Method
- Mix all ingredients except flour in a large mixing bowl or in the bowl of a stand mixer. Slowly add flour to the dough 1 cup at a time and mix by hand (or with the dough hook attachment if using a stand mixer) until the dough is sticky but workable.
- Knead the dough for at least 5 minutes until it’s smooth but still sticky. It should not be a firm dough. (If the dough is too sticky to work with even after adding the required amount of flour, cover it and let the dough rest for 30 minutes before trying again, instead of adding more flour)
- Place the dough in a large bowl or baking bucket. Add a splash of olive oil to keep the dough from sticking to the sides of the bowl. If you’re using a stand mixer, you can keep it in the bowl you used when mixing. Cover the dough and let it rise for 45 minutes in a warm place or until doubled in size.
- Begin shaping the dough by rolling it out into a 13” wide rectangle, similar to how you would for cinnamon rolls.
- Roll the dough into a log shape, using a bench scraper to keep it tight as you roll it toward you. Seal it.
- Place the shaped dough in a non-stick or greased and floured Pullman pan seam side down and cover it with the lid, then begin the final rise (you can use a proofing box for this step). This step should take about 30 minutes at room temperature.
- Once the dough is about 1/2 inch (1.3 cm) away from the lid of the pan, preheat the oven to 375°F (190°C).
- Once the oven is preheated, bake with the lid ON for 40 minutes. After removing the bread from the oven, pull the lid back a little bit to allow the bread to begin cooling. The internal temperature of the bread should be around 170-180°F (77-82°C). After 30 minutes, turn the bread out onto a cooling rack and allow it to cool completely before slicing.
Nutrition
Notes
- Sourdough Pullman Loaf: If you're a fan of sourdough bread and would like to try sourdough Pain de Mie, check out my recipe for the sourdough version!
- Measure Ingredients Accurately: Use a kitchen scale to measure ingredients accurately, especially flour. This ensures consistency in the dough texture and final result.
- Use Proper Yeast: Instant yeast is preferred for this recipe as it can be added directly to the dry ingredients without needing to be activated in warm water. If using active dry yeast, activate it in warm water before adding to the dough.
- Knead Thoroughly: Proper kneading is essential for developing gluten in the dough, which contributes to the bread's structure and texture. Knead the dough until it is smooth, elastic, and passes the windowpane test.
- Monitor Dough Consistency: Pay attention to the dough consistency throughout the mixing and kneading process. It should be slightly tacky but not overly sticky. Adjust the flour or water as needed to achieve the right consistency.
- Allow Sufficient Rise Time: Ensure the dough is given enough time to rise during both the bulk fermentation and proofing stages. This allows the yeast to ferment and the dough to double in size, resulting in a light and airy crumb.
- Shape the Loaf Properly: When shaping the dough for the Pullman loaf pan, make sure to roll it tightly to create a smooth surface and even shape. This helps prevent air pockets and ensures an evenly baked loaf.
- Use a Pullman Loaf Pan: If possible, use a Pullman loaf pan with a lid to achieve the classic square shape and soft crust. The lid helps trap steam during baking, resulting in a tender crumb and a uniformly browned crust.
- Preheat the Oven and Pan: Preheat the oven and Pullman loaf pan before baking to ensure even heat distribution and proper oven spring. A hot oven and pan help kick-start the baking process, resulting in a well-risen loaf.
- Cool Completely Before Slicing: Allow the Pullman loaf to cool completely on a wire rack before slicing. This allows the internal moisture to redistribute, preventing a gummy texture, and ensures clean slices.
Storage
- Cool Completely: Allow the Pullman loaf to cool completely on a wire rack before storing. This prevents condensation buildup, which can make the bread soggy.
- Wrap Tightly: Once cooled, wrap the Pullman loaf tightly in plastic wrap or aluminum foil. Ensure that the entire loaf is covered to prevent moisture loss and keep it fresh.
- Store at Room Temperature: Store the wrapped Pullman loaf at room temperature in a cool, dry place, such as a bread box or pantry. It will stay fresh for 2-3 days.
- Refrigerate for Longer Storage: If you don't plan to consume the Pullman loaf within a few days, you can refrigerate it for extended freshness. Wrap it tightly and place it in the refrigerator for up to a week.
- Freeze for Long-Term Storage: For even longer storage, you can freeze the Pullman loaf. Wrap it tightly in plastic wrap, then place it in a resealable freezer bag or wrap it again with aluminum foil. Frozen Pullman loaves can last for several months.
- Thaw Properly: When ready to use frozen Pullman loaf, thaw it in the refrigerator overnight or at room temperature for a few hours. Avoid thawing it in the microwave, as this can make the bread soggy.
- Reheat if Desired: If you prefer warm bread, you can reheat slices of Pullman loaf in a toaster or oven until warmed through. This can help revive the texture and flavor, especially if the bread has been stored for a while.