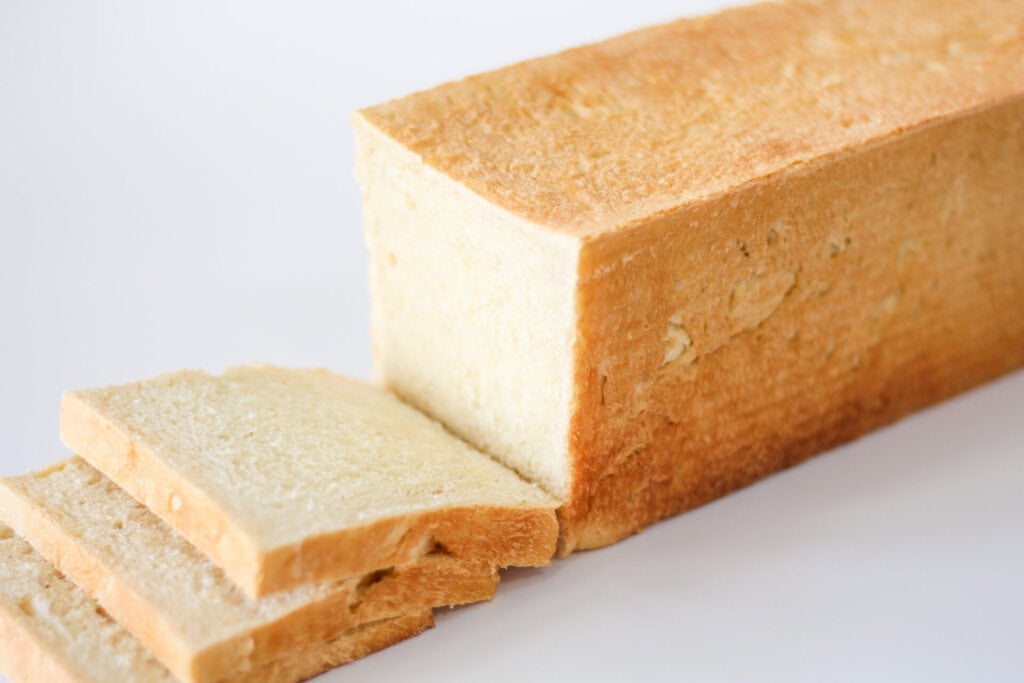
Classic sourdough sandwich bread just got an upgrade! This sourdough pullman loaf makes soft, square bread that’s perfect for sandwiches or sourdough french toast. It’s long-fermented, but I included notes for using sourdough discard and yeast to speed up the process. I also have measurements for using fresh-milled flour, if that’s your preference.
Quick Recipe Overview: Sourdough Pullman Loaf
- ⏱️ Prep Time: 20 minutes
- 🕰️ Total Time: 12 hours 55 minutes
- 🍞 Servings: 1 loaf (13-inch Pullman pan)
- 🔥 Calories: ~231 kcal per serving (based on nutrition panel)
- 👩🍳 Cook Method: Long-fermented sourdough, baked in a lidded Pullman pan for a soft square loaf
- 😋 Flavor Profile: Soft, mildly tangy sourdough sandwich bread with a fine, even crumb—perfect for toast and sandwiches.
- ⭐ Difficulty: Medium — simple ingredients, but timing and proper proofing in the Pullman pan matter.
SUMMARIZE & SAVE THIS CONTENT ON
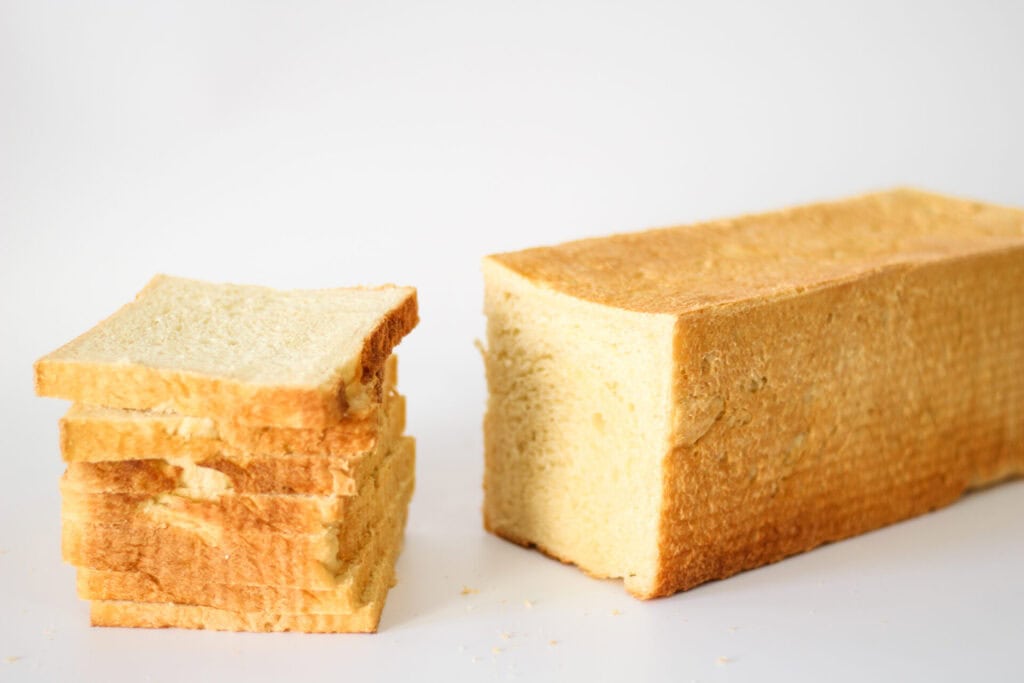
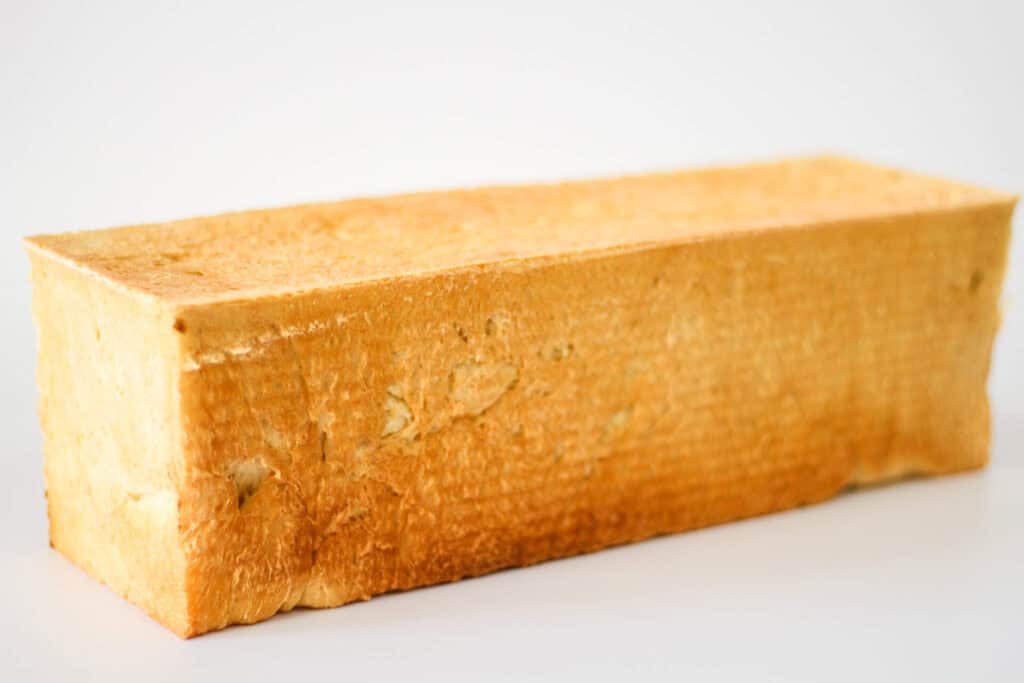
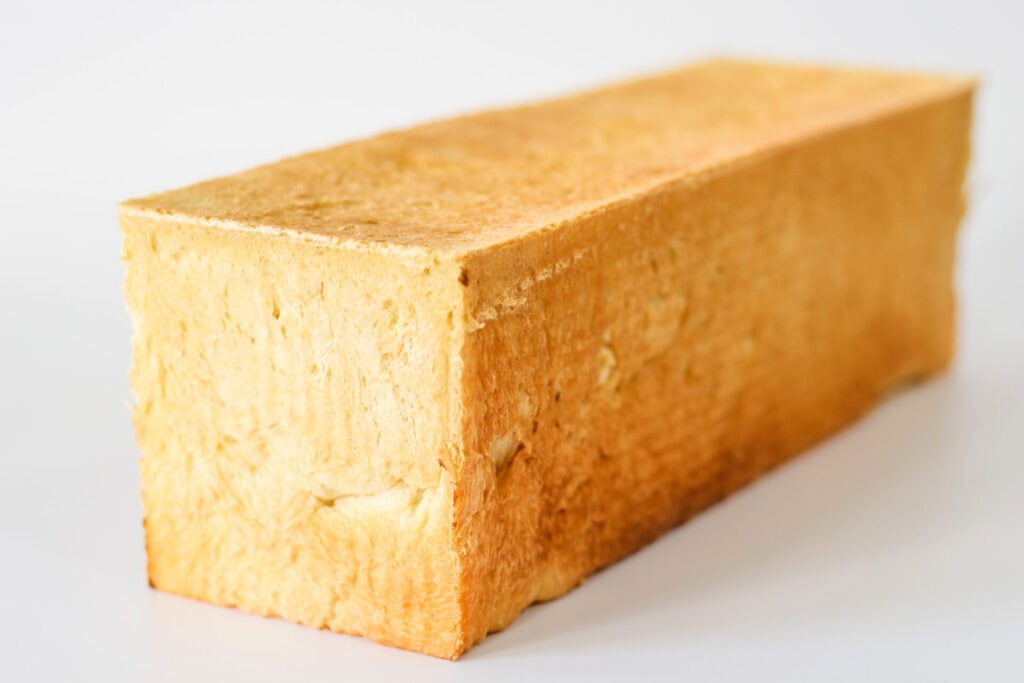
If you’re flying through classic sourdough sandwich bread, it’s time to upgrade to the Pullman loaf! This 13″ pullman loaf yields 24 slices of square bread that’s perfect for toast, sandwiches, french toast, etc. Once you master this basic Pullman loaf, try my sourdough cinnamon raisin swirl bread made in a Pullman pan or get creative with sourdough cannoli!
Why You’ll Love This Recipe
- Perfect for picky eaters: Sourdough artisan bread is amazing, but picky eaters sometimes prefer the familiar white, square sandwich bread we’re all used to. This Pullman loaf recipe is the perfect way to get your picky eaters to love sourdough bread!
- Long-fermented: This dough is long-fermented, so the gluten and phytic acid break down, making the final product easy to digest and nutritious.
- You can use sourdough discard: If you are short on time and don’t have active starter, just use discard and add a tablespoon of yeast when mixing the dough.
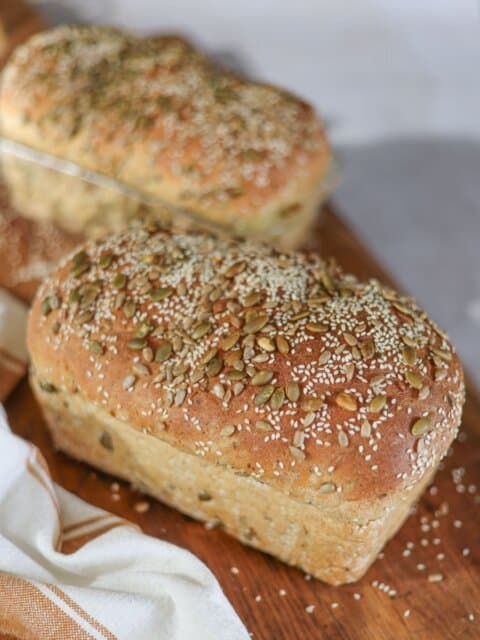
- You can use all-purpose flour OR freshly milled: The loaves in the pictures in this post were made with organic, unbleached all-purpose flour. But I regularly make this recipe with fresh-milled flour and it’s so good! I have an entire section of notes and measurements if you want to use FMF.
“I was scared of baking my first sandwhich style loaf with sourdough because I usually only cook for years with commercial yeast but this was incredibly easy!! and such amazing bread. I don’t have to compromise on delicious tasting bread with sourdough cooking. Praise God !!” – Heidy
This post may contain affiliate links. I only recommend products I use and love. If you purchase through my links, I may earn a small commission at no extra cost to you.
This bread recipe is a family favorite! Watch my video tutorial as I share all my tips and tricks for baking sourdough bread for the week.
Key Ingredients
Exact measurements and instructions can be found in the recipe card at the end of the post.
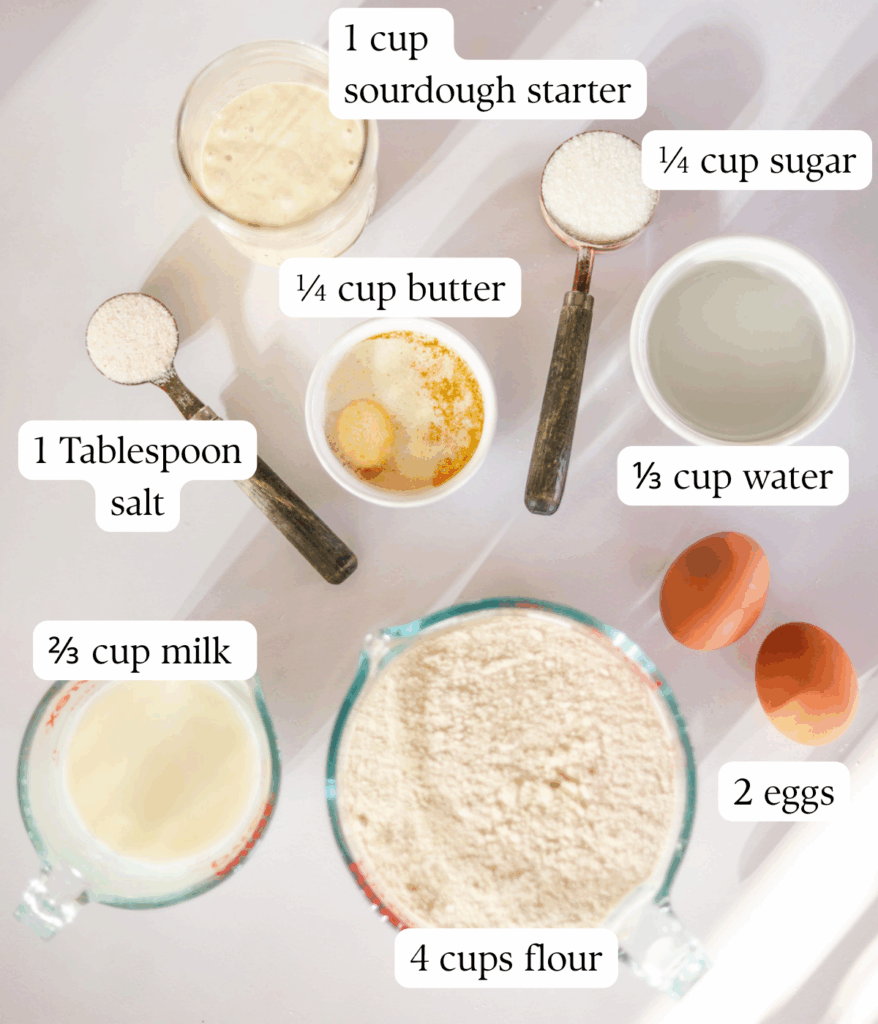
- Sourdough Starter: The starter is the star of the show. For this recipe, it does need to be active so it can long-ferment and leaven the dough. If you use discard, you’ll need to add a tablespoon of yeast to the dough to get it to rise. Check out my guide to making and keeping a sourdough starter.
- Organic Cane Sugar: I buy minimally processed organic cane sugar in bulk from Azure Standard and use it in baking daily. Sugar gets a bad rap, but the processing makes all the difference. Azure’s sugar still contains some molasses from the original sugar cane for added nutrients!
- Flour: Whether I’m using all-purpose flour or milling my own, I get my supplies in bulk from Azure Standard. Azure’s Organic Unbleached Artisan Bakers Flour is an amazing all-purpose option.
- Butter: I use grass-fed butter daily for baking, in my opinion, it’s one of nature’s most bountiful foods! Adding butter to the dough gives the bread a brioche-like texture. But you can easily substitute the butter for olive oil, avocado oil, or coconut oil without seeing much of a change in the final product.
- Milk: Adding milk to bread dough results in a softer crumb, a slightly sweeter loaf, and helps the crust be more golden brown. However, if you want to steer clear of dairy, you can just use water in place of milk for this recipe.
Fresh Milled Flour for Sourdough Pullman Loaf
TLDR – I use 4 1/2 cups flour, fresh milled from hard white wheat in this recipe. It takes 2 1/2 cups plus 1 tablespoon hard white wheat berries to give you 4 1/4 cups flour.
- Best Wheat Variety: I usually use hard white wheat for this recipe. Hard wheat has a higher gluten content and adds structure. I get my Hard White Wheat from Azure Standard. I’ve also used hard red wheat in this recipe which makes a delicious, brown, “whole wheat” looking loaf.
- Flour Ratio: Freshly Milled to All-Purpose: Hard white wheat can be used 1:1. I usually need to add a little more FMF than all-purpose. After mixing the dough and letting it rest, if it is still too sticky to knead, add more FMF (freshly milled flour) 1/4 cup at a time until it is workable. I have to use 4 1/2 cups fresh milled flour for this recipe.
- How Freshly Milled Flour Affects Texture and Flavor: Using freshly milled flour gives sourdough bread a slightly nutty, subtly sweet flavor and a tender texture while still providing plenty of structure to give a good rise, resulting in a more flavorful and artisan-like loaf compared to all-purpose flour.
Step-By-Step for Making a Sourdough Pullman Loaf

STEP 1: Mix all ingredients except flour in a large mixing bowl or in the bowl of a stand mixer. Slowly add flour to the dough 1 cup at a time and mix until the dough is sticky but workable.
STEP 2: Knead the dough for at least 5 minutes until it’s smooth but still slightly sticky. It should not be a firm dough. (If the dough is too sticky to work with even after adding the required amount of flour, cover it and let the dough rest for 30 minutes before trying again, instead of adding more flour)
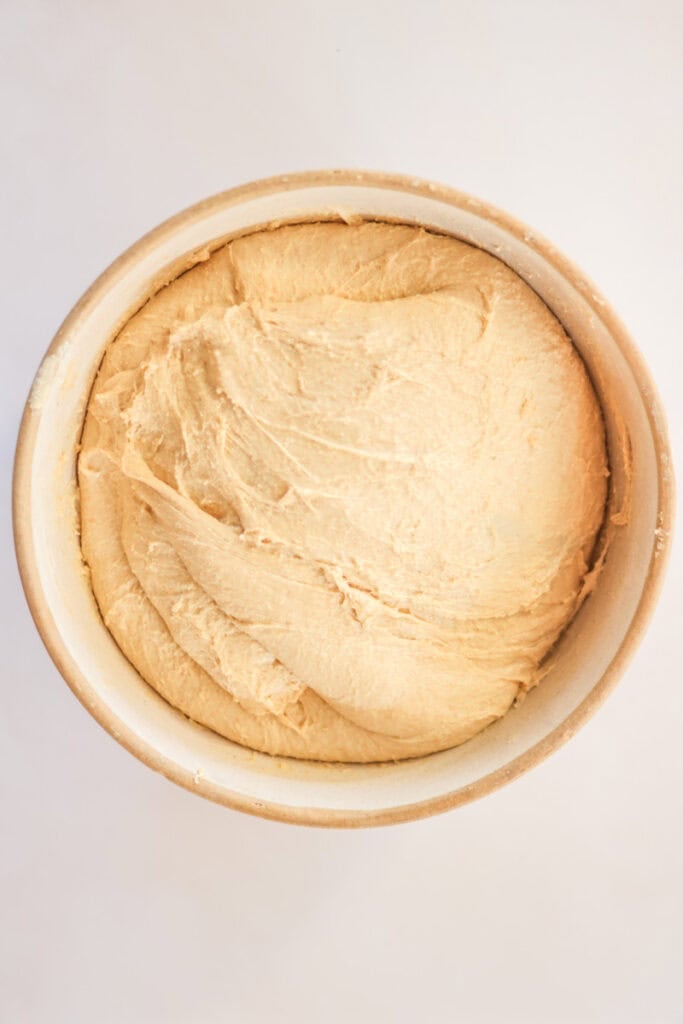
STEP 3: Place the dough in a large bowl, cover it, and let it bulk ferment (rise) for 8-12 hours at room temperature or in a warm place or until it has doubled in size. (This will take longer if your home is cool. I use this proofer in the winter months to speed things up.
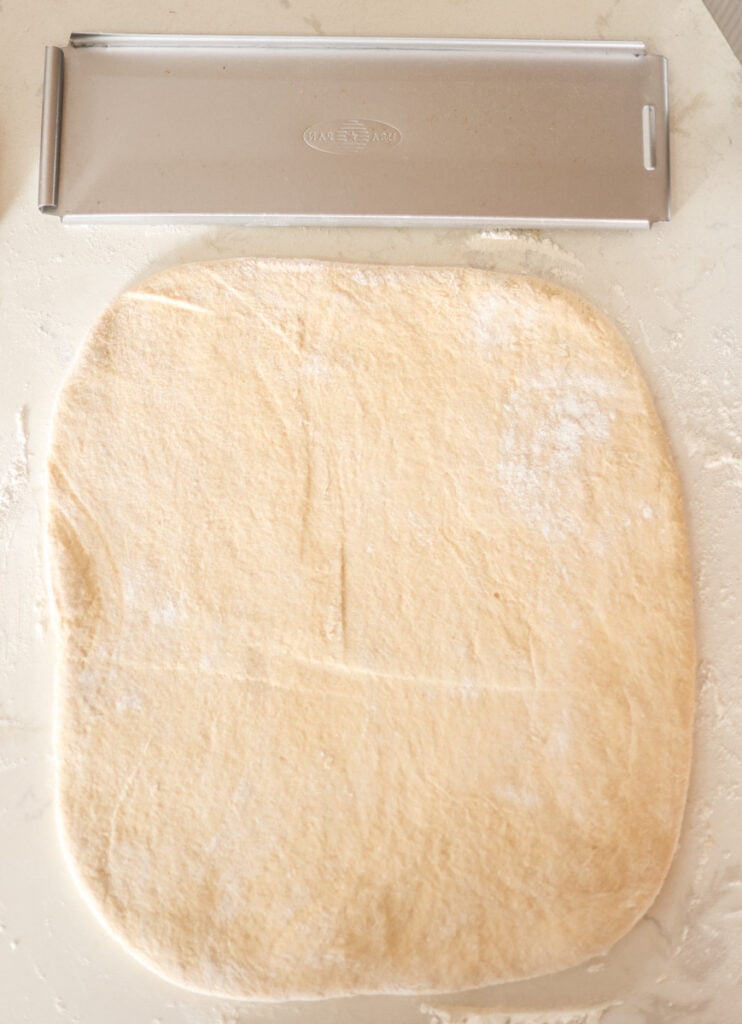
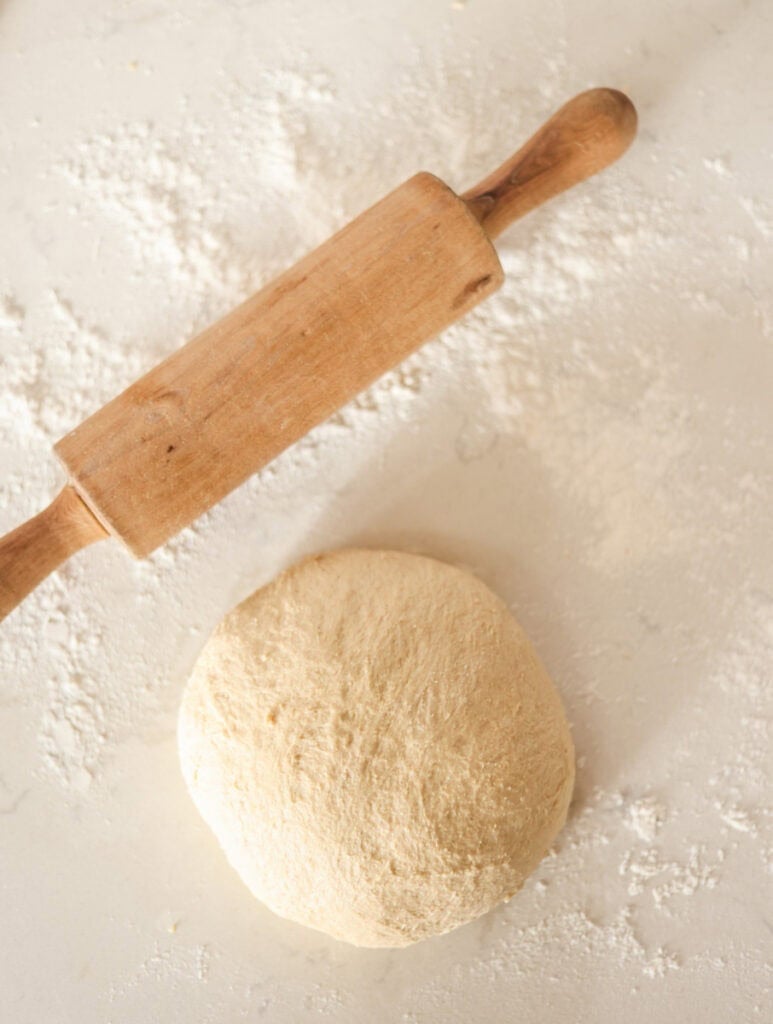
STEP 4: Shape the dough by rolling it out into a 13” wide rectangle, similar to how you would for cinnamon rolls. Roll the dough into a log shape, using a bench scraper to keep it tight as you roll it toward you. Seal it.
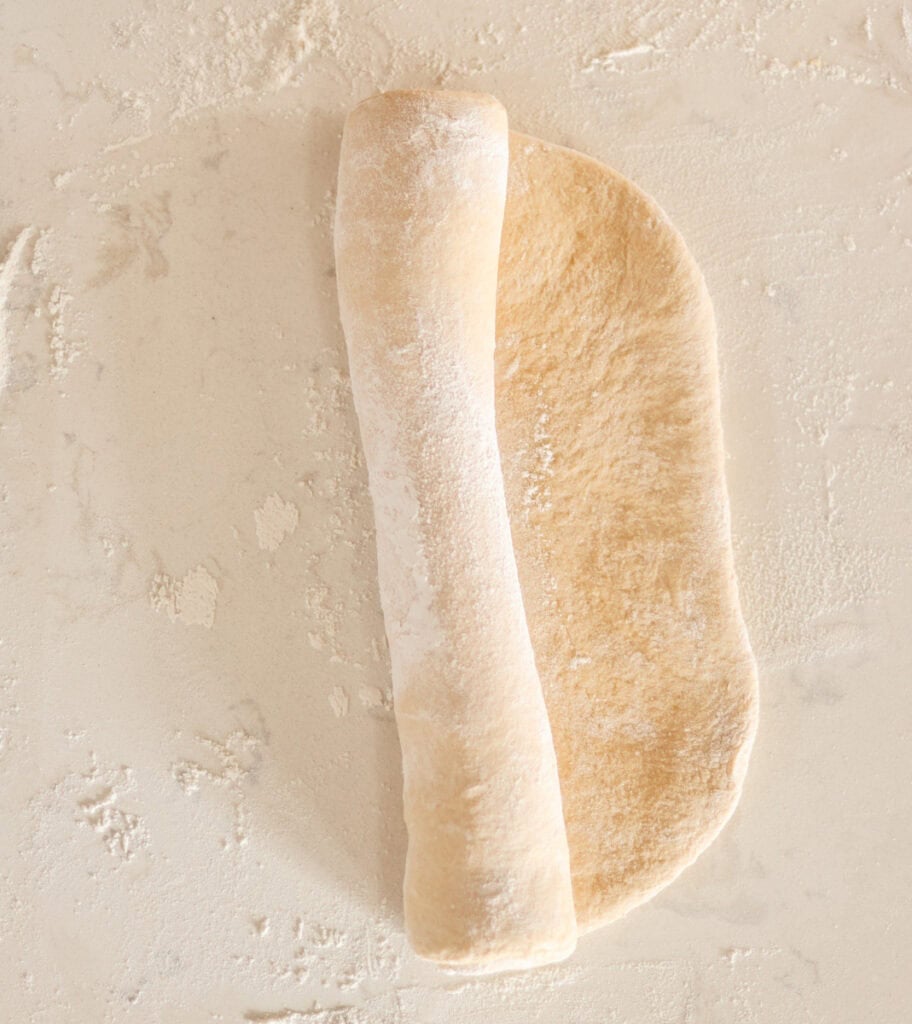
STEP 5: Roll the dough into a log shape, using a bench scraper to keep it tight as you roll it toward you. Seal it.
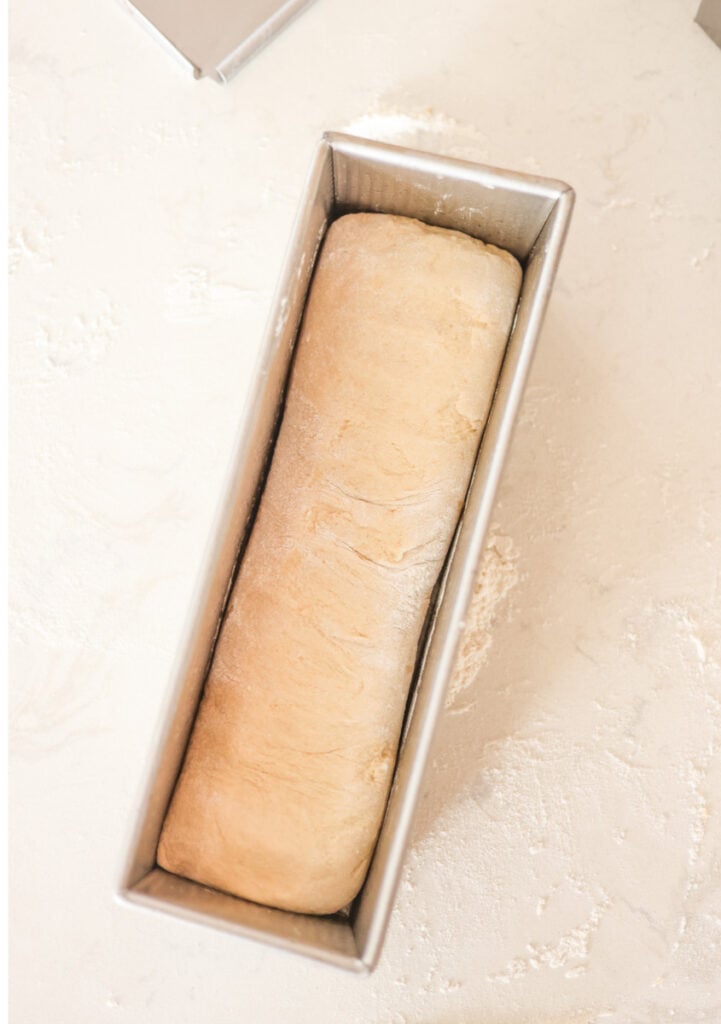
STEP 6: Place the shaped dough in a greased Pullman pan seam side down and cover it with the lid, then begin the final rise.
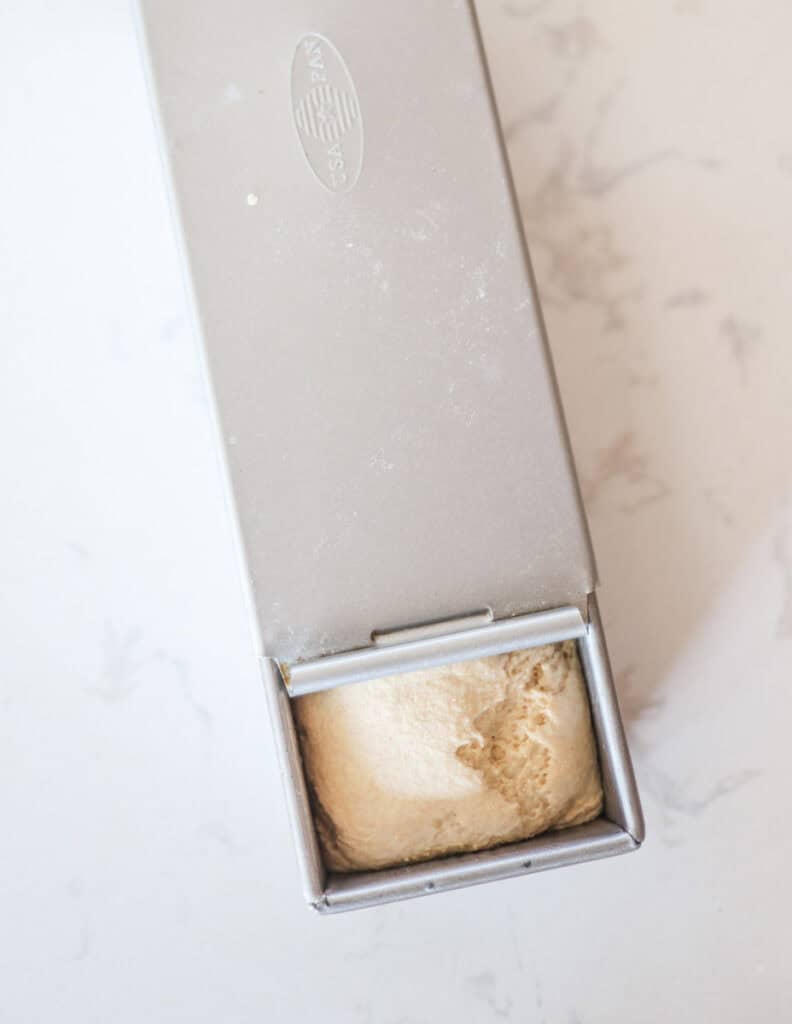
STEP 7: This step should take about 4-6 hours at room temperature. Once the dough is about 1/2 inch (1.3 cm) away from the lid of the pan, preheat the oven to 375°F (190°C).
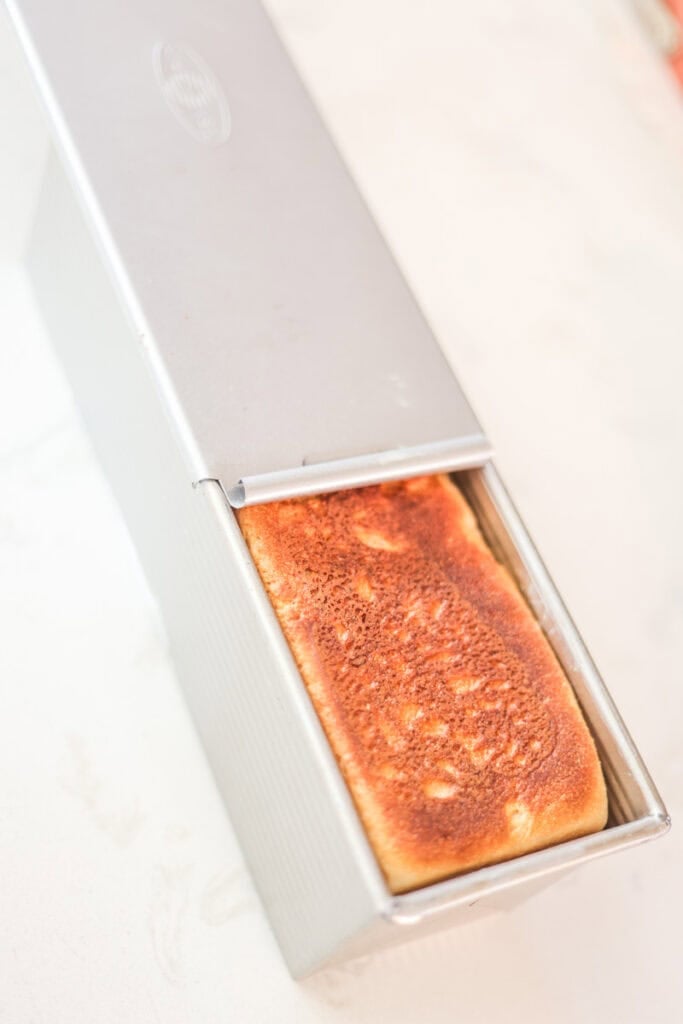
STEP 8: Bake in a preheated oven with the lid ON for 35 minutes. After removing the bread from the oven, pull the lid back a bit to allow the bread to begin cooling. The internal temperature of the bread should be around 170-180°F (77-82°C). After 30 minutes, turn the bread out onto a cooling rack and allow it to cool completely before slicing.
If you need help with sourdough vocabulary, check out my Complete Guide to Sourdough Terms!
Sourdough Bread Baking Schedule (Sample Timeline)
Next Day Bake
DAY 1
- 8am – feed your starter so it’s active and ready (if you have a really active starter or a warm house, you may only have to feed it 4-6 hours in advance. You know your starter!
- 8pm – Mix and knead the dough, then cover and let it rise overnight at room temperature.
DAY 2
- 6am – (or whenever the dough is doubled in size) roll it out into a rectangle, then shape it and place in the pullman pan with lid on for the final rise.
- 10am – once the dough is about 1/3″ from the lid, preheat the oven to 375F. Bake for 35 minutes with lid on.
Same Day Bake
DAY 1
- 8pm– feed your starter so it’s active and ready (if you have a really active starter or a warm house, you may only have to feed it 4-6 hours in advance. You know your starter!
DAY 2
- 6am – Mix and knead the dough, then cover and let it rise overnight at room temperature.
- 4pm – (or whenever the dough is doubled in size) roll it out into a rectangle, then shape it and place in the pullman pan with lid on for the final rise.
- 8pm – once the dough is about 1/3″ from the lid, preheat the oven to 375F. Bake for 35 minutes with lid on.
Sourdough Pullman Loaf FAQs
Yes. Fresh-milled hard white wheat works best for structure. Fresh-milled flour absorbs more liquid, so add extra flour only if needed until the dough is soft and slightly tacky.
This recipe is written for a 13-inch Pullman pan with a lid, which creates a square sandwich loaf. Standard loaf pans can be used, but the loaf will not be square.
This usually happens if the dough was under-proofed or the starter was weak. Let the dough rise until it is about ½ inch from the lid before baking.
Yes. You can use discard by adding about 1 tablespoon of instant yeast and shortening the rise times. The flavor will be milder than a long-fermented loaf.
Dense or gummy bread is usually caused by under-proofing, slicing while hot, or adding too much flour. Allow the loaf to cool completely before slicing and ensure the dough is fully risen.
Store tightly wrapped at room temperature for up to 5 days, refrigerate for up to 7–9 days, or freeze for up to 3 months.
Expert Tips
- Make sure you use a strong, active sourdough starter. This will make all the difference. A strong, active sourdough starter should at least double in size and have lots of bubbles in 12 hours or less. A healthy starter will give your bread a good dough rise and flavor. Feeding regularly keeps starters healthy.
- Watch the dough, not the clock. There are a lot of variables in sourdough baking – temperature, elevation, starter hydration, strength, etc. The bulk fermentation may only take 4 hours for one person, while taking 16 hours for the next. Don’t worry if your dough hasn’t doubled after 8-12 hours; be patient and give it time. You may even need to start your bread in the evening, let the dough rise overnight, and finish the next day.
- Don’t add all the flour to the dough at once. You can always add more, but you can’t take it away once it’s mixed in. When in doubt because the dough seems too sticky, cover it and let it rest for 15 minutes before adding more flour. The dough becomes more workable the longer it rests.
- Let the bread cool completely before slicing. This will lock the moisture in and prevent your bread from drying out or becoming gummy.
- If at first you don’t succeed, evaluate, adjust, and try again! Sourdough baking is a skill and an art. It takes practice and patience.
Try another long-fermented fave: super soft long fermented sourdough cinnamon rolls!
Storage
This bread stores very well. Sealed tightly, it lasts about 5 days at room temperature, 7-9 days in the fridge, and up to 3 months in the freezer.
Make sure the bread cools completely on a wire rack before wrapping it in plastic wrap to store.


If you love this recipe, please leave a ⭐ 5-star ⭐ rating below! If you have questions or suggestions – drop a comment!

Sourdough Pullman Loaf
Ingredients
Equipment
Method
- Mix & Knead Dough: In a large bowl or stand mixer, whisk together milk, water, starter, eggs, sugar, butter, and salt. Gradually add flour until the dough is soft, slightly sticky, and workable. Knead ~5–7 minutes until smooth.
- Bulk Ferment: Cover and let rise 8–12 hours at room temperature (until roughly doubled). (Timing will vary by room temp and starter strength.)
- Shape for Pan: Turn dough out, roll into a 13″ rectangle, then roll into a tight log. Pinch to seal.
- Final Rise in Pan: Place seam-side down in a greased 13″ Pullman pan with lid on. Let rise until ~½″ (1.3 cm) from the lid.
- Bake: Preheat oven to 375 °F (190 °C). Bake 35 minutes with the lid on.
- Cool: Remove from oven, crack lid slightly to begin cooling, then turn out onto a rack after ~30 minutes and let cool completely before slicing.
Nutrition
Video
Notes
- Flour: All-purpose flour gives a soft, classic sandwich loaf.
- Fresh Milled Option: Use hard white wheat for best structure. Fresh-milled flour can absorb more liquid—start with the same amount and add more only if needed until the dough is soft and slightly tacky.
- Dough Texture: Dough should be soft and supple, slightly tacky but not sticky. If it feels wet, rest 15–30 minutes before adding more flour.
- Fermentation Timing: Rise times vary by temperature and starter strength. Bulk ferment until roughly doubled—watch the dough, not the clock.
- Discard Option: Sourdough discard may be used by adding ~1 tablespoon instant yeast when mixing dough ingredients and shortening rise times.
- Pan Size: A 13″ Pullman pan with lid creates a square loaf and soft crust. Divide the dough into two and use two standard loaf pans if you don’t have a Pullman pan. The standard loaves will be small.
- Cooling: Cool completely before slicing to prevent a gummy crumb.
- Storage: Store airtight at room temperature up to 5 days, refrigerate 7–9 days, or freeze up to 3 months.
Tried this recipe?
Let us know how it was!About the Author

Welcome to Hopewell Heights, I’m Steph – seasoned sourdough baker, homesteader, homemaker, homeschooling mom of 5, and creator behind this Heritage American food blog. I hope you enjoy my family’s favorite, from-scratch recipes!
We have REALLY enjoyed this recipe, I try to keep it on hand for our go-to sandwich bread. My husband got me the Pullman loaf pans for Christmas and they’re the 9 inch ones so we converted this recipe and it’s a hit! I consistently make a cinnamon raisin swirl loaf and a regular one. I use all fresh milled flour, about 2/3 hard white and for the remaining 1/3 I usually use a mix of hard red and kamut.
The best sourdough Pullman loaf recipe!!
Excellent recipe! Worked perfectly and does not taste like traditional sourdough. For my family I call is “Wild Yeast” bread.
This is our go-to sandwich bread, I make 2-4 loaves a week and we fly through it! I typically use fresh-milled flour from hard white wheat but I’ve used hard red wheat as well which gives you more of a brown, whole-wheat style loaf.
Hello, I would like to try making the Pullman loaf. I am wondering if I can use bread flour or will this change the rise?
This recipe came out beautifully. My kids loved the little burger buns I made with this dough recipe. Absolutely delish. Nice soft and fluffy dough.
I was scared of baking my first sandwhich style loaf with sourdough because I usually only cook for years with commercial yeast but this was incredibly easy!! and such amazing bread. I don’t have to compromise on delicious tasting bread with sourdough cooking. Praise God !!
I love this bread. I baked it yesterday as sourdough rolls. I found her YouTube channel and came over from there. Just received my Pullman pans and am waiting for the dough to rise. I’m wondering if I can shape the dough tonight and place it in the fridge. Can I bake it in the morning? Should I wait for it to come to room temp or can I bake it cold from the refrigerator?
I have never made a Pullman loaf bread before. This recipe was easy to follow and yes, my dough was very sticky. However, watching the YouTube video and following the tips and tricks made my bread look just like the one you see here! I was thrilled. The bread is soft and delicious and I even used it to make French toast! Thank you so much for sharing this recipe with us!!