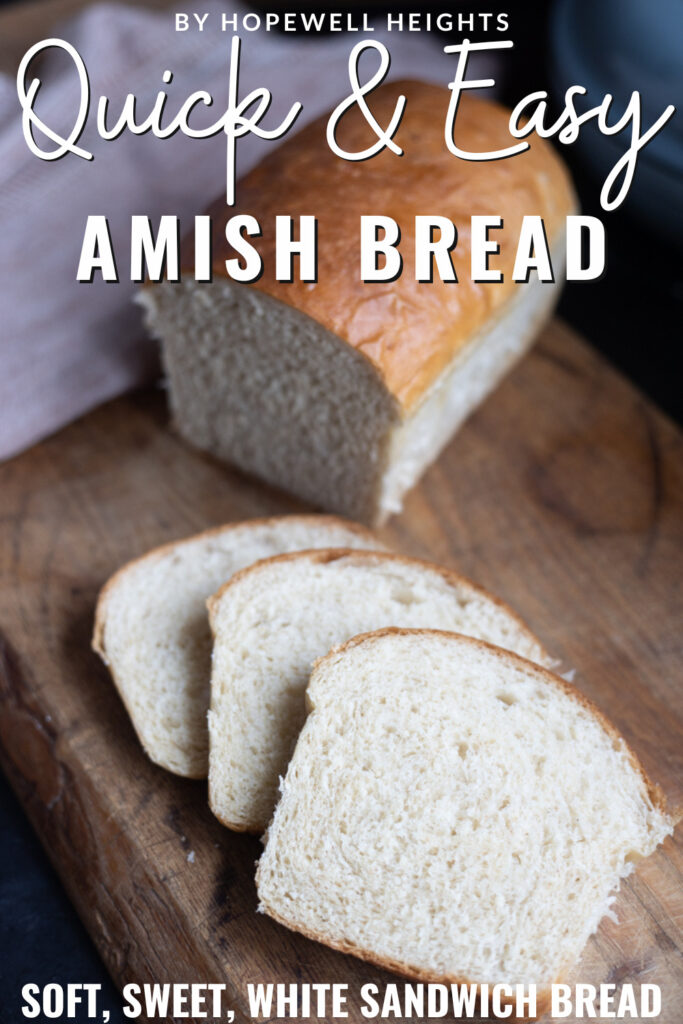
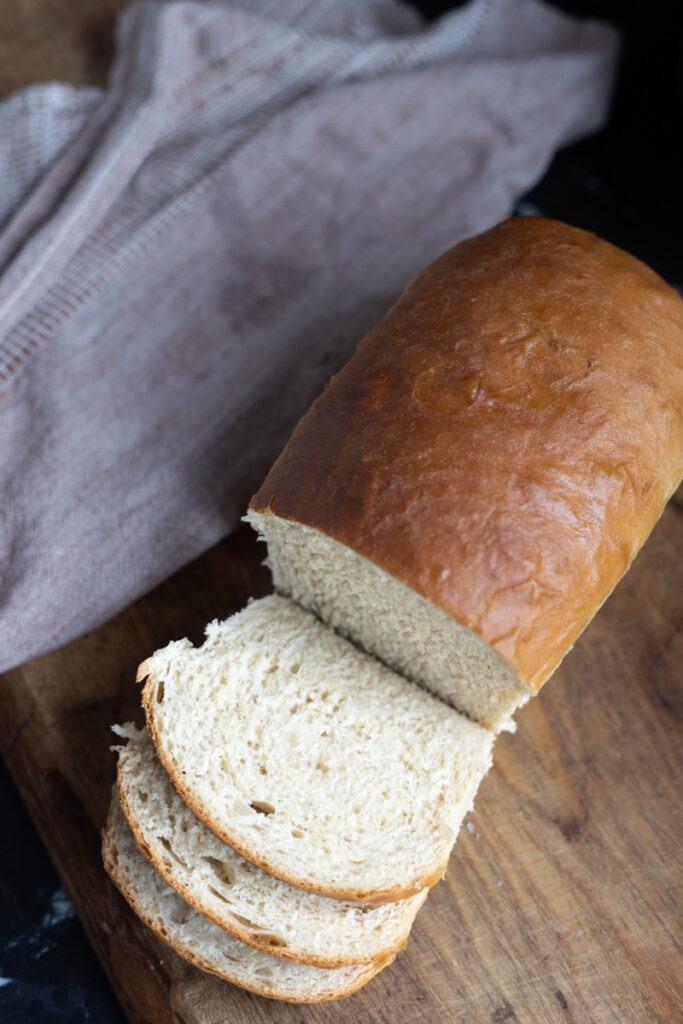
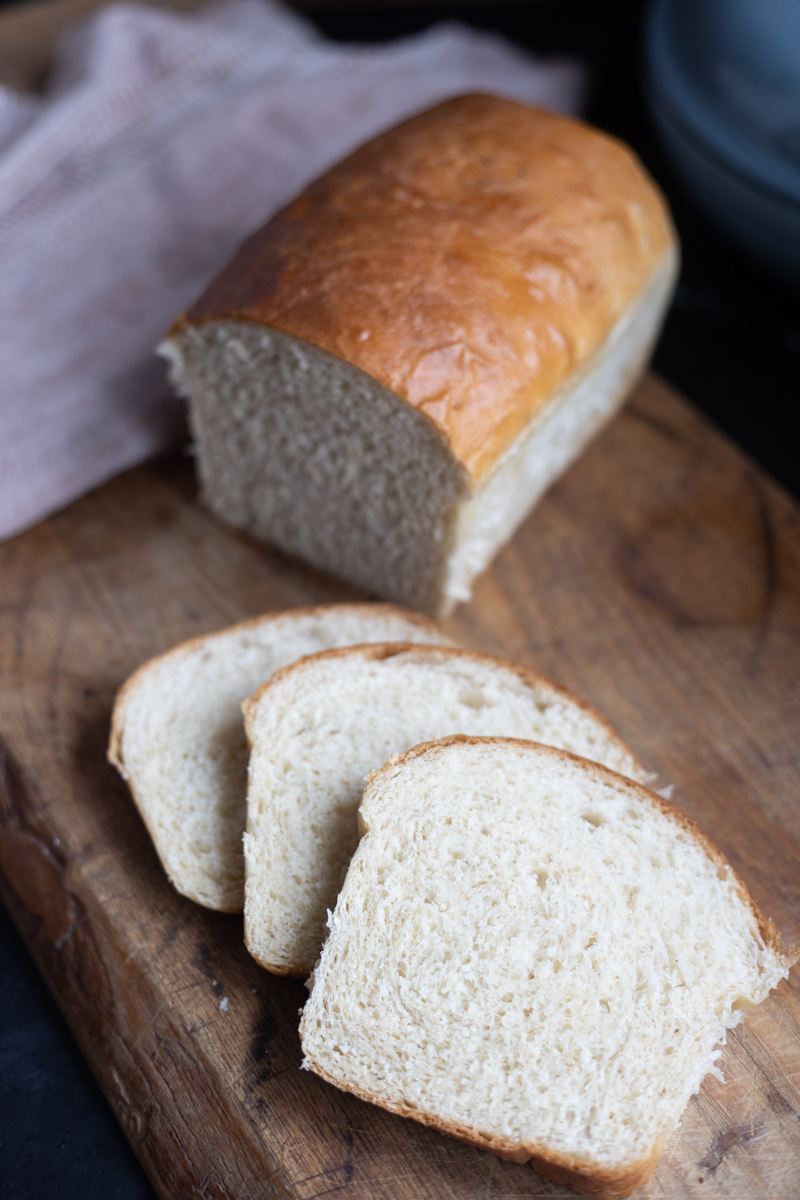
This Amish friendship bread recipe is quick & easy, no starter required – just yeast! This is the perfect, soft, white, homemade bread that will be your new go-to in a pinch.
This is one of my oldest bread recipes – an adaptation of traditional Amish friendship bread made with a sourdough starter/bread starter. The reason it’s called friendship bread is that you can share some sourdough starter with friends along with a loaf of fresh bread and then they can make their own bread with the gifted starter.
My husband’s grandmother used to tell a story of her mother keeping a bread starter. She remembers people stopping in from time to time to ask if they could have a little bit of that starter, which they just called “yeast” back then. And that’s actually all a starter is – just wild yeast and bacteria from the environment and grains! Enough about sourdough and bread starters though, because this recipe is quick & easy since it’s made with commercial yeast.
I love my sourdough bread, but sometimes you need a loaf of bread and don’t have time to wait 12-24 hours. This is why I always keep commercial yeast – both instant yeast and active dry yeast – on hand. Whether you use commercial yeast or sourdough starter to make your bread – homemade bread is healthier and more delicious than store-bought bread any day of the week. This is an easy, milk bread recipe that’s perfect for beginners.

I may receive a small commission for items purchased through affiliate links in this post at no additional cost to you.
Why You’ll Love This Recipe
- This quick bread only takes 2-3 hours to make from start to finish. It’s the perfect solution when you need bread in a pinch and don’t have time to run to the store.
- This bread recipe is easily adaptable. I typically use all-purpose flour, but I’ve used a mix of all-purpose and whole-wheat flour or just all whole-wheat flour, and it always turns out great.
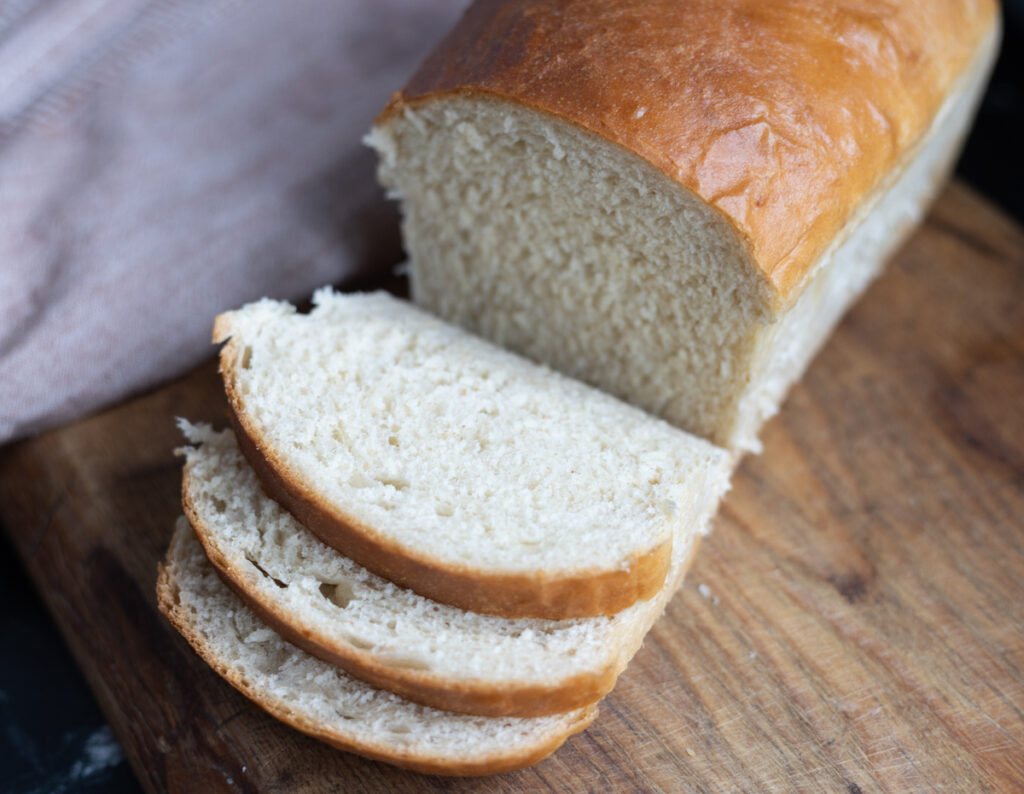
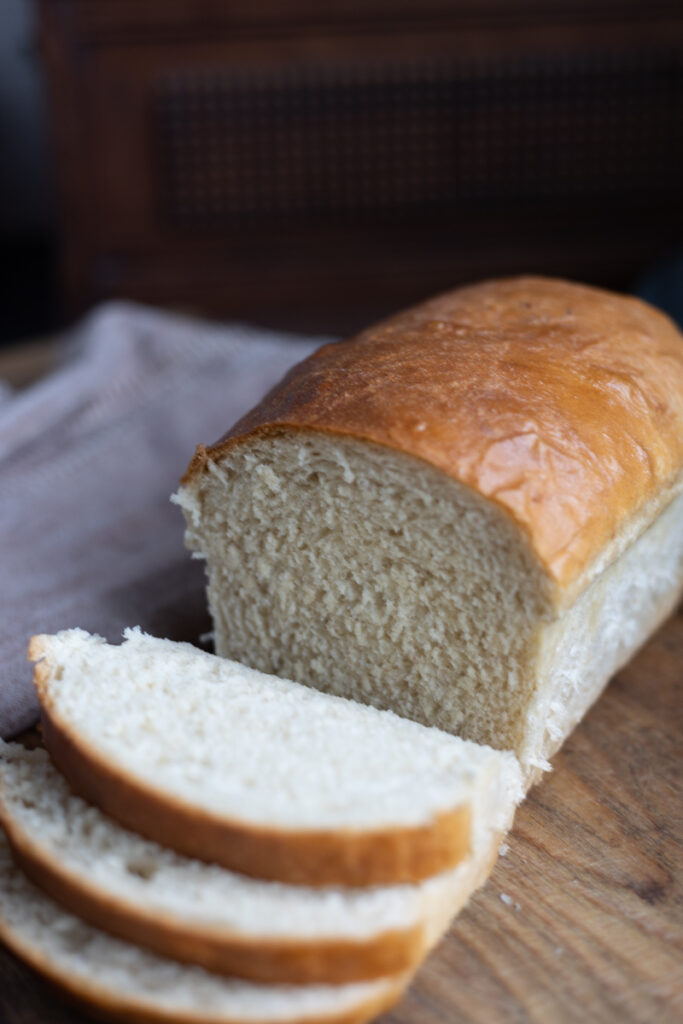
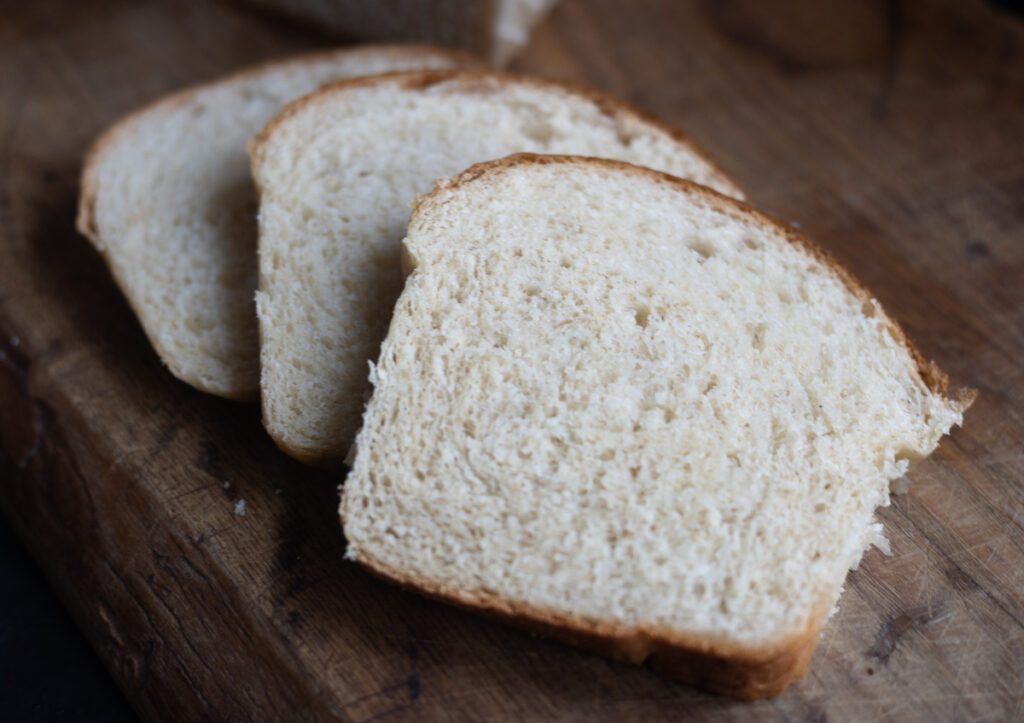
- This is a soft, sweet bread, so everyone loves it fresh out of the oven with some butter or for sandwiches.
What You’ll Need
INGREDIENTS
- 1 cup water (240 grams)
- 1 cup whole milk (240 grams)
- 2/3 cup white sugar (133 grams)
- 1 1/2 tablespoons active dry yeast (21 grams) (you can use instant yeast as well)
- 1 1/2 teaspoons salt (9 grams)
- 1/4 cup olive oil (60 grams)
- 6 cups bread flour (600-720 grams)
- 2 tablespoons melted butter for brushing the tops of the loaves (28 grams)
TOOLS
large bowl or stand mixer
wooden spoon or spatula
damp cloth
2 greased 9×5 inch loaf pans
Step-By-Step Instructions
INSTANT YEAST
It’s not necessary to “proof” instant yeast or allow the dough to rise before shaping, so the process is much quicker.
Warm water and milk to about 100F in the microwave or on the stovetop. The liquid must NOT be any warmer than 110F, or it will kill the yeast. Add warm milk and water, sugar, olive oil, salt, and instant yeast to a large mixing bowl or the bowl of a stand mixer with the dough hook attachment and mix to combine. Add 4 cups of flour and mix, slowly add another 1/2 cup of flour at a time until the dough comes together into a ball that is still slightly sticky, but workable.

If using a bowl and hand kneading, turn the dough out onto a lightly floured surface and knead for 5 minutes until the dough is smooth. If using a stand mixer, knead with the dough hook on medium speed for 3-5 minutes. The dough should be slightly sticky, but easy to handle.
Divide the dough in half, each half should weigh about 700g.

Shape each half into a loaf shape and place the seam side down into greased loaf pans. Cover the pans with a damp towel and place them in a warm spot. The dough rise should take an hour or two. Once it has doubled in size to fill out the loaf pan and risen to about a half inch above the top of the pan, it is ready to bake.
Bake the loaves in a preheated oven at 350 for 30 minutes.
Once the loaves have baked, brush the tops with melted butter and turn them out to cool on a wire rack for 30-60 minutes before slicing. This resting period is important because the bread continues to bake in the center so long as the loaf remains whole. Don’t worry, it will still be warm after a short rest period if you want a slice of warm butter bread!
ACTIVE DRY YEAST
Active dry yeast must proof and requires a first and second rise, so the rise time is longer than if using instant yeast.
Warm water and milk to about 100F in the microwave or on the stovetop. The liquid must NOT be any warmer than 110F, or it will kill the yeast. Pour the warm milk, water, sugar, and yeast into a bowl, cover it with a towel, and let it proof for 10-15 minutes or until the yeast is foamy.
Add the olive oil, salt, and 4 cups of flour to the yeast mixture. Mix and slowly add another 1/2 cup of flour at a time until the dough comes together into a ball that is still slightly sticky, but workable.
If using a bowl and hand kneading, turn the dough out onto a lightly floured surface and knead for 5 minutes until the dough is smooth. If using a stand mixer, knead with the dough hook on medium speed for 3-5 minutes. The dough should be slightly sticky, but easy to handle.
Shape the bread dough into a ball and place it back in a greased bowl, cover with a damp towel, and begin the first rise. To speed up this process, place the bowl in a warm place like the oven on proof setting (anywhere from 100-110F) or a proofing box. Otherwise, just let it rise at room temperature.


Once the dough has doubled in size, punch it down, turn it out onto a floured surface, and knead for a minute until smooth. Divide the dough in half, each half should weigh about 700g. Knead each half for a moment and shape into a ball. Place on the counter, cover with a towel, and allow each ball of dough to rest for 15 minutes.
Shape each half into a loaf shape and place the seam side down into greased loaf pans. Cover the pans with a damp towel and place them in a warm spot for the second rise. The dough rise should take an hour or two. Once it has doubled in size to fill out the loaf pan and risen to about a half inch above the top of the pan, it is ready to bake.
Gently brush the tops of the loaves with melted butter and bake at 350 degrees F for 30 minutes. The tops of the loaves will be golden brown when they come out of the oven, brush the tops with melted butter again and let the loaves rest in the loaf pans for 5 minutes before turning them out to cool.
Turn the loaves out to cool on a wire rack for 30-60 minutes before slicing. This resting period is important because the bread continues to bake in the center so long as the loaf remains whole. Don’t worry, it will still be warm after a short rest period if you want a slice of warm butter bread!
Shape the bread dough into a ball and place it back in the mixing bowl, cover with a damp towel, and begin the first rise. To speed up this process, place the bowl in a warm place like the oven on proof setting (anywhere from 100-110F) or a proofing box. Otherwise, just let it rise at room temperature.
FAQ
Do I have to use all-purpose flour to make homemade bread?
No, you do not have to use all-purpose, white flour to make homemade bread. The good news is that you can use any kind of flour you like or even a mixture of different kinds of flour. Just keep in mind that the texture, density, and flavor of your loaf will change depending on the type of flour you use. A mix of half all-purpose and half whole wheat flour works nicely in this recipe.
What’s the difference between instant yeast and active dry yeast?
Instant yeast does not require proofing in liquid before mixing in with flour, whereas active dry yeast does. Bread dough made with instant yeast also does not. need a first and second rise. The dough can be shaped immediately after kneading and baked after the first rise. Bread dough made with active dry yeast needs to bulk rise and then rise a second time after being shaped.
Can I use a bread machine to make Amish friendship bread?
Yes, you can use a bread machine to make Amish friendship bread. Use this simple recipe and follow the instructions for your particular bread machine.
Mt dough did not rise, what went wrong?
If the water and milk were too warm, it could have killed the yeast. The yeast may have expired. The dough may have just needed more time, especially if it was sitting in a cool place to rise.
My bread turned out dense and heavy, what went wrong?
Using too much flour, over-kneading, and insufficient rise time can all result in a dense loaf. Using ancient grains can also result in a loaf that is more dense than the standard all-purpose loaf. The most common reason for a dense loaf is too much flour. This is why it is important to add flour slowly so that the dough is still a bit sticky when kneading. If the dough is stiff and difficult to knead, too much flour has been added and the loaf will be heavy and dense.
Tips
- Raise the temperature. Warmth is your friend when making bread. Using warm liquids (no warmer than 110F, or the yeast will die) and placing the dough in a warm place to rise will dramatically speed up the process of making homemade bread.
- Try some add-ins. Try cinnamon and raisins, nuts berries, or herbs and cheese to this versatile white bread recipe.
- Make cinnamon rolls. Turn this sweet white bread into cinnamon rolls by following the instructions in the recipe card to prepare the dough through the first rise. Then, roll the dough out into a rectangle that is 1/3″ thick. Mix 1/2 cup butter, 2 T cinnamon, and 1/2 cup brown sugar in a small bowl and spread it evenly over the rolled-out dough. Roll the dough toward you, seal it, and use a piece of thread to cut cinnamon rolls. Place them on a greased baking sheet and bake in a preheated oven at 350 degrees F for 18-20 minutes or until the tops are golden brown. Make a glaze or icing to top the cinnamon rolls.
Storage
Once the bread has cooled completely, store it as a whole loaf or sliced in an airtight container, wrapped in plastic wrap, or in a Ziploc bag. Amish friendship bread can be stored at room temperature for 4-5 days, in the refrigerator for 5-7 days, and in the freezer for up to 3 months. I often make big, bulk batches of this bread and wrap several loaves to freeze for later.
Homemade Amish Friendship Bread Recipe – Easy, No Starter!
Ingredients
Equipment
Method
- INSTANT YEAST: It's not necessary to "proof" instant yeast or allow the dough to rise before shaping, so the process is much quicker.
- Warm water and milk to about 100F in the microwave or on the stovetop. The liquid must NOT be any warmer than 110F, or it will kill the yeast. Add warm milk and water, sugar, olive oil, salt, and instant yeast to a large mixing bowl or the bowl of a stand mixer with the dough hook attachment and mix to combine. Add 4 cups of flour and mix, slowly add another 1/2 cup of flour at a time until the dough comes together into a ball that is still slightly sticky, but workable.
- If using a bowl and hand kneading, turn the dough out onto a lightly floured surface and knead for 5 minutes until the dough is smooth. If using a stand mixer, knead with the dough hook on medium speed for 3-5 minutes. The dough should be slightly sticky, but easy to handle.
- Divide the dough in half, each half should weigh about 700g. Shape each half into a loaf shape and place the seam side down into greased loaf pans. Cover the pans with a damp towel and place them in a warm spot. The dough rise should take an hour or two. Once it has doubled in size to fill out the loaf pan and risen to about a half inch above the top of the pan, it is ready to bake.
- Gently brush the tops of the loaves with melted butter and bake at 350F for 30 minutes. The tops of the loaves will be golden brown when they come out of the oven, brush the tops with melted butter again and let the loaves rest in the loaf pans for 5 minutes before turning them out to cool.
- Turn the loaves out to cool on a wire rack for 30-60 minutes before slicing. This resting period is important because the bread continues to bake in the center so long as the loaf remains whole. Don't worry, it will still be warm after a short rest period if you're wanting a slice of warm butter bread!
- ACTIVE DRY YEAST: Active dry yeast must proof and requires a first and second rise, so the rise time is longer than if using instant yeast.
- Warm water and milk to about 100°F in the microwave or on the stovetop. The liquid must NOT be any warmer than 110°F, or it will kill the yeast. Pour the warm milk, water, sugar, and yeast into a bowl, cover it with a towel, and let it proof for 10-15 minutes or until the yeast is foamy.
- Add the olive oil, salt, and 4 cups of flour to the yeast mixture. Mix and slowly add another 1½ cup of flour at a time until the dough comes together into a ball that is still slightly sticky, but workable.
- If using a bowl and hand kneading, turn the dough out onto a lightly floured surface and knead for 5 minutes until the dough is smooth. If using a stand mixer, knead with the dough hook on medium speed for 3-5 minutes. The dough should be slightly sticky, but easy to handle.
- Shape the bread dough into a ball and place it back in a greased bowl, cover with a damp towel, and begin the first rise. To speed up this process, place the bowl in a warm place like the oven on proof setting (anywhere from 100-110F) or a proofing box. Otherwise, just let it rise at room temperature.
- Once the dough has doubled in size, punch it down, turn it out onto a floured surface, and knead for a minute until smooth. Divide the dough in half, each half should weigh about 700g.
- Knead each half of the dough for a moment and shape into a ball, place seam side down on the counter, cover with a towel, and let the dough rest for 15 minutes.
- Shape each half into a loaf shape and place the seam side down into greased loaf pans. Cover the pans with a damp towel and place them in a warm spot for the second rise. The dough rise should take an hour or two. Once it has doubled in size to fill out the loaf pan and risen to about a half inch above the top of the pan, it is ready to bake.
- Gently brush the tops of the loaves with melted butter and bake at 350 degrees F for 30 minutes. The tops of the loaves will be golden brown when they come out of the oven, brush the tops with melted butter again and let the loaves rest in the loaf pans for 5 minutes before turning them out to cool.
- Turn the loaves out to cool on a wire rack for 30-60 minutes before slicing. This resting period is important because the bread continues to bake in the center so long as the loaf remains whole. Don't worry, it will still be warm after a short rest period if you're wanting a slice of warm butter bread!
Nutrition
Notes
Raise the temperature
Warmth is your friend when making bread. Using warm liquids (no warmer than 110F, or the yeast will die) and placing the dough in a warm place to rise will dramatically speed up the process of making homemade bread.Try some add-ins
Try cinnamon and raisins, nuts berries, or herbs and cheese to this versatile white bread recipe.Make cinnamon rolls
Turn this sweet white bread into cinnamon rolls by following the instructions in the recipe card to prepare the dough through the first rise. Then, roll the dough out into a rectangle that is 1/3" thick. Mix 1/2 cup butter, 2 T cinnamon, and 1/2 cup brown sugar in a small bowl and spread it evenly over the rolled-out dough. Roll the dough toward you, seal it, and use a piece of thread to cut cinnamon rolls. Place them on a greased baking sheet and bake in a preheated oven at 350 degrees F for 18-20 minutes or until the tops are golden brown. Make a glaze or icing to top the cinnamon rolls.Tried this recipe?
Let us know how it was!More Delicious Homemade Bread Recipes
Sourdough Pullman Loaf – Pain De Mie
Sourdough Amish Friendship Bread
Oh my Gosh…. This bread is fantastic.. So darn soft… I can eat the whole loaf
So glad you loved it Cindy! It’s a staple in our house for sure!
How do you usually store yours to last the week?
I use bread containers!