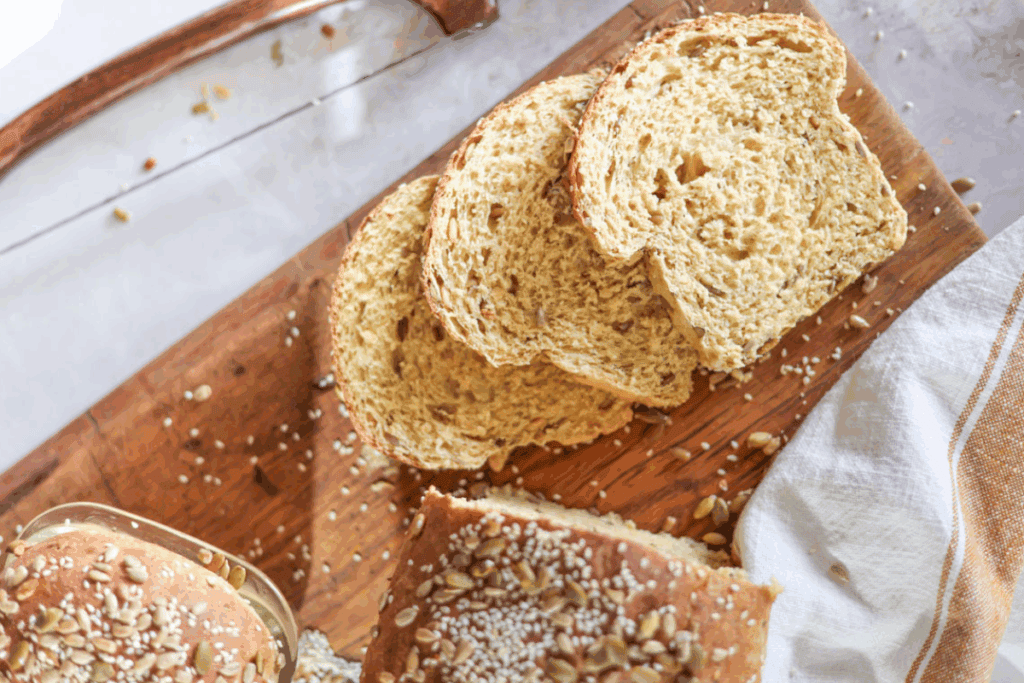
Seeded sourdough sandwich bread is a super soft, lightly sweet loaf that’s long fermented for flavor and digestibility. I’ve included a quick discard option for busy days, plus notes for using fresh milled flour if that’s your preference.
Quick Recipe Overview: Seeded Sourdough Sandwich Bread
⏱ Ready In: ~12 hours (long fermentation + bake time)
🍞 Serves: 1 9×5-inch loaf
🔥 Calories: ~170–190 per slice
🌾 Main Ingredients: Active sourdough starter, flour, mixed seeds, water, milk, oil or butter, salt
🥖 Dietary Info: Naturally leavened, yeast-free (discard option included), adaptable for fresh milled flour
💛 Why You’ll Love It: This seeded sourdough sandwich bread is long fermented for flavor and structure, yet stays soft and mild enough for everyday sandwiches. It includes a quick discard option for busy days and clear notes for using fresh milled flour, making it flexible and family-friendly.
SUMMARIZE & SAVE THIS CONTENT ON
“This is my favorite recipe yet! This soft bread with just the right amount of crunchy seeds, turned out perfect. Great recipe!!” – Stacie
Why You’ll Love This Recipe
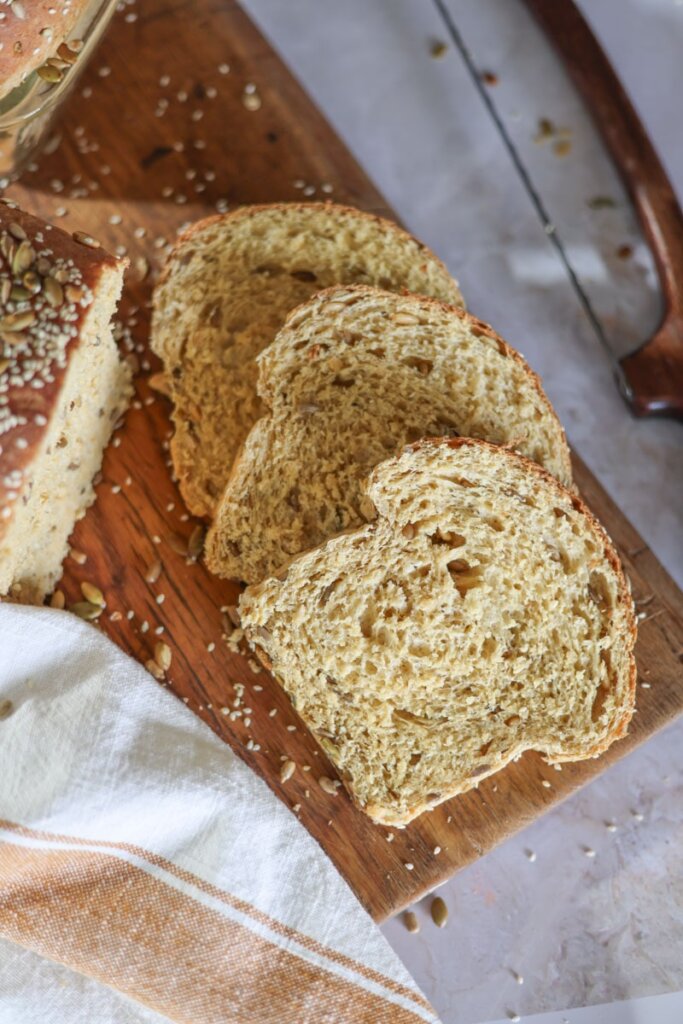
- Long fermented but still soft: Develops great flavor while staying tender with a mild, sandwich-friendly crumb.
- Hearty yet family-friendly: A blend of seeds adds texture and nutrition without making the loaf dense.
- Quick discard option: Includes a faster method for days when you don’t have time for a long ferment.
- Fresh milled flour option: Easy swaps included if you prefer baking with freshly milled wheat.
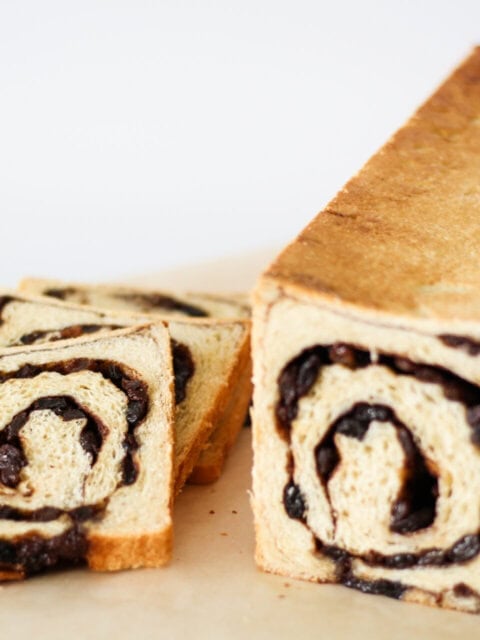
This recipe is a delicious twist on my classic sourdough sandwich bread recipe that I’ve been making for years! I love making this bread in the fall, and for chicken salad sandwiches, it’s always a hit!
If you prefer a video walkthrough, spend the day with me in my homestead kitchen baking Seeded Sourdough Bread.
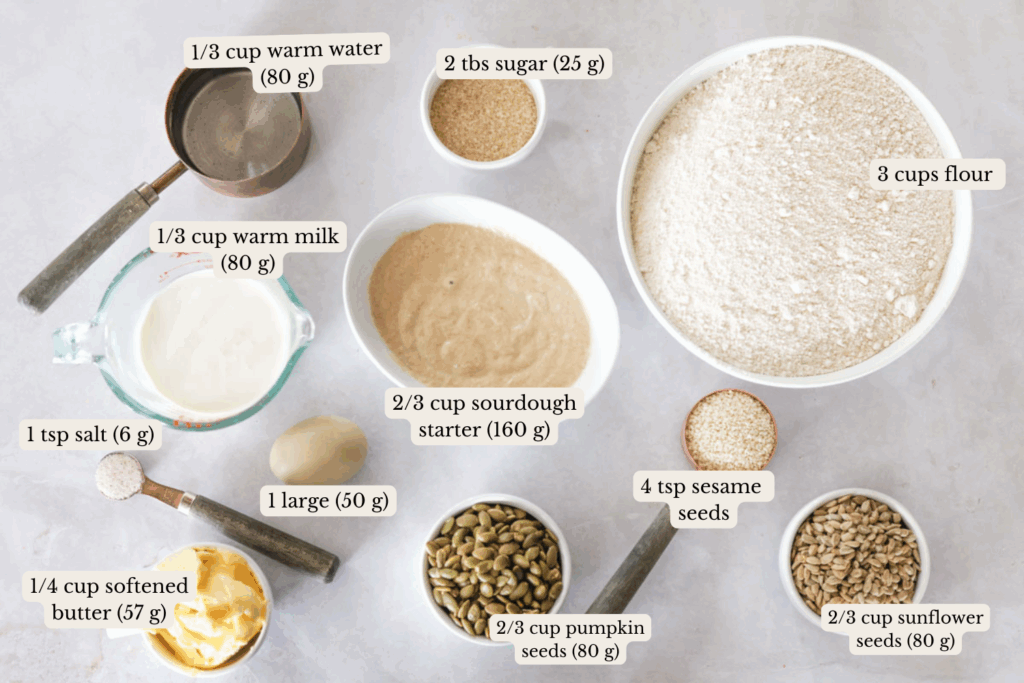
Key Ingredients
Precise measurements and instructions can be found in the recipe card at the bottom of the page.
Bread Ingredients
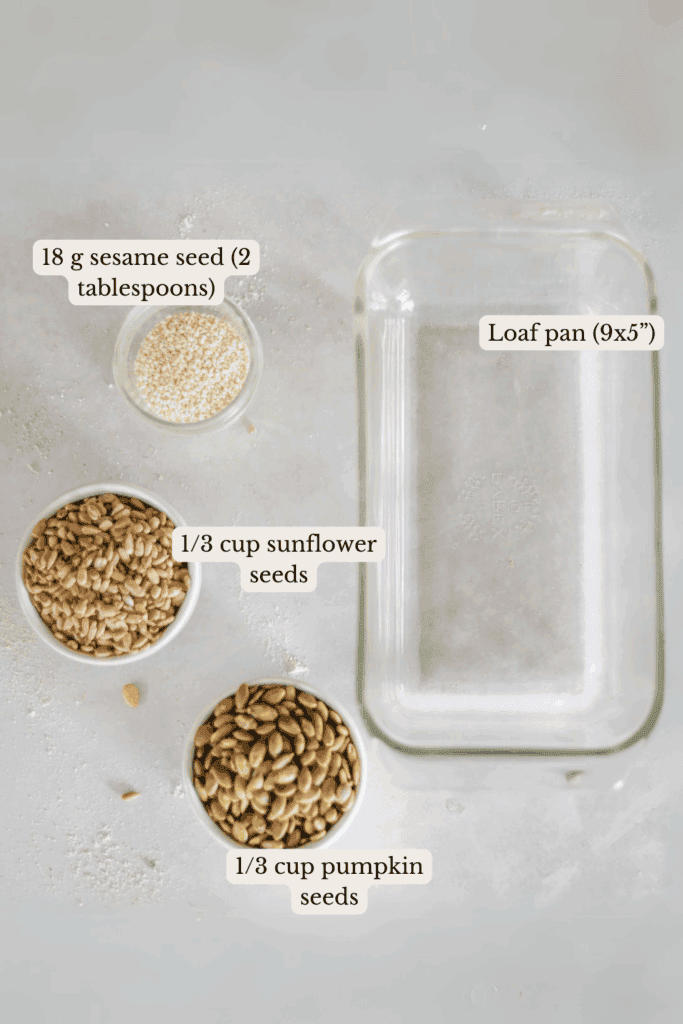
Seed Mix for Coating Seeded Sourdough Sandwich Bread
- Active sourdough starter: Naturally leavens the bread and provides mild sourdough flavor while breaking down phytic acid and gluten.
- All-purpose flour: Keeps the loaf soft and tender while supporting a good rise. I buy organic flour and grain in bulk from Azure Standard.
- Milk and water: Create a soft, enriched crumb without making the bread heavy.
- Egg: Adds richness and helps create a soft, sliceable sandwich loaf.
- Butter: Keeps the bread tender and flavorful. Substitute any neutral oil like avocado oil or coconut oil for a similar result.
- Mixed seeds: Pumpkin, sunflower, and sesame seeds add texture, flavor, and a hearty finish.
- Sugar: Lightly sweetens the bread and supports fermentation. I buy minimally processed organic cane sugar in 25 lb bags.
- Salt: Balances flavor and strengthens the dough structure. I use quality salt like Redmond Real Salt.
Fresh Milled Flour for Seeded Sourdough Sandwich Bread
TLDR – You can use freshly milled hard white wheat as a 1:1 replacement for the all-purpose flour in this recipe.
- Best Wheat Variety: Hard white wheat works well for seeded sourdough sandwich bread because it provides enough strength to support the added seeds while still baking up soft and mild.
- How to Substitute: Replace the all-purpose flour with freshly milled hard white wheat by weight (1:1).
- Hydration Tip: Fresh milled flour absorbs liquid differently—hold back 1–2 tablespoons of liquid and add only if the dough feels dry.
If you need help with sourdough vocabulary, check out my Complete Guide to Sourdough Terms!
Step-By-Step Instructions
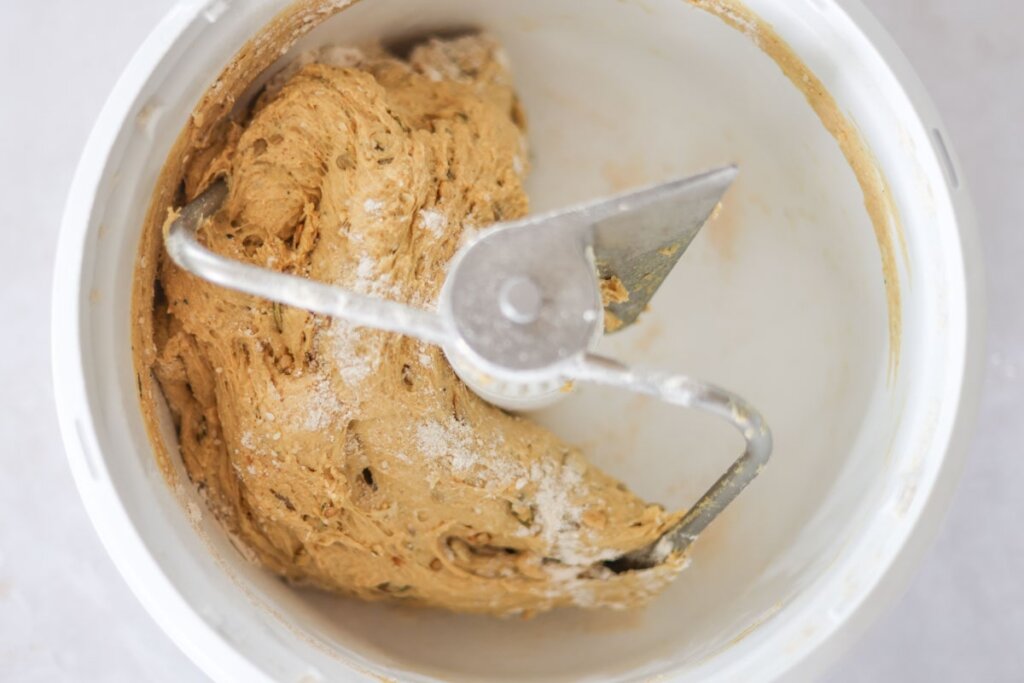
Step 1: Add all dough ingredients to a large mixing bowl (or stand mixer bowl). Mix and knead for 5–10 minutes until smooth and workable (it will still feel a bit sticky).

Step 2: Shape the dough into a ball, place it in a greased bowl, cover, and let it rise in a warm place until doubled. (4-12 hours depending on starter strength and temperature)
Step 3: Shape dough into a loaf. Then mix the topping seeds in a loaf pan and roll the shaped loaf in the seeds, pressing gently so they stick.

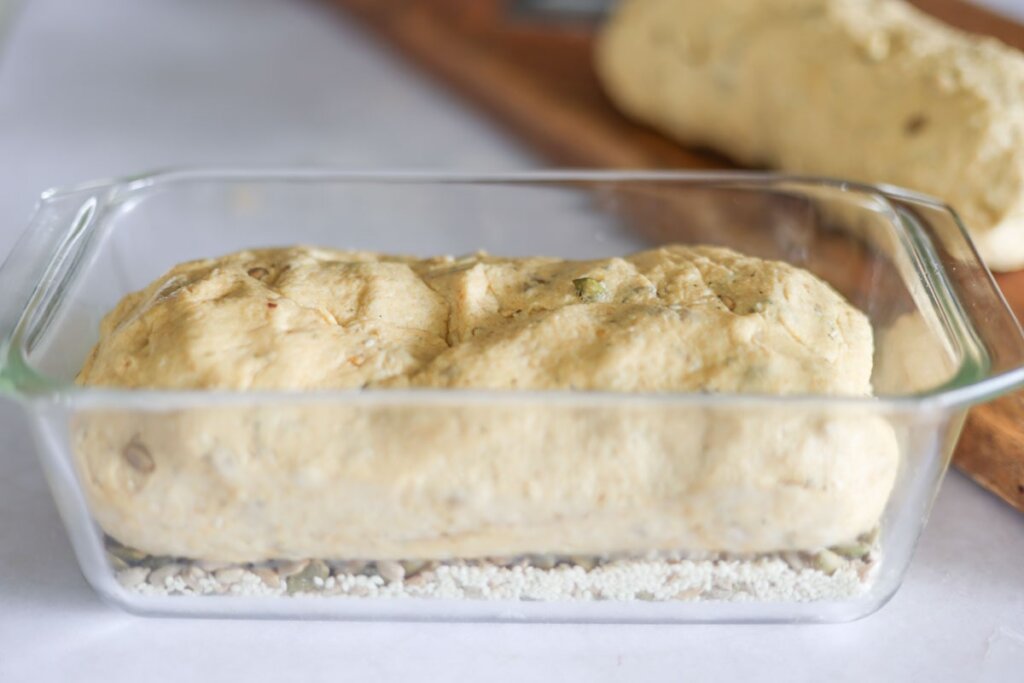
Step 4: Place the seeded loaf into a greased 9×5-inch loaf pan, cover, and let rise until doubled.

Step 5: When the dough has risen about 1 inch above the pan, bake at 375°F for 30 minutes.
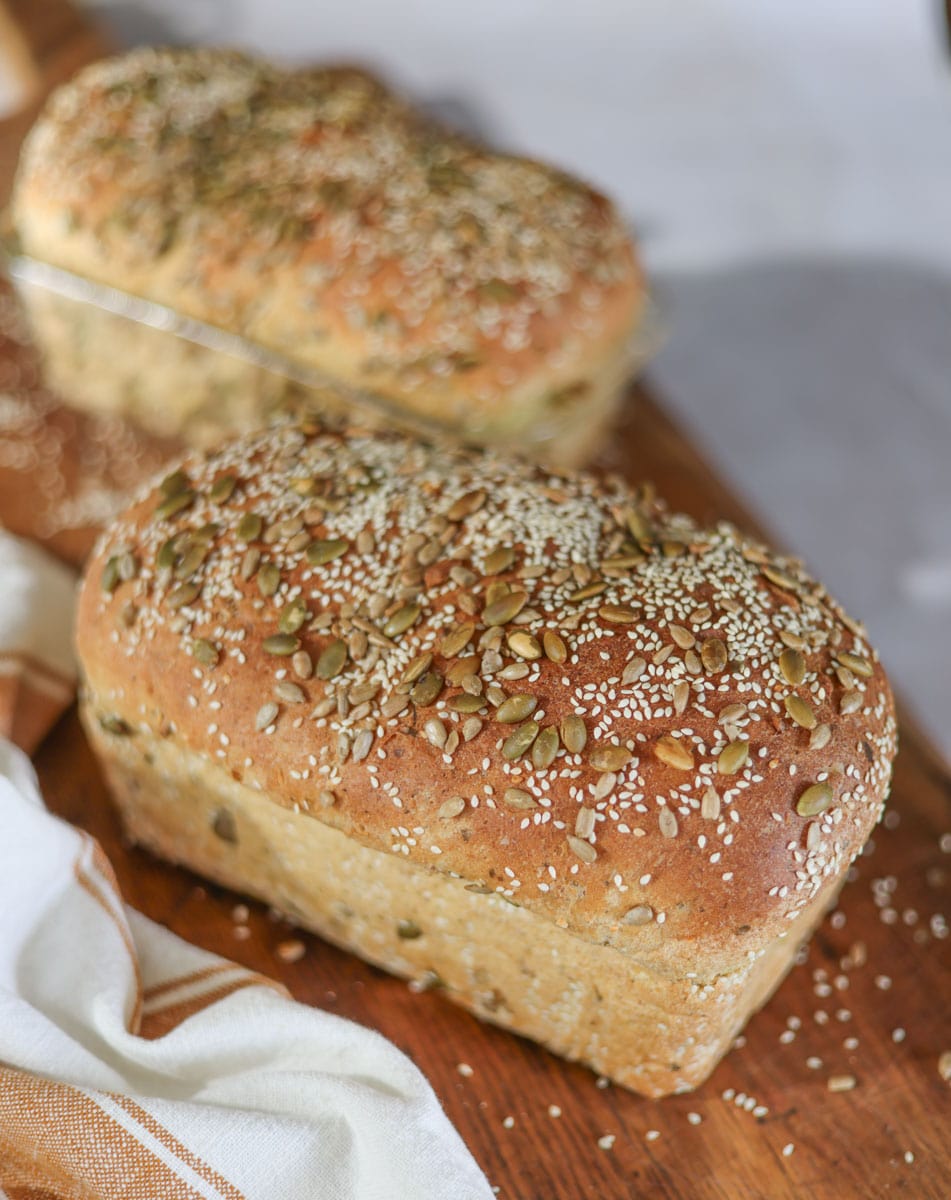
Step 6: Remove from the pan and cool before slicing.
Seeded Sourdough Sandwich Bread Sample Timelines
Quick Discard Option
Same Day
- 0:00 – Add 2 teaspoons instant yeast to dough ingredients, then mix and knead the dough.
- 0:10–1:30 – Cover and rise at room temperature until doubled.
- 1:30–1:45 – Shape the dough, then roll in seed topping.
- 1:45–2:45 – Place in loaf pan and rise until the dough crowns about 1 inch above the pan.
- 2:45–3:30 – Bake, cool, and slice.
Long-Fermented Option
Day 1
- Morning–Afternoon – Feed sourdough starter.
- Evening – When starter is active, mix and knead dough. Cover and ferment overnight at room temperature.
Day 2
- Morning – Shape dough, roll in seed topping, and place in loaf pan for final rise.
- Late Morning – Once the dough crowns about 1 inch above the pan, bake.
- Midday – Cool completely, then slice.
Seeded Sourdough Sandwich Bread FAQs
Seeded sourdough sandwich bread stays soft because the dough is enriched with milk, egg, and butter, which create a tender crumb. Proper hydration, kneading, and full fermentation also help prevent a dense loaf.
Yes. Seeded sourdough sandwich bread can be made with sourdough discard by adding 1 tablespoon of instant yeast to support proper rise and shorten the fermentation time.
Pumpkin seeds, sunflower seeds, and sesame seeds work especially well in seeded sourdough sandwich bread. You can mix seeds into the dough and press extra seeds onto the loaf before baking.
No special flour is required for seeded sourdough sandwich bread. All-purpose flour works well, or you can use fresh milled hard white wheat, adding extra flour 1 tablespoon at a time if needed.
Store seeded sourdough sandwich bread in an airtight container at room temperature for 2–3 days, or freeze slices for up to 3 months and toast or warm before serving.
Expert Tips
- Use a strong starter: An active, bubbly starter helps support the added weight of seeds and prevents a dense loaf.
- Develop gluten well: Knead until the dough stretches smoothly without tearing to create a structure that holds seeds evenly.
- Don’t rush fermentation: Wait until the dough is clearly puffy and light before shaping.
- Shape with tension: Roll the loaf tightly to create surface tension, which helps the bread rise tall instead of spreading.
- Press seeds firmly: Gently press the loaf into the seed topping so the seeds adhere without deflating the dough.
- Bake to temperature when unsure: Bake until the internal temperature reaches 200–205°F.
- Cool completely: Let the loaf cool fully before slicing to keep the crumb soft and prevent seeds from pulling away.
Storage
- Room temperature: Store completely cooled bread in a bag or airtight container for 2–3 days.
- Refrigeration: Refrigerate in an airtight bag for up to 5 days.
- Freezing: Freeze the entire loaf or slices in an airtight bag for up to 3 months. Thaw at room temperature.


If you love this recipe, please leave a ⭐ 5-star ⭐ rating below! If you have questions or suggestions – drop a comment!
Seeded Sourdough Sandwich Bread
Ingredients
Equipment
Method
- Add all ingredients to a large mixing bowl (or stand mixer bowl).
- Mix until a dough forms, then knead for 5–10 minutes until smooth and workable (it will still feel a bit sticky).
- Shape the dough into a ball, place it in a greased bowl, cover, and let it rise in a warm place until doubled (4-12 hours depending on starter strength and temperature).
- Punch the dough down, then shape it into a loaf.
- Mix the topping seeds in a pie plate, then roll the shaped loaf in the seeds, pressing gently so they stick.
- Place the seeded loaf into a greased 9×5-inch loaf pan, cover, and let rise until doubled.
- Bake at 375°F for 30 minutes.
- Remove from the pan and cool before slicing.
Nutrition
Video
Notes
- Starter strength: Use an active, bubbly starter at peak rise for the best lift and mild sourdough flavor.
- Fermentation timing: Rise times will vary based on room temperature and starter activity—look for dough that has doubled and feels light rather than relying on the clock.
- Pan size: This recipe is designed for a standard 9×5-inch loaf pan.
- Seed coverage: Gently press the loaf into the topping seeds so they adhere without deflating the dough.
- Fresh milled flour option: Use freshly milled hard white wheat as a 1:1 replacement by weight for the all-purpose flour. Add a bit more flour if needed.
- Discard option: To make this recipe with sourdough discard, add 2 teaspoons instant yeast to the dough and shorten the first rise to about 1–2 hours, or until doubled.
- Baking tip: If the top browns too quickly, tent loosely with foil during the final 10 minutes.
- Cooling: Let the loaf cool completely before slicing to avoid a gummy crumb and keep slices clean.
Tried this recipe?
Let us know how it was!About the Author

Welcome to Hopewell Heights, I’m Steph – seasoned sourdough baker, homesteader, homemaker, homeschooling mom of 5, and creator behind this Heritage American food blog. I hope you enjoy my family’s favorite, from-scratch recipes!
I love making this bread for chicken salad or lunchmeat sandwiches – so soft and delicious!
One of my favorite bread recipes ever!
LOVE this recipe. Always turns out delicious and I’ve made it time and time again!
This is my favorite recipe yet! This soft bread with just the right amount of crunchy seeds, turned out perfect. Great recipe!!