This flaky, all-butter sourdough pie crust can be made with active starter OR discard, and I’ve included instructions for using either all-purpose flour or fresh milled flour. It makes two 9-inch pie crusts and works beautifully for sweet pies, savory pies, quiche, and pot pies.
A Quick Recipe Overview: Flaky Sourdough Pie Crust
- ✅ Recipe Name: Flaky Sourdough Pie Crust
- 🕒 Ready In: About 20 minutes (+ chill time optional)
- 🥧 Makes: 2 (9-inch) pie crusts
- 🥣 Main Ingredients: Flour, butter, sourdough starter/discard, sugar, salt
- 📖 Dietary Info: Vegetarian, discard-friendly, fresh milled flour option, freezer-friendly
- ⭐ Why You’ll Love It: This is a simple, reliable pie crust with rich butter flavor and a tender, flaky texture — and it’s the perfect way to use up sourdough starter without needing any long fermentation.
SUMMARIZE & SAVE THIS CONTENT ON
If you’re still learning sourdough basics (like discard, hydration, and bulk fermentation), refer to my Guide to Sourdough Terms and bookmark it!
Why You’ll Love This Recipe
- All Butter & Extra Flaky: No shortening — just real butter for rich flavor and beautiful layers.
- Use Active Starter OR Discard: Since the dough doesn’t need to rise, this recipe works perfectly with unfed discard.
- Fresh Milled Flour Option: I included easy substitutions so you can make fresh milled pie crust, too.
- Only 5 Simple Ingredients: Flour, butter, starter, sugar, and salt — that’s it.
- Sweet or Savory: Use it for fruit pies, pumpkin pie, quiche, meat pies, or chicken pot pie.
“Honestly the best pie crust I’ve ever made from scratch! I’ve made this for pot pies and fruit pies. Love that I can use up my sourdough starter and also love that this freezes so well too! Love love love it. Thanks for the recipe!” – Victoria
This post may contain affiliate links. I only recommend products I use and love. If you purchase through my links, I may earn a small commission at no extra cost to you.

Key Ingredients
Precise measurements and full instructions can be found in the recipe card at the bottom of the page.

- Flour: This recipe works great with all-purpose flour, but you can use fresh milled flour too (see the section below). If you’re milling your own, I recommend soft white wheat for the most tender, flaky crust. I get all of my flour and grain from Azure Standard and highly recommend it if you like to buy in bulk.
- Sourdough Starter (Active or Discard): You can use active, bubbly starter or unfed discard — both work because pie crust doesn’t rely on the starter for rising. Discard adds a subtle depth of flavor without making the crust taste sour.
- Butter: Use very cold butter (straight from the fridge). Cold butter is the secret to flaky pie crust — those butter pieces melt in the oven and create steam pockets that form layers.
- Sugar: A small amount of sugar helps with browning and balances the tang from the starter. If you’re making a savory crust, you can reduce it slightly (but I still recommend leaving a little for browning). I buy this minimally processed organic cane sugar in 25 lb bags and use it in my daily baking.
- Salt: Don’t skip it — salt brings out buttery flavor and makes the crust taste “like pie crust” instead of bland dough. I use Redmond Real Salt in all of my daily baking.
Fresh Milled Flour for Sourdough Pie Crust
TLDR: Fresh milled flour works beautifully for pie crust — Use 1 3/4 cup plus 2 tablespoons freshly milled soft white wheat flour in this recipe.
- Best wheat for pie crust: Soft white wheat makes an ideal pastry-style flour because it’s naturally lower in protein (gluten), which gives you a tender, flaky crust instead of a chewy one. I buy wheat berries from Azure Standard so I can stock up in bulk.
- Substitution note: Fresh milled flour absorbs more moisture than store-bought flour, so you’ll typically need a bit more flour (or slightly less liquid) to get the same dough texture. Start with your measured amount, then adjust until the dough holds together but still feels soft.
- Flavor + texture: Freshly milled flour gives this pie crust a slightly nutty, wholesome flavor while still keeping the classic buttery flake.
Join me in my kitchen to make some sourdough pie crust and do some fall cooking and baking!
Step-By-Step Instructions

Step 1: Add dry ingredients to the bowl of a food processor or large mixing bowl. Mix to combine.
Cut or grate the cold butter into the dry ingredients. Mix until you reach a meal consistency, with pea-sized pieces of butter remaining.

Step 2: Add 1 cup sourdough starter. Pulse/mix until combined into a ball. Do not overmix or the butter will begin to melt, and the dough will become greasy.

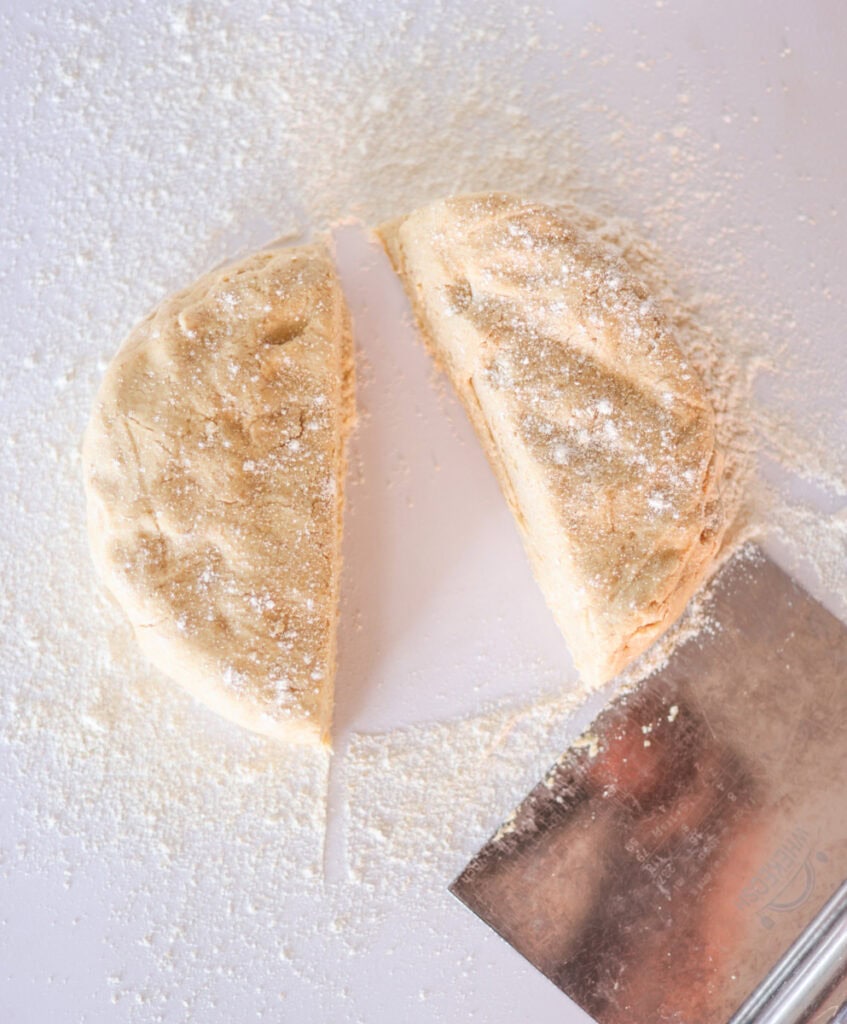


Step 4: Cut the dough into two equal pieces and shape it into discs. These two discs of pie dough will make the top crust and the bottom crust. Wrap each disc with a piece of plastic wrap and chill in the fridge for at least an hour so it stays together when you roll it out.
If you only need a bottom crust, save one piece of dough in the fridge or freezer for later use.


STEP 5: Grease the pie plate and roll out the dough. Prepare a lightly floured work surface and use a floured rolling pin to roll out the pie dough to 1/8″ thick and 2–3 inches wider than the pie plate. For a 9″ pie plate, the dough will be rolled into a 12″ circle.


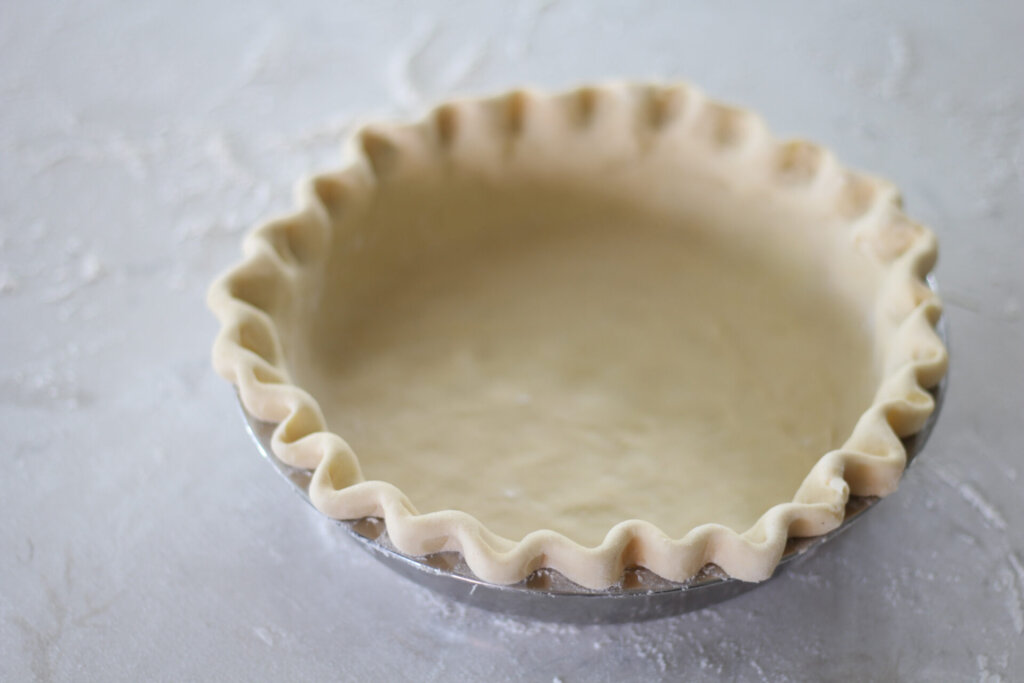
STEP 6: Trim the edges of the pie dough and fold under, then crimp or press with a fork. The crust is ready to either blind bake or to add filling.
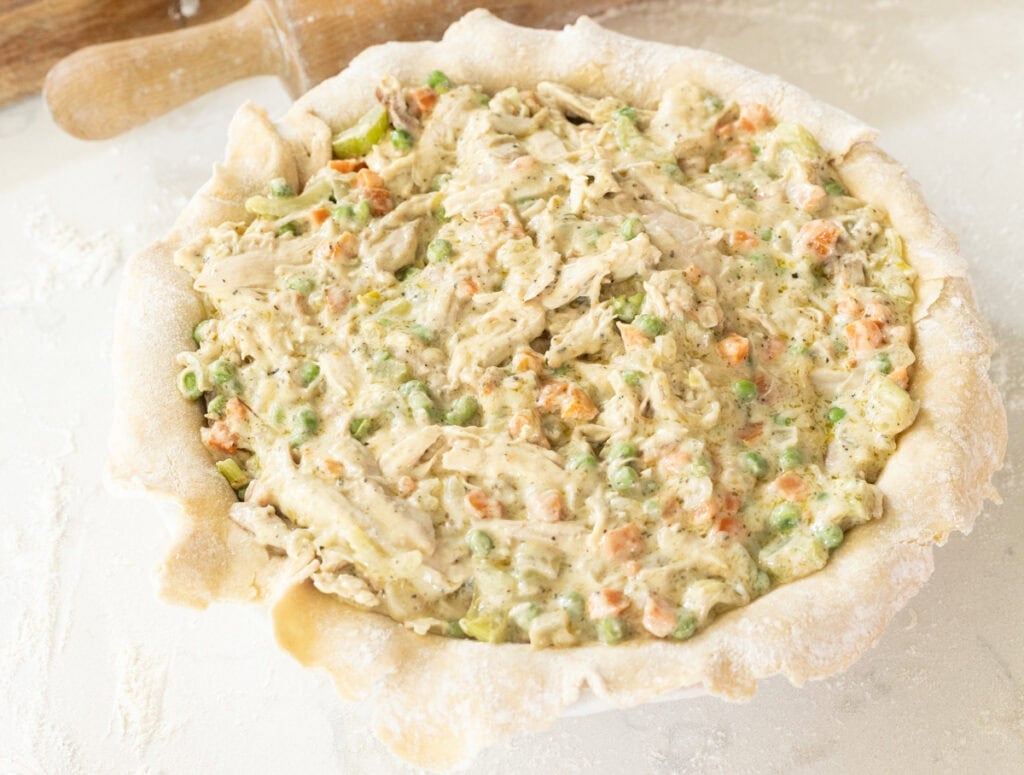

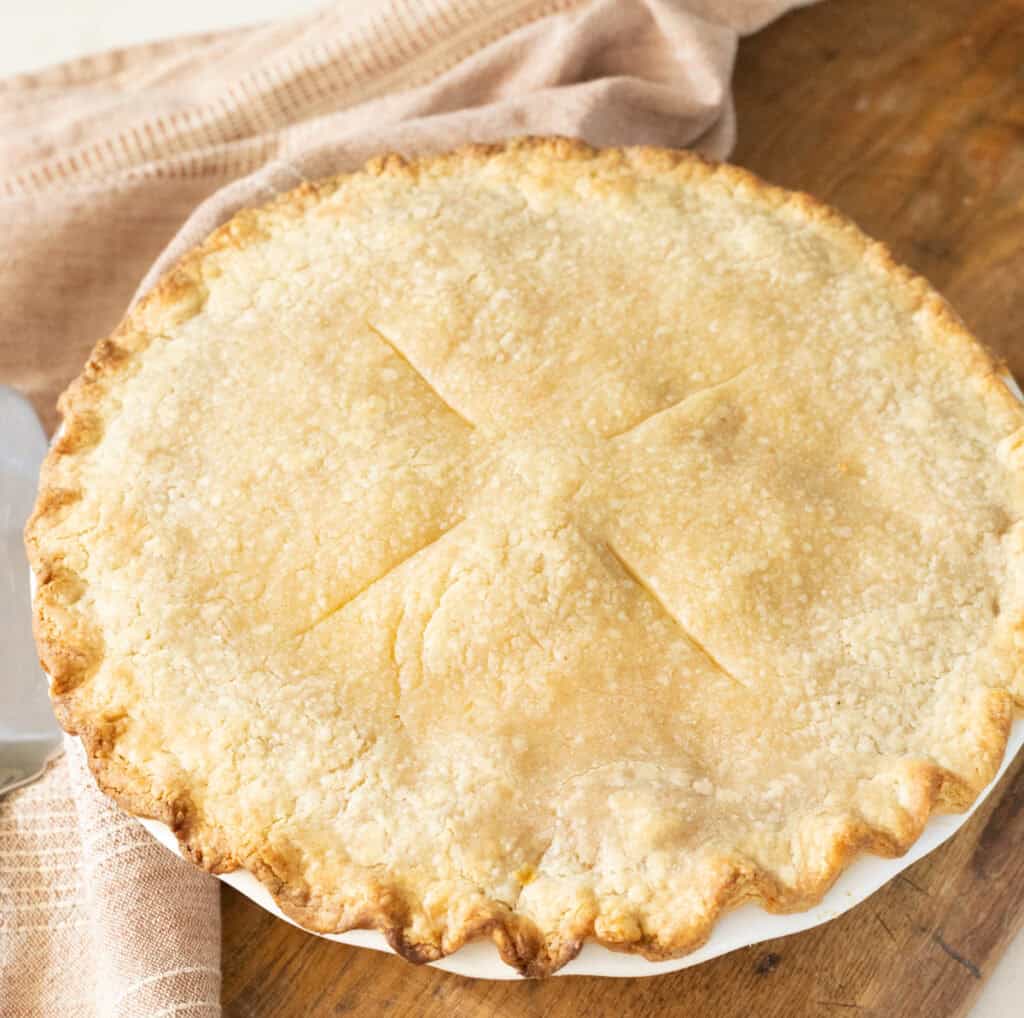
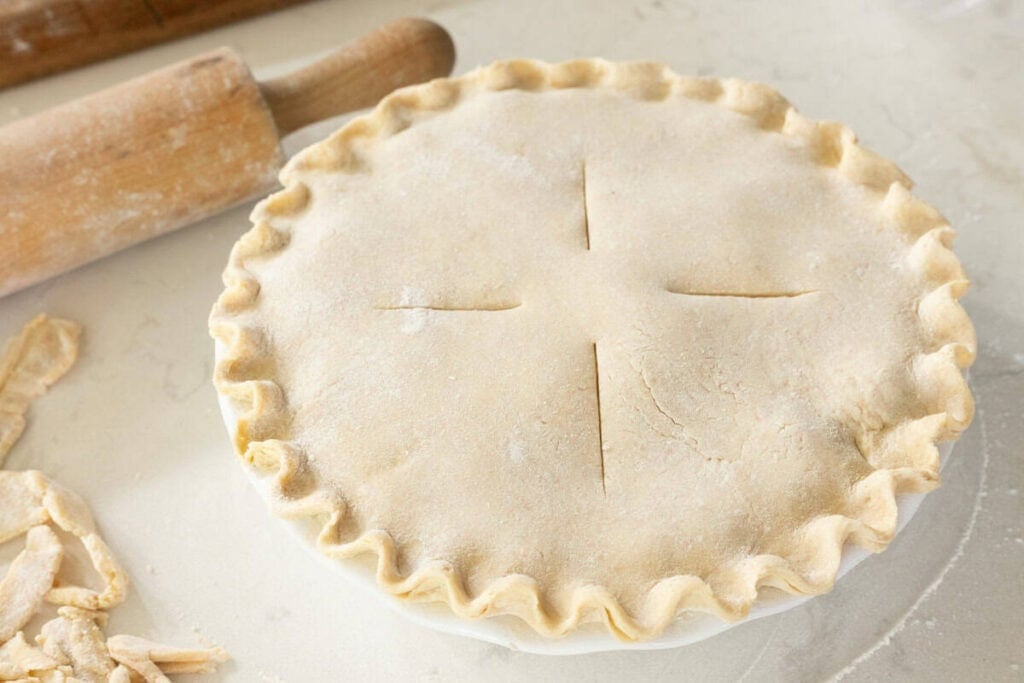
STEP 7: Add the pie filling and bake. Make sure your filling is completely cooled, or the pie crust can lose its shape. If making a double-crust pie, add the top crust and crimp or seal the edges with a fork after adding the filling. Use a sharp knife to score the pie.
Follow the bake time and temperature for the specific pie you’re making. When I use this crust for my sourdough chicken pot pie recipe, I bake it at 425°F for 35 minutes.
Blind Baking Instructions
- This sourdough pie crust dough works beautifully for blind baking. Follow the instructions above for rolling the dough and setting it into the pie plate.
- Crimp or press the edges, then chill in the fridge for 30 minutes. While the dough chills, preheat the oven to 400°F.
- Line the chilled dough with parchment paper and fill with dry beans or pie weights so the crust doesn’t shrink.
- Don’t skip this step, or the crust can shrink and ruin the shape.
- Blind bake with the weights in place for 15 minutes.
- Lift out the parchment and weights, poke holes in the bottom with a fork, then return to the oven at 375°F for 10–15 minutes more (until golden) for a fully baked crust.
- For a partially baked crust, only bake for 7 minutes after removing the weights.
- For pies that will bake again (like quiche or pumpkin pie), add filling immediately and return to the oven.
- For no-bake pies, let the crust cool completely before adding the filling.
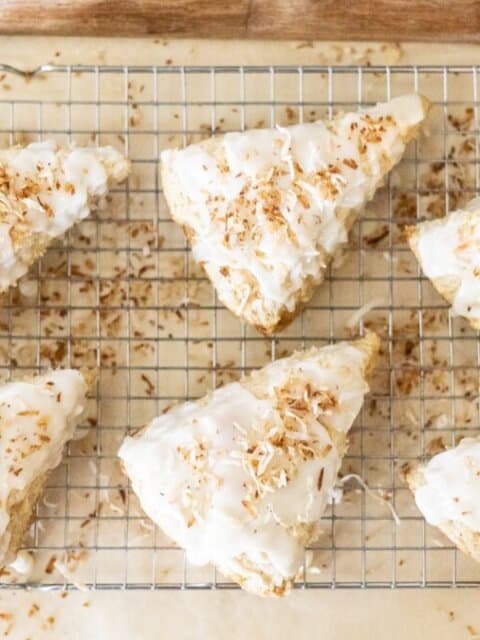
Try blind baking this crust for my sourdough coconut cream pie!

Sourdough Pie Crust Sample Timelines
Discard Pie Crust
Ready in about 1 hour
- Starter: active or discard (either works)
- 0:00 – Mix the dough and bring it together until smooth.
- 0:10 – Divide into two discs, wrap, and chill in the fridge for 30 minutes (this helps prevent shrinking).
- 0:40 – Roll out and shape in pie plate. Crimp edges.
- 0:50 – Fill + bake OR blind bake, depending on your pie.
Long-Fermented Pie Crust
1–3 days (best flavor + digestibility)
- Starter: discard is perfect (active works too)
- Day 1 – Mix dough, divide into 2 discs, wrap tightly.
- Day 1–3 – Refrigerate 24–72 hours (cold ferment = best flavor and easier digestion).
- Baking Day – Let dough sit at room temp 10–15 minutes (just until rollable), then roll out and bake as directed for your pie.
Sourdough Pie Crust FAQs
No, the pie crust dough doesn’t long ferment so the sourdough tang mellows out while baking and adds flavor to sweet and savory pies alike rather than overpowering them.
Yes, sourdough discard works well in pie crust because the dough doesn’t need to rise. The discard adds mild tang and flavor depth without making the crust taste sour.
Sourdough pie crust can be easier to digest, especially if the dough is allowed to cold proof in the fridge for a few days before baking. Cold proofing allows the starter time to break down gluten and phytic acid in the dough.
Yes, sourdough pie crust can be used for sweet and savory pies because the sourdough flavor mellows out during baking and complements a wide variety of pies from quiches to custards to meat pies, etc.
Yes, it freezes very well. Just wrap it tightly in plastic wrap beforehand, then freeze for up to 3 months. Thaw overnight in the fridge before rolling out and baking.
Yes, sourdough pie crust can be blind baked. Chill the shaped dough, line with parchment paper, fill with pie weights to prevent shrinking. Bake 15 minutes, remove weights, then bake until golden for a fully baked crust or briefly for partial baking.
Expert Tips for Making Flaky Sourdough Pie Crust
- Use soft white wheat if you’re milling your flour fresh. This variety works best for pastries like pie crust and gives you a tender, flaky crust.
- Keep your butter VERY cold. Cold butter creates flaky layers as it melts in the oven.
- Don’t overwork the dough. Overmixing melts the butter and develops gluten, which can make the crust tough instead of flaky.
- If the dough feels sticky while rolling, dust with a little flour — but avoid adding too much or the crust can become dry.
- Chill the shaped crust before baking (or before adding filling) to help prevent shrinking and improve flakiness.
Storage
To refrigerate: Wrap each dough disc tightly in plastic wrap and store in the fridge for up to 3 days. (This cold ferment option actually improves flavor and digestibility!)
To freeze: Wrap tightly in plastic wrap, then place in a freezer bag. Freeze for up to 3 months. Thaw overnight in the fridge before rolling out.
Pro tip: If your dough feels too firm after chilling, let it sit at room temperature for 10–15 minutes before rolling so it doesn’t crack.


If you love this recipe, please leave a ⭐ 5-star ⭐ rating below! If you have questions or suggestions – drop a comment!

Flaky Sourdough Pie Crust
Ingredients
Equipment
Method
- Mix dry ingredients: Whisk flour, sugar, and salt.
- Cut in cold butter until crumbly with pea-sized pieces.
- Stir in starter/discard until a shaggy dough forms (add 1 tsp cold water at a time only if needed).
- Divide into 2 discs, wrap, and refrigerate at least 30 minutes (or up to 3 days).
- Roll into a 12-inch circle (about ⅛-inch thick) on a floured surface.
- Place in greased pie plate, trim/crimp edges, and chill 15–30 minutes.
- Fill and bake per your pie recipe (or blind bake if needed).
- Fit crust into pie plate, crimp edges, and chill 30 minutes.
- Preheat to 400°F.
- Line crust with parchment and fill with pie weights or dry beans.
- Bake 15 minutes.
- Lift out parchment/weights, then prick bottom with a fork.
- Finish bake: Return to oven at 375°F for 10–15 minutes until golden (fully baked crust).
- Partial bake option: Bake 7 minutes after removing weights (partially baked crust).
- Add filling and bake as directed (or cool completely for no-bake pies).
Nutrition
Video
Notes
- Keep butter + dough cold for flaky crust (chill anytime it softens).
- Active starter or discard both work — dough doesn’t need to rise.
- Mix gently / don’t overwork (prevents tough crust).
- Chill the dough 30 min before rolling to prevent shrinking.
- Make ahead: refrigerate up to 3 days or freeze up to 3 months (thaw in fridge).
- Blind bake for custard/no-bake pies for a crisp bottom.
- Fresh milled flour – Use 1 3/4 cup plus 2 tablespoons soft white wheat freshly milled flour in place of all-purpose flour.
Tried this recipe?
Let us know how it was!About the Author

Welcome to Hopewell Heights, I’m Steph – seasoned sourdough baker, homesteader, homemaker, homeschooling mom of 5, and creator behind this Heritage American food blog. I hope you enjoy my family’s favorite, from-scratch recipes!
Delicious
This is our go to pie crust, I usually make 3x the recipe so I can have frozen pie crust ready to go for easy dinners or desserts, and I like to leave the dough in the fridge to cold proof for a couple days before baking so it’s easy to digest – delicious every time!
1.5 cups of AP flour is not 355 grams. It’s 185 grams. This needs corrected
You bake so much like I did in my early years. I really loved cooking. I was brought up on a sheep farm in New Zealand many years ago so started cooking very early in my life. Mum would go have a rest & leave me to it & say just come ask if you need to.
I loved watching you bake. I am nearly 80 & have only just started making sourdough. I am a bit slow doing things now & have to rest in between but try to do things I like when I can. I started slab pottery 2yrs ago too.
Watching you brings back so many great memories. Thanks for your video posts.
I really liked this recipe, all of your recipes haven’t failed me yet. Thanks soo much for the content it’s been super helpful
Honestly the best pie crust I’ve ever made from scratch! I’ve made this for pot pies and fruit pies. Love that I can use up my sourdough starter and also love that this freezes so well too ? Love love love it. Thanks for the recipe!
Very helpful and well done. Thank you Steph! ?