This chili with dried beans recipe starts with a full 24-hour soak, followed by cooking the beans until tender before adding them to the chili. Cooking the beans separately ensures even texture, better digestion, and rich, slow-simmered flavor—no canned beans needed!

Quick Recipe Overview: Chili with Dried Beans
⏱️ Ready In: 1–2 days (includes soaking time)
🍽️ Serves: ~16 servings
🔥 Calories: ~370 per serving (varies by toppings)
🫘 Main Ingredients: Dried kidney beans, ground beef, bacon, sausage, onion, celery, green pepper, spices, broth, pasta sauce
🥣 Dietary Info: Gluten-free (check labels), high-protein, hearty comfort food
❤️ Why You’ll Love It: Made completely from scratch with dried beans for better texture, deeper flavor, and a chili that tastes even better the next day
SUMMARIZE & SAVE THIS CONTENT ON
“Everyone in my family loves this chili – even the kids!! I do an extra long soak with the dry bean until they’re almost sprouted for easier digestion.” – Steph
Why You’ll Love This Recipe
- No canned beans: Using dried beans gives you better texture, flavor, and full control over seasoning.
- Deep, layered flavor: Three meats, slow simmering, and balanced spices create a rich, hearty chili.
- Even better the next day: Like all great chilis, the flavors deepen overnight—perfect for make-ahead meals.
I’ve been making this chili for years, although I typically take the heat down now that we have kids – but when it was just my husband and me, I cranked the heat! The nice thing about chili is that it’s super easy to adjust for little eaters. If you love a hearty, wintertime, from-scratch meal – try my sourdough chicken and dumplings next!
This post may contain affiliate links. I only recommend products I use and love. If you purchase through my links, I may earn a small commission at no extra cost to you.
Key Ingredients for Making Chili with Dried Beans
Precise measurements and instructions can be found in the recipe card at the bottom of the page.
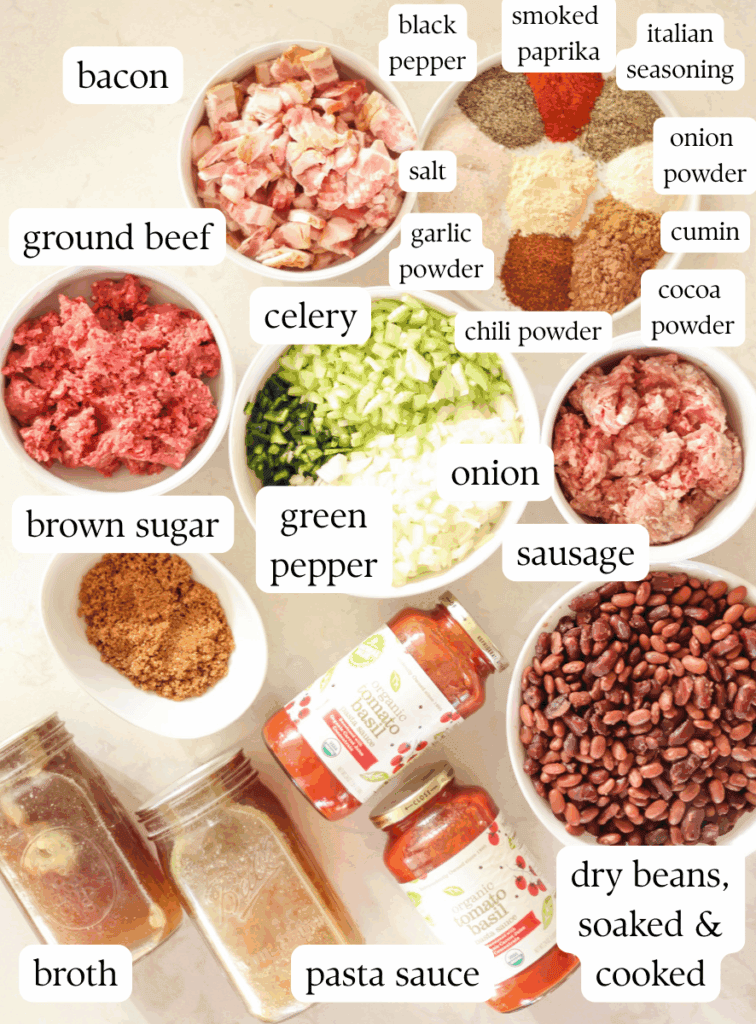
- Dried Kidney Beans: Using dried beans instead of canned gives you better texture and full control over seasoning. A long soak and separate cook ensure tender, evenly cooked beans. I source organic, dry beans in bulk from Azure Standard.
- Ground Meats (Beef, Sausage & Bacon): This combination builds deep, layered flavor—beef for body, sausage for seasoning, and bacon for richness.
- Aromatic Vegetables: Onion, green pepper, and celery create a classic savory base that adds balance and depth to the chili.
- Chili Spices: Chili powder, cumin, smoked paprika, garlic powder, onion powder, and Italian seasoning create a warm, well-rounded chili flavor.
- Cocoa Powder & Brown Sugar: A small amount of each enhances richness and balances acidity without making the chili sweet.
- Broth & Pasta Sauce: Broth provides body while pasta sauce adds concentrated tomato flavor for a thick, slow-simmered chili. Use my tutorial to make your own bone broth. Substitute tomato sauce for pasta sauce for a thinner, soup-like chili.
Methods for Making Chili with Dried Beans
Three methods for making chili with dried beans: adding the dry beans straight into the chili, soaking before adding beans to chili, and lastly, my preferred method: soaking & cooking the beans before adding them to chili.
Dry Beans
Dry beans are added straight to the chili pot and simmered for several hours until tender, with extra liquid.
You would need 10 extra cups of water or broth using this method for this recipe!
This method is convenient but can lead to unevenly cooked beans and requires close monitoring.
Soaked Beans
Beans are soaked overnight, drained, then added to the chili to cook fully in the sauce.
Soaking shortens cook time and improves texture but still relies on the chili liquid to soften the beans evenly.
8 extra cups of water or broth is needed using this method for this recipe.
Soaked & Cooked Beans
Beans are soaked for overnight or up to 24 hours, then cooked separately in fresh water until fully tender, then drained before being added to the chili.
This method gives the most consistent texture, better digestion, and prevents undercooked or chalky beans.
IMO, the extra steps and time is worth it!
If you like cooking from scratch, try making my long fermented sourdough cinnamon rolls next!
Step-By-Step Instructions for Making Chili with Dried Beans
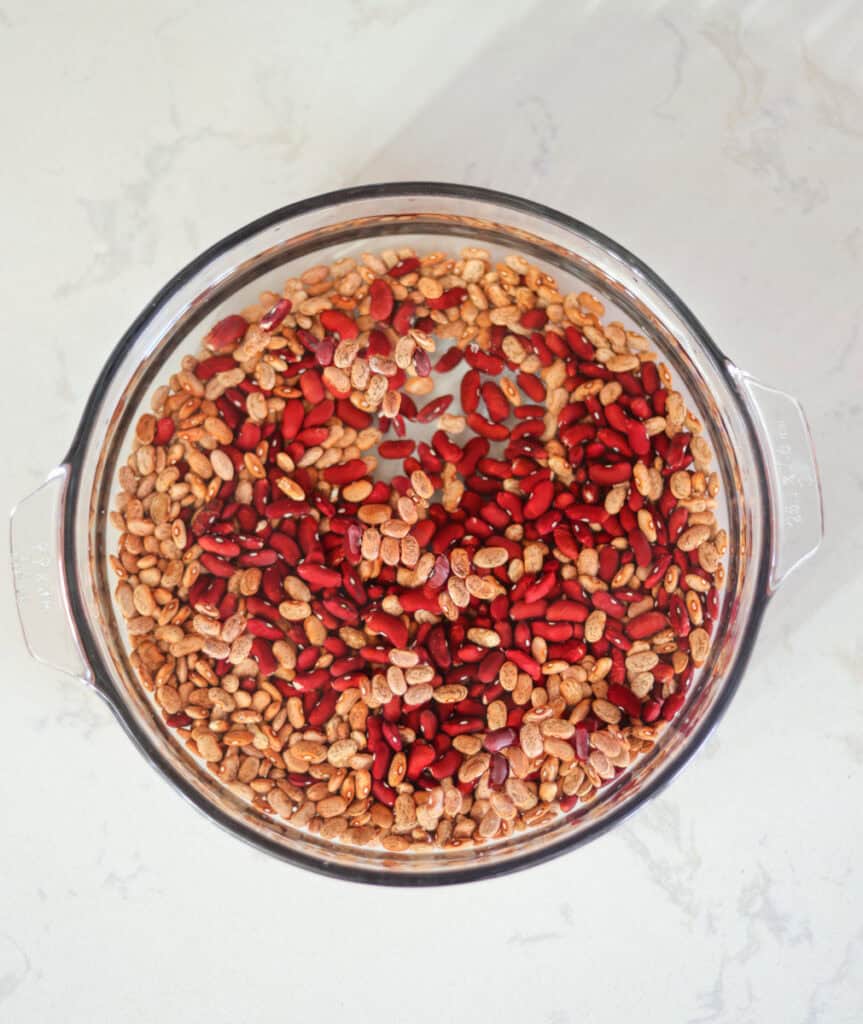
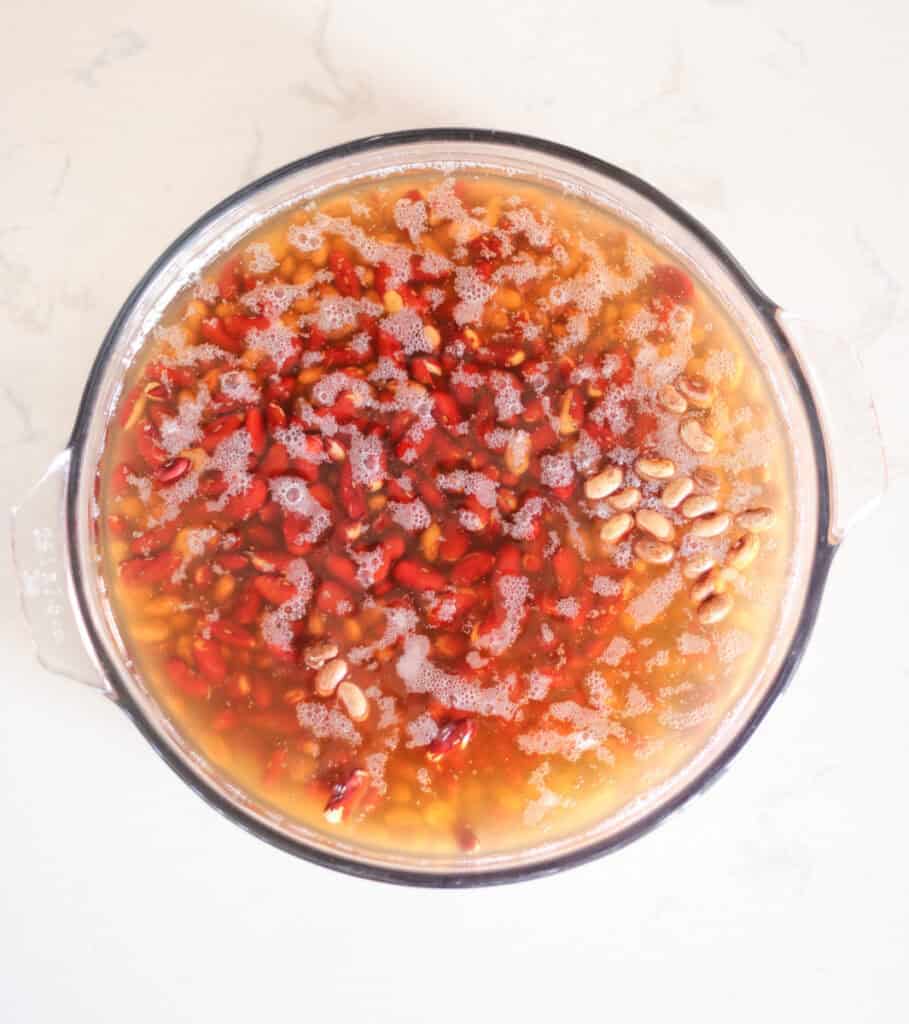
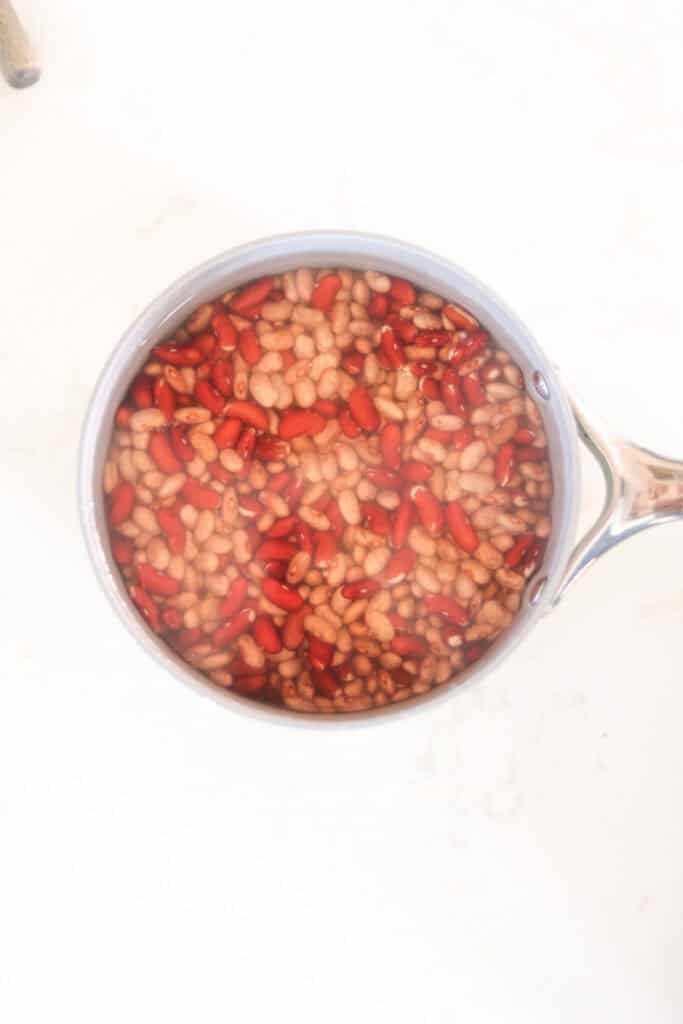
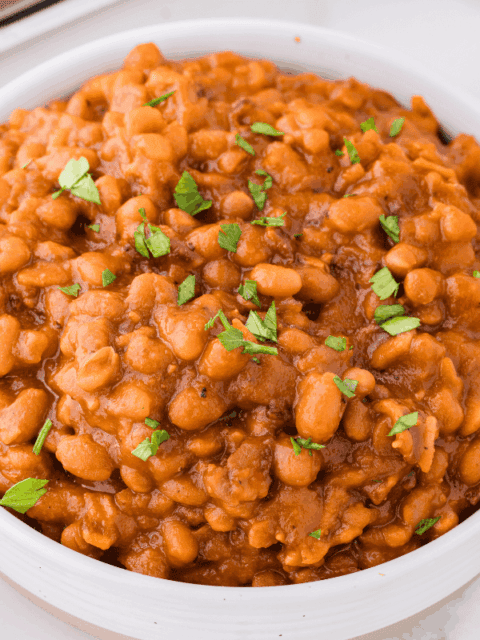
Step 1 – Soak and cook the beans: Rinse the dry kidney beans and soak them overnight or for up to 24 hours. Drain, add to a pot, cover with fresh water, and simmer until fully tender, then drain and rinse well. (Do not season the beans.)
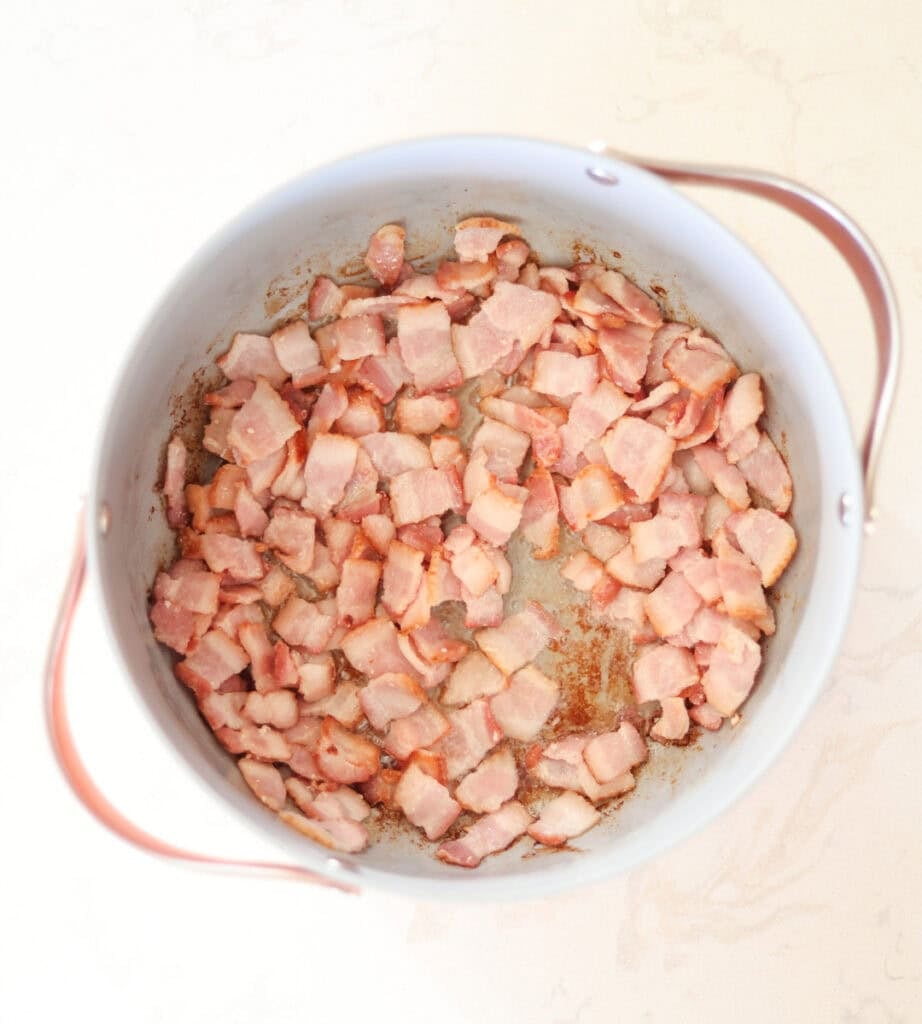

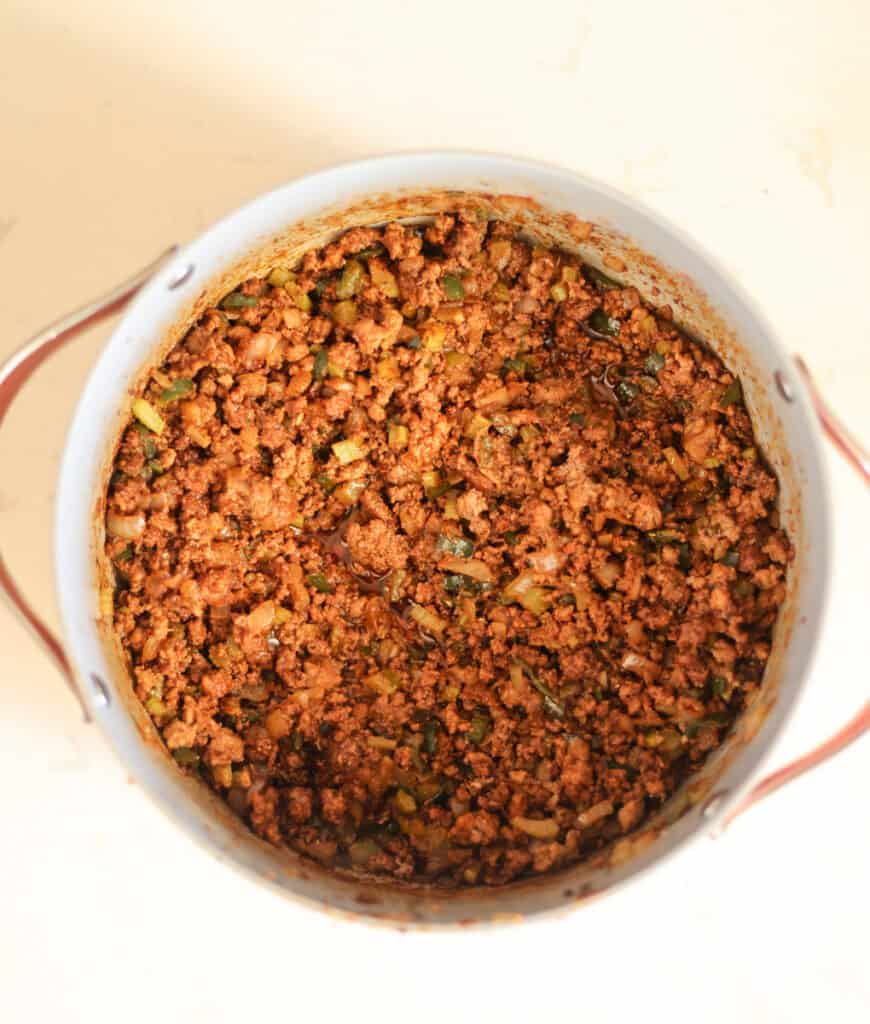
Step 2 – Prepare the chili base: Dice the bacon, onion, celery, and green pepper. In a large pot, cook the bacon until browned and the fat is rendered, then remove it. Brown the ground beef and sausage in the same pot, then add the onion, celery, and green pepper and cook until softened and translucent. Don’t drain any grease from the pot, al of the grease is used to form the base of the chili.
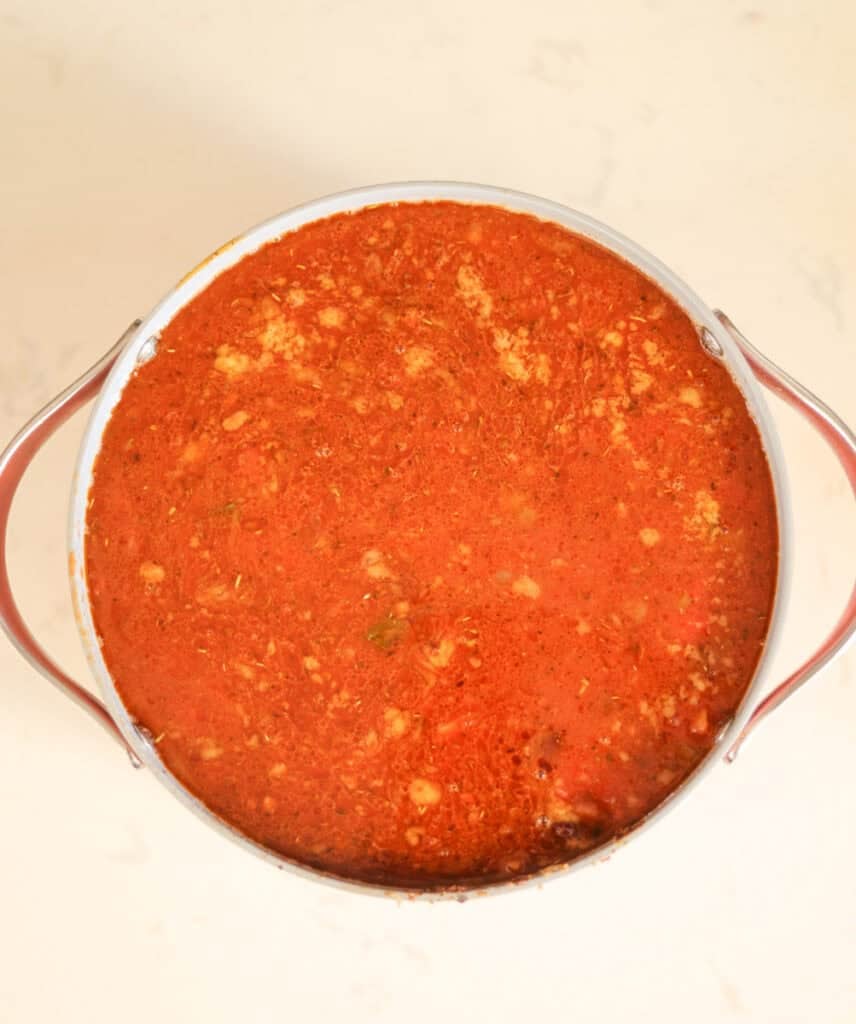
Step 3 – Finish the chili: Return the bacon to the pot, add the seasonings and stir briefly to bloom the spices. Add the broth, pasta sauce, and cooked beans, then bring to a gentle simmer. Cover and cook until thick and flavorful, stirring occasionally, at least 45-60 minutes. Serve hot—or refrigerate overnight for even better flavor the next day.
Chili with Dried Beans FAQs
Yes. Chili can be made with dried beans, but they need to be properly soaked and cooked to ensure even texture and good digestion. Cooking the beans separately before adding them to the chili gives the most reliable results.
Dried beans should be soaked before making chili with dried beans to reduce cook time and help them soften evenly. A long soak also improves texture and digestibility.
Dry beans can be added directly to chili, but this method requires much more liquid and a long simmer. Beans may cook unevenly and can remain chalky in the center.
Cooking beans before adding them to chili with dried beans ensures they are fully tender and prevents undercooked beans. This method also gives you better control over seasoning and final texture.
Chili with dried beans typically takes one to two days when including soaking time, plus several hours of cooking. While it takes longer than using canned beans, the flavor and texture are worth it.
Yes. Like most chili recipes, chili with dried beans tastes even better the next day as the flavors have time to fully develop.
Expert Tips
- Use a full 24-hour soak for dried beans to promote even cooking and better digestion—especially important for chili that simmers for hours.
- Cook beans separately until fully tender before adding them to the chili to avoid chalky centers or split skins.
- Rinse soaked beans before cooking to remove excess starch and any compounds released during soaking.
- Avoid acidic ingredients early (tomatoes, vinegar, wine), which can slow bean softening; add them after the beans are cooked.
- Test beans before adding to chili—they should mash easily between your fingers with no firmness in the center.
- Expect beans to absorb flavor, not liquid once cooked, so adjust chili thickness near the end, not at the beginning.

Storage
- Refrigerator: Let chili cool completely, then store in an airtight container in the refrigerator for up to 4–5 days.
- Freezer: Chili with dried beans freezes well for up to 3 months. Cool completely, portion into freezer-safe containers, and leave headspace for expansion.
- Reheating: Reheat gently on the stovetop or in the microwave, adding a splash of broth or water if the chili thickens.
- Make-Ahead Tip: Flavor improves after a day in the fridge, making this chili ideal for meal prep or entertaining.


If you love this recipe, please leave a ⭐ 5-star ⭐ rating below! If you have questions or suggestions – drop a comment!

How to Make Chili with Dried Beans
Ingredients
Equipment
Method
- Soak the beans (overnight or 24 hours). Rinse the dry kidney beans, then cover with plenty of water in a large bowl or pot. Soak overnight or up to 24 hours, then drain.
- Cook the beans (don’t season). Transfer soaked beans to a large pot and cover with fresh water. Bring to a boil, then reduce to a simmer and cook until tender (time varies—start checking around 45–60 minutes).
- Drain and rinse the beans. Drain the cooked beans in a colander and rinse well with warm water. Set aside. (Do not season the beans—seasoning happens in the chili.)
- Dice and Chop. Dice the bacon and chop the onion, celery, and green pepper.
- Fry the bacon. In a large 6.5-quart pot or Dutch oven over medium heat, cook the bacon until browned and the fat is rendered. Remove bacon to a plate, leaving the grease in the pot.
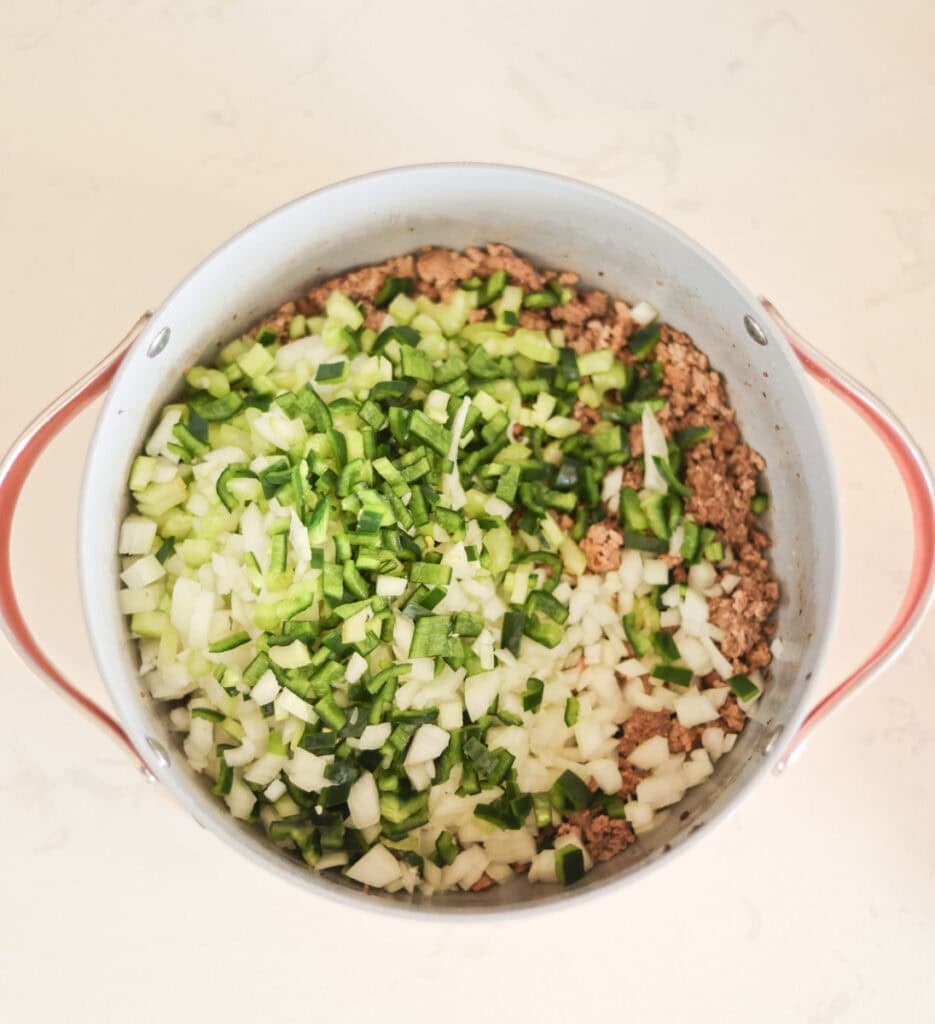
- Brown the beef and sausage. Add ground beef and ground sausage to the same pot and cook until browned, breaking it up as it cooks. Don’t drain any of the grease, leave it in the pot.
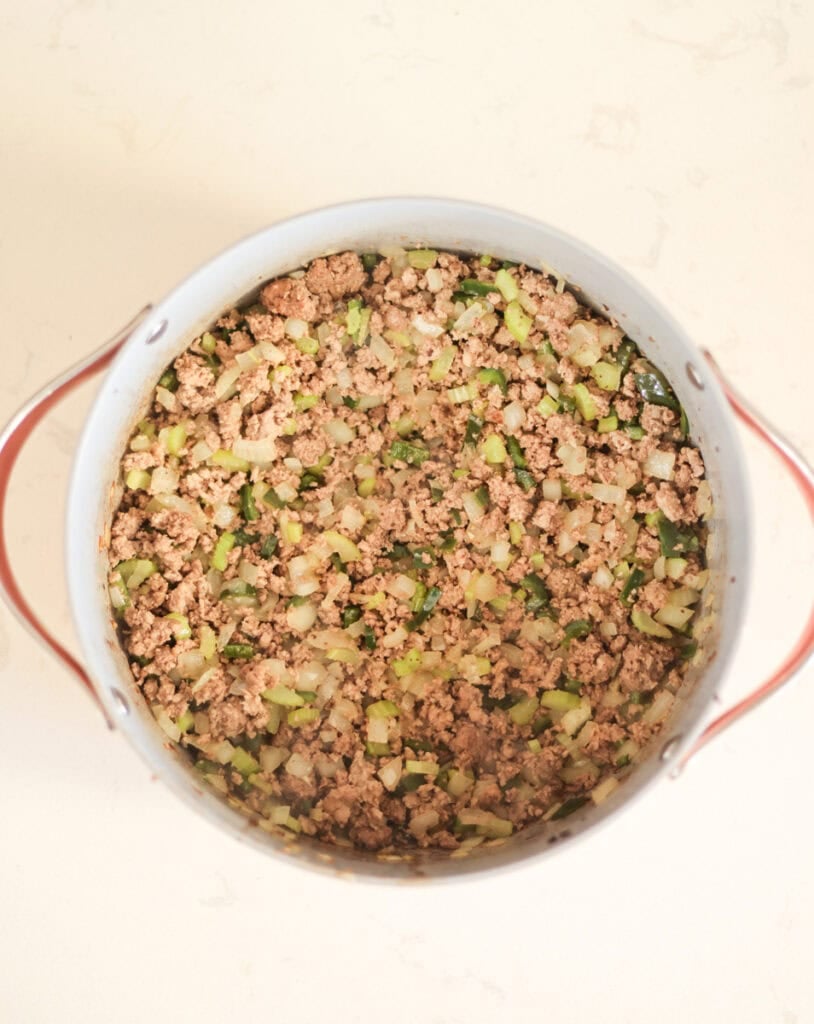
- Add the vegetables. Add the diced onion, celery, and green pepper to the browned meat. Cook for 3–5 minutes, stirring, until the onion is soft and translucent.
- Return the bacon. Add the cooked bacon back into the pot.
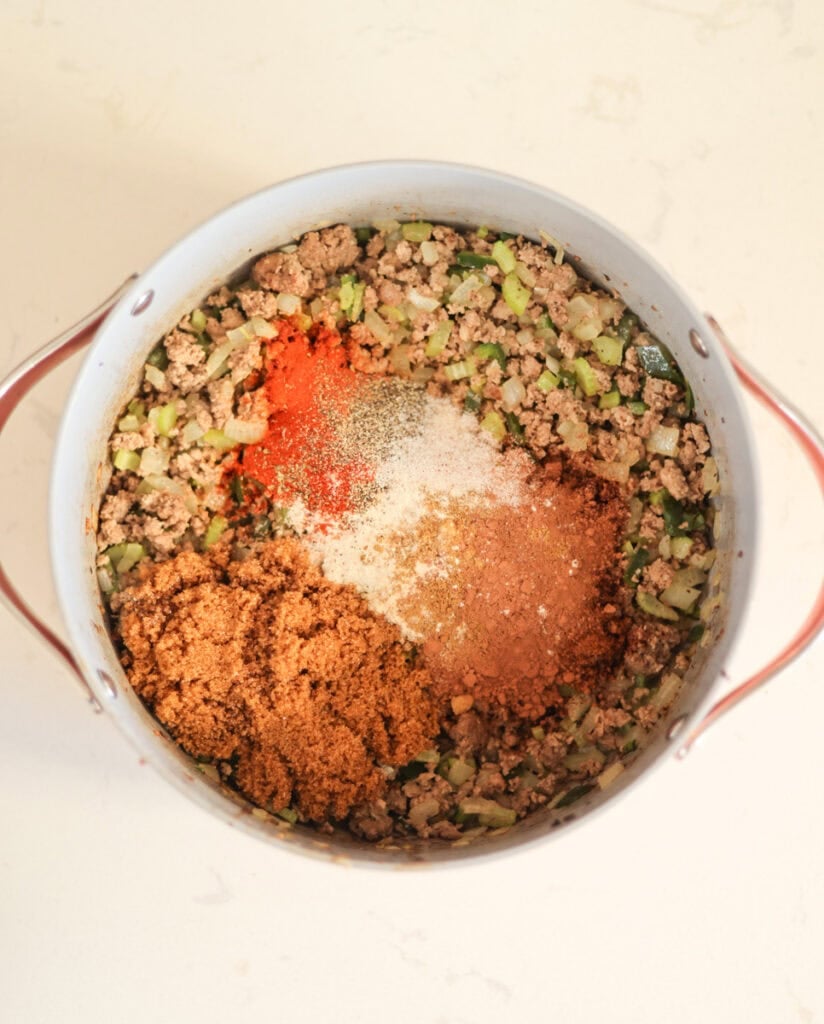
- Add seasonings. Sprinkle in the chili powder, cumin, salt, pepper, garlic powder, Italian seasoning, smoked paprika, brown sugar, onion powder, and cocoa powder. Stir well and cook for 30–60 seconds to bloom the spices.
- Add liquids and beans. Pour in the broth and pasta sauce, then add the cooked, drained beans. Stir to combine.
- Simmer covered. Bring to a gentle simmer, then reduce heat to low, cover, and simmer until thick and flavorful (at least 45–60 minutes, longer if you have time). Stir occasionally.
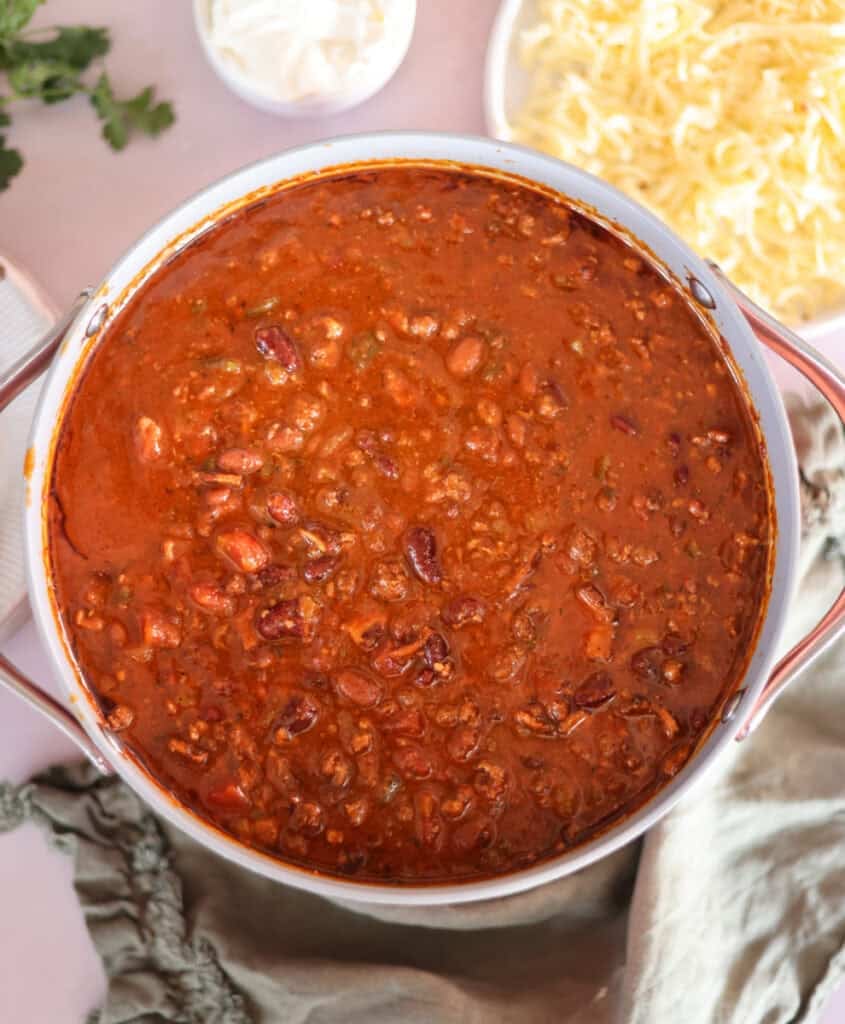
- Serve. Serve hot with your favorite toppings. For the best flavor, cool and refrigerate overnight—this chili is even better the next day!
Nutrition
Notes
- Mild Chili option: Cut the chili powder down to 1 tablespoon for super mild chili (for kids).
- Super Spicy Chili option: Add an extra tablespoon of chili powder, 1 teaspoon of cracked red pepper, 1 teaspoon of cayenne pepper, and a few diced jalapenos to the chili for a super spicy version.
- Option 1: Add dry beans directly to the chili — Dry beans go straight into the pot with the chili. Increase liquid to 10 extra cups of broth and plan on a long simmer (3–4 hours or longer), stirring often. Beans may cook unevenly and require close monitoring.
- Option 2: Soak beans, then add to the chili — Soak beans overnight, drain, then add directly to the chili. Use 8 extra cups of broth and simmer 2–3 hours, until beans are fully tender.
- Option 3 (Recommended): Soak and cook beans first — Soak beans overnight or 24 hours, cook separately in fresh water until tender, then drain and rinse before adding to the chili. This method gives the most consistent texture, better digestion, and a predictable simmer time.
Tried this recipe?
Let us know how it was!About the Author

Welcome to Hopewell Heights, I’m Steph – seasoned sourdough baker, homesteader, homemaker, homeschooling mom of 5, and creator behind this Heritage American food blog. I hope you enjoy my family’s favorite, from-scratch recipes!
Everyone in my family loves this chili – even the kids!! I do an extra long soak with the dry bean until they’re almost sprouted for easier digestion.