Make rich, nourishing bone broth at home with this simple bone broth recipe. This slow simmered broth is packed with flavor, minerals, and collagen, making it perfect for sipping, cooking, or boosting soups and stews.
Quick Recipe Overview: Bone Broth Recipe
Ready In: 24 hours (mostly hands-off)
Yields: 3 quarts
Calories: ~40 per cup
Main Ingredients: Bones, apple cider vinegar, (optional: onion, carrots, celery, garlic, seasonings)
Dietary Info: Paleo, Keto, Whole30, Gluten-Free, Dairy-Free
Why You’ll Love It: Deep flavor, budget-friendly, nutrient-dense
SUMMARIZE & SAVE THIS CONTENT ON
“I love that I’m able to use such a simple recipe to stretch my bone in cuts of meat further and get as much nutrition as possible from the bones, I make bone broth a couple times a week!” – Steph
Why You’ll Love This Recipe
- Rich, slow-simmered flavor you can’t get from store-bought broth.
- Budget-friendly & waste-reducing way to use leftover bones.
- Packed with collagen & minerals for gut and joint support. (source)
What is Bone Broth?
Bone broth is a slow simmered broth made from bones, connective tissue, and a splash of acid, like vinegar, to help extract collagen, minerals, and a deep savory flavor.
Unlike quick stocks, its long cook time creates a rich, gelatinous texture and concentrated nourishment that many people value for supporting joints, digestion, and overall wellness. (source)
Though it takes time, the process is mostly hands-off and turns inexpensive bones into a versatile kitchen staple you can sip warm, use as a base for soups and stews, cook grains in, enrich sauces, or add depth and flavor to everyday meals.
Stock vs. Bone Broth
These terms are often used interchangeably, but they differ in cooking time, ingredients, and purpose.
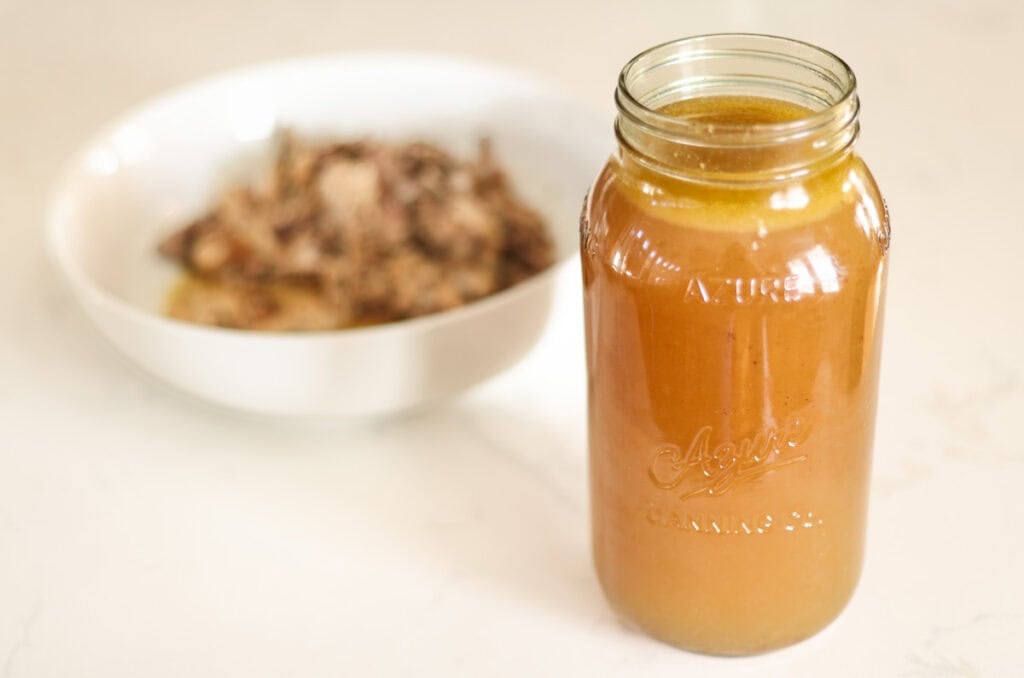
I always have drippings and some skin or other tissues in my “bone broth” because I start by roasting whole cuts of meat.
- Stock: Made primarily from bones and connective tissue, simmered 4–8 hours to extract gelatin and structure. Used as a cooking base for soups and sauces.
- Bone Broth: Bones are simmered much longer (12–24+ hours) with a splash of acid to help release collagen, minerals, and amino acids. Rich, gelatinous, and deeply nourishing.
- Carcass Broth: Made from leftover roasted poultry bones and scraps. Similar to bone broth but often includes more meat remnants and roasted flavor.
Quick takeaway: Stock builds flavor for cooking, broth is light and sippable, and bone broth is slow-simmered for richness and nutrient extraction.
For gut-healing protocols like GAPS, short simmered meat stock is often preferred over long simmered bone broth because extended cooking can increase histamine levels, which may aggravate sensitive digestion. (source)
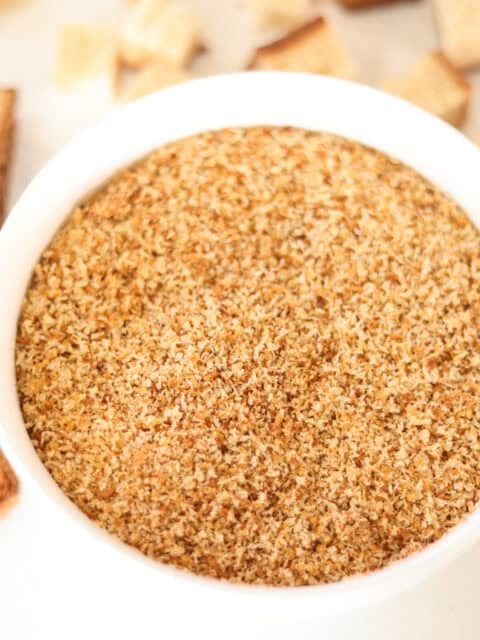
Looking for a convenient, quality bone broth option? I keep this organic, free range powdered bone broth in my pantry in case I run out. Use my code HOPEWELLHEIGHTS10 for 10% off.

This post may contain affiliate links. I only recommend products I use and love. If you purchase through my links, I may earn a small commission at no extra cost to you.
Types of Bone Broth
Different bones produce different flavors, nutrients, and cooking times. Choose based on taste preference and how you plan to use the broth.
- Beef Bone Broth: Deep, rich flavor with high gelatin content. Excellent for sipping, stews, and hearty soups.
- Chicken Bone Broth: Mild, versatile, and budget-friendly. Perfect for everyday cooking, soups, and gut-healing diets. Roast a whole chicken, eat the meat, then use the entire carcass plus drippings to make super-rich bone broth.
- Turkey Bone Broth: Similar to chicken but richer and slightly more savory. Great for fall soups and gravies. A whole turkey yields a ton of broth; don’t waste your turkey carcasses!
- Fish Bone Broth: Light, mineral-rich, and quick to cook (30–60 minutes). Ideal for seafood soups and mineral support.
- Pork Bone Broth: Slightly sweet and gelatin-rich. Common in ramen and Asian-inspired dishes.
- Lamb Bone Broth: Bold and earthy flavor. Best suited for Mediterranean or Middle Eastern recipes.
Quick takeaway: Chicken is the most versatile, beef is the richest, fish cooks fastest, and specialty broths add unique depth to recipes. My tip is to make broth with what you have.
How Simmer Time Affects Nutrition & Gelatin Extraction
- 2–4 hours: Produces a light broth with mild flavor and easily digestible proteins; minimal gelatin extraction with lower histamine. (source)
- 6–8 hours: More minerals and amino acids are released, and the broth develops a deeper flavor and moderate body. (source)
- 12–18 hours: Collagen breaks down into gelatin, creating a richer texture and increased glycine and proline content that support connective tissue. (source)
- 18–24 hours: Maximum gelatin extraction and mineral release; broth becomes deeply flavorful and often gels firmly when chilled. (source)
- Over 24 hours: Flavor intensifies but may become overly strong or bitter; extended cooking can also increase histamine levels in sensitive individuals. (source)
- Pressure cooking (2–3 hours): Achieves similar collagen breakdown and mineral extraction to long simmering in a fraction of the time. (source)
Key Ingredients
Precise measurements and instructions can be found in the recipe card at the bottom of the page.

- Bones: Use a mix of bones, connective tissues, skin, and drippings (fat) for the best gelatin, flavor, and nutrient extraction. Roasted bones add deeper color and richness. I make my broth using the whole carcass from chickens, or I throw soup bones in the pot when I’m making roast beef, then use the bones, fat, and drippings that remain after eating the meat as the base of my broth.
- Acid: A small splash of apple cider vinegar helps draw minerals and collagen from the bones during the long simmer. If you don’t have apple cider vinegar, you can substitute lemon juice, white vinegar, wine vinegar, a small amount of tomato paste, or simply omit it and still produce a rich broth.
- Untreated Water: Using clean, filtered water keeps the flavor pure and prevents unwanted off-tastes.
- Onion (optional): Adds natural sweetness and depth to the broth.
- Carrots (optional): Contribute subtle sweetness and balance the savory richness.
- Celery (optional): Provides classic aromatic flavor and enhances the overall savoriness.
- Garlic (optional): Adds warmth and complexity without overpowering the broth.
- Salt & Whole Peppercorns (optional): Season lightly during cooking; final salt can be adjusted after straining.
Step-By-Step Instructions for making Bone Broth

Step 1 – Roast the bones (or a bone-in cut of meat). Roast bones until deeply browned, or roast a whole bone-in cut of meat like a roast beef or whole chicken.

Step 2 – Remove the meat. Pull the cooked meat from the bones and set it aside for another meal.

Step 3 – Transfer bones and drippings to a pot. Place the roasted bones, connective tissue, skin, pan drippings, and browned bits into a large stockpot.

Step 4 – Add the acid. Stir in 1 tablespoon of acid (ACV or another acid) per 3 quarts of water.

Step 5 – Add cold water. Pour in cold water—just enough to cover everything (don’t overfill or the broth will be diluted). You’ll need about 3 quarts of water for one whole chicken. Add optional flavor boosters. Add salt (optional), peppercorns, bay leaves, an herb bouquet, and veggie scraps or whole veggies.

Step 6 – Rest, then bring to a boil and simmer. Let everything sit 1 hour (off heat) so the acid can begin drawing minerals and collagen from the bones, then cover and bring to a boil. Reduce immediately to a gentle simmer and cook 12–24 hours, keeping it at a low bubble (not a hard boil). Add water only if needed to keep bones covered.

Step 7 – Strain the broth. Remove from heat and strain through a fine mesh strainer to remove bones and solids.

Step 8 – Cool and store. Allow the broth to cool, then refrigerate or freeze—or use right away.
How to Make Bone Broth in an Instant Pot (Lower Histamine & Faster)
Using an Instant Pot is a convenient way to make bone broth in a fraction of the time while potentially reducing histamine development associated with very long simmering.
Pressure cooking extracts gelatin, minerals, and deep flavor in about 2–3 hours instead of 12–24, making it ideal for those sensitive to histamines or short on time.
Simply add bones, aromatics, a splash of acid, and water to the pot, cook on High Pressure for 2 hours, then allow a natural release before straining. The result is a rich, nourishing broth with excellent body and flavor — without the all-day simmer.
Bone Broth FAQs
The best bones for a bone broth recipe include marrow bones, knuckles, joints, feet, and oxtail because they contain connective tissue and collagen that create a rich, gelatinous broth. Using a mix of bones improves both flavor and nutrient extraction.
A bone broth recipe typically simmers 12–24 hours to fully extract collagen, minerals, and deep flavor. Chicken bones may be ready in 12–18 hours, while beef bones benefit from a full 24-hour simmer.
Apple cider vinegar helps draw minerals and collagen from the bones, but it is not required. Lemon juice, white vinegar, or wine vinegar can be used instead, or you can omit it and still make a rich broth.
Bone broth may not gel if there were not enough collagen-rich bones, the simmer time was too short, or too much water was used. Using joints, feet, and knuckles and keeping the broth concentrated improves gelatin formation.
Yes, many people enjoy bone broth daily as a warm, nourishing beverage. It can also be used as a base for soups, grains, and sauces to add flavor and nutrients to everyday meals.
Bone broth keeps 4–5 days in the refrigerator when stored in airtight containers. For longer storage, freeze it for up to 6 months.
Sounds crazy, but trust me – bone broth makes some of the most delicious and nutritious hot chocolate, highly recommend giving it a try!
Expert Tips for Making Bone Broth
- Use collagen-rich bones. Knuckles, joints, feet, necks, and oxtail produce the most gelatin and body.
- Roast for a deeper flavor. Roasting bones first creates richer color and a more complex, savory taste.
- Start with cold water. This helps draw collagen and minerals out slowly for better extraction.
- Keep it at a gentle simmer. A rolling boil can emulsify fat and make the broth cloudy.
- Skim if desired. Skimming foam during the first hour improves clarity, but it’s optional.
- Don’t overfill with water. Too much water dilutes flavor and reduces gelatin formation.
- Add salt lightly (or later). Broth reduces as it cooks, so adjust the seasoning after straining.
- Use a mix of bones. Combining marrow bones with joint bones creates better flavor and texture.
- Cool quickly for food safety. Divide into smaller containers and cool quickly or prepare for pressure canning.
- Look for the gel. Properly made broth should gel when chilled — a sign of excellent collagen extraction.

Storage
- Refrigerator: Store cooled bone broth in airtight containers for 4–5 days.
- Freezer: Freeze for up to 6 months for the best quality and flavor.
- Portion for convenience: Freeze in quart jars, silicone trays, or muffin tins for easy single servings.
- Leave headspace: Allow room for expansion when freezing to prevent glass jars from cracking.
- Fat cap protection: The solid fat layer that forms on top helps seal and preserve the broth; leave it intact until ready to use.
- Thaw safely: Thaw overnight in the refrigerator or gently warm on the stovetop.
- Reboil if needed: If storing longer than a few days in the fridge, bring to a boil before using.
- Pressure canning: For shelf-stable storage, pressure can broth at 10 PSI (dial gauge) or 11 PSI (weighted gauge) — 20 minutes for pints and 25 minutes for quarts (adjust for altitude according to your canner manual).
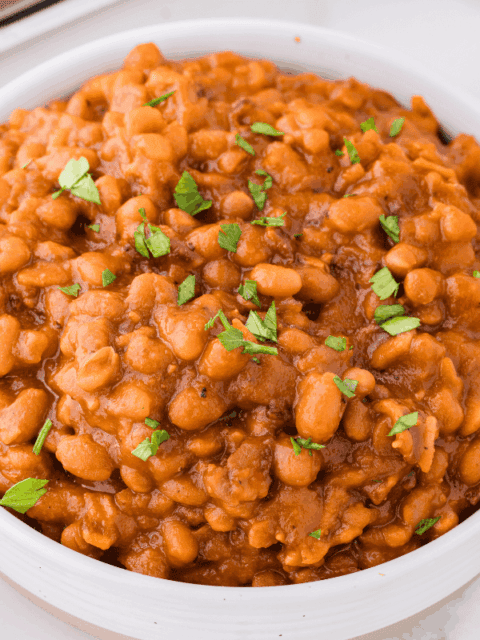
Use this homemade bone broth to make dry bean chili!
If you love this recipe, please leave a ⭐ 5-star ⭐ rating below! If you have questions or suggestions – drop a comment!

Bone Broth Recipe
Ingredients
Equipment
Method
- Roast the bones (or a bone-in roast). Roast bones until deeply browned, or roast a whole bone-in cut of meat.
- Remove the meat. Pull the cooked meat from the bones and set aside for another meal.
- Transfer bones and drippings to a pot. Place the roasted bones, connective tissue, skin, pan drippings, and browned bits into a large stockpot.
- Add cold water. Pour in cold water—just enough to cover everything (don’t overfill or the broth will be diluted).
- Add the acid. Stir in 1 tablespoon acid (ACV or another acid) per 3 quarts of water.
- Add optional flavor boosters. Add salt (optional), peppercorns, bay leaves or an herb bouquet, and veggie scraps (or onion, garlic, celery, and carrots).
- Rest, then bring to a boil and simmer. Let everything sit 1 hour (off heat) so the acid can begin drawing minerals and collagen from the bones, then cover and bring to a boil. Reduce immediately to a gentle simmer and cook 12–24 hours, keeping it at a low bubble (not a hard boil). Add water only if needed to keep bones covered.
- Strain the broth. Remove from heat and strain through a fine mesh strainer to remove bones and solids.
- Cool and store. Allow the broth to cool, then refrigerate or freeze—or use right away.
Nutrition
Notes
- Roasting adds flavor: Roasting bones (or using a roasted carcass) creates deeper color and richer taste, but raw bones work well too.
- Use collagen-rich bones for gel: Knuckles, joints, feet, necks, and oxtail produce the most gelatin and body.
- Simmer gently, not rapidly: A low simmer keeps the broth clear and prevents emulsified fat.
- Acid is helpful but optional: Vinegar or lemon juice helps draw minerals, but excellent broth can be made without it.
- Expect a fat layer: Once chilled, fat will solidify on top and can be removed or saved for cooking.
- Gelatin is a good sign: Properly made broth often gels when cold due to natural collagen extraction.
-
Cook time varies by bones:
- Chicken: 12–18 hours
- Beef/pork/lamb: 18–24 hours
- Fish: 30–60 minutes
- Instant Pot shortcut: Pressure cook 2–3 hours for similar richness with less time and potential histamine buildup.
- Refrigerate cooled broth in airtight containers for up to 5 days.
- Freeze for up to 6 months; portion into small containers for convenience.
- Pressure can for shelf storage: process at 10 PSI (dial gauge) or 11 PSI (weighted gauge) for 20 minutes (pints) or 25 minutes (quarts), adjusting for altitude.
Tried this recipe?
Let us know how it was!About the Author

Welcome to Hopewell Heights, I’m Steph – seasoned sourdough baker, homesteader, homemaker, homeschooling mom of 5, and creator behind this Heritage American food blog. I hope you enjoy my family’s favorite, from-scratch recipes!
I love that I’m able to use such a simple recipe to stretch my bone in cuts of meat further and get as much nutrition as possible from the bones, I make bone broth a couple times a week!